
Hey there, good to see you back on this second part of our DevOps Intoduction series😃
Today’s roadmap we’ll be the following:
-
Creation of our Digital Ocean Cloud server
-
Installation of PostgreSQL on our cloud server
Part 1. Creation of a Digital Ocean (DO) cloud server.
Alright, so first let’s get set up with Digital Ocean. If you don’t have a pre-existing DO account, go here to set it up. You’ll need to input your credit card info but usually there are available promo deals offering up to $200 worth of credit for new users for the first few months. Additionally, given the really small workload that we’ll use even without any promo plan, it wil not cost us more than $5 to perform this tutorial.
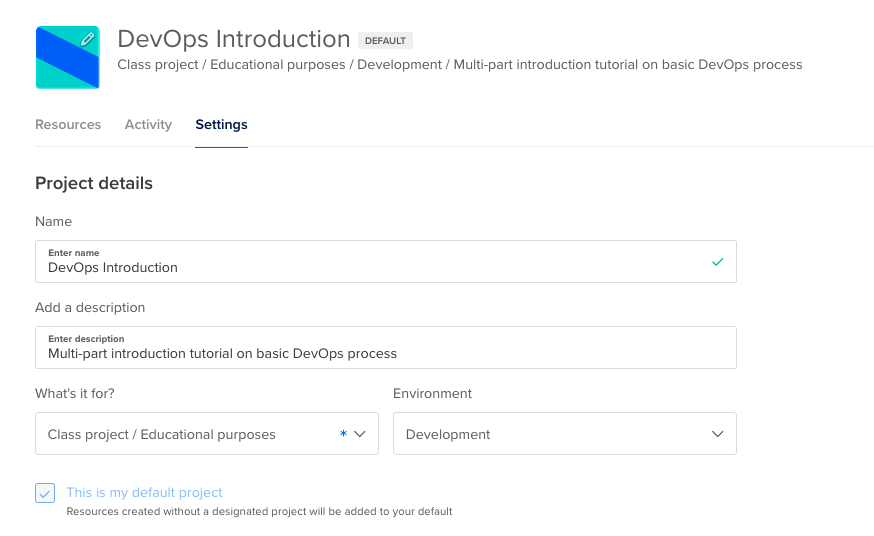
Cool, so right after onboarding you should be met with this initial screen, presenting the current state of our project.

So first, let’s customise it a little bit by clicking on settings and modifying our project detail as follows:
Alright, so now that we cleaned up a bit our project let’s move on to create our cloud server also called droplet inside the Digital Ocean ecosystem by simply clicking on the droplet tab inside the manage section.

From there click on create droplet and wait to get redirected to the droplet creation page.
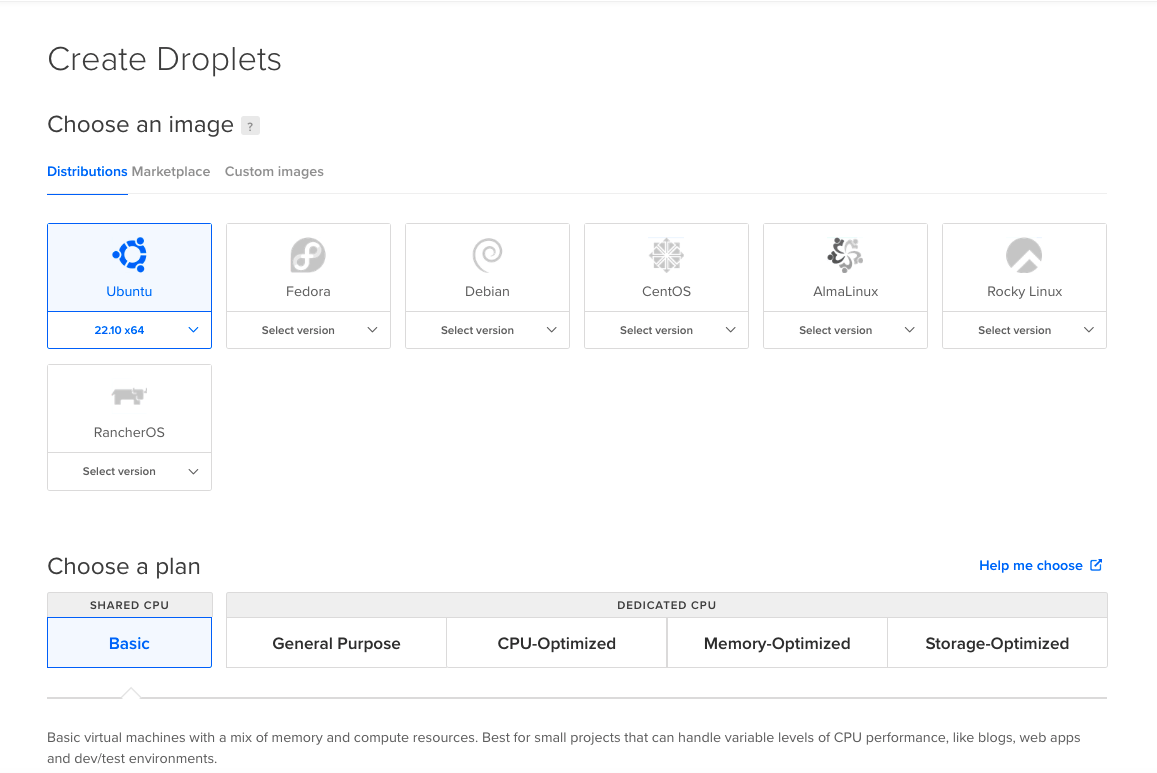
Alright so here as you can see through scrolling the page we have a lot of option. However given the pretty basic project that we’re aiming to realise there is no need here to select ultra fancy parameters. As such we;’ll use the following parameters:
-
Distribution: Ubuntu 22.10 x64
-
Plan: Basic Plan (Shared CPU)
-
CPU options: Regular with SSD ($6/mo)
-
Datacenter Region: Choose the one closer to your location
-
Authentication: Password
-
No additional options
-
How many Droplets: 1
-
Choose a hostname : DevOps-Intro (or any name of your liking)
Once everything is set click on create droplet and wait for it to be created by the platform.

Part 2. Installation of PostgreSQL in DO server
Great, so now that we have an up and running cloud server, let’s access it in order to install PostgreSQL on it. To do so, let’s open a terminal window on our computer.
➡️ If you’re on Mac go in the finder, browse to application and then click on the Utilities folder and there double click on the Terminal application. If you’re on window, just open the start menu and type cmd before pressing enter.
From there we’re going to ssh into our server. To do so just copy and paste the IP of your droplet shown here:

And type the following command into your terminal:
ssh root@(YOUR DROPLET IP)
If you’re prompted with a message relative to the authenticity of the host in your terminal type yes and press enter. Right after it you’ll get ask your droplet password so again just type it into your terminal an press enter.
From there if everything goes well, you should be greeting by the following welcoming message from your Ubuntu cloud server.
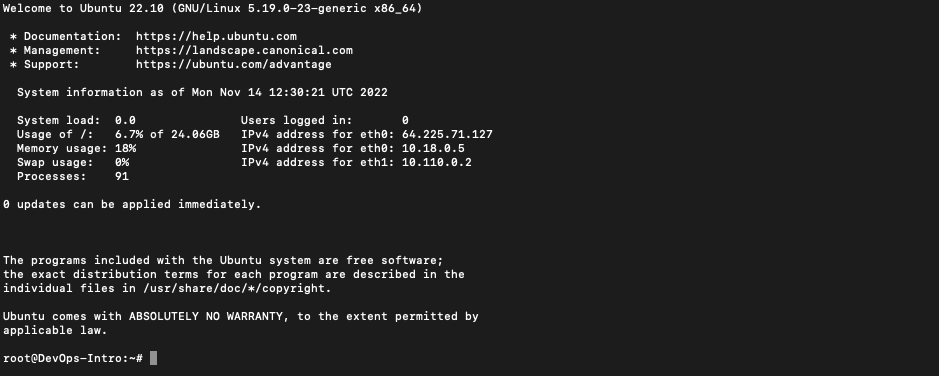
Alright so now that we’re inside our server let’s install PostgreSQL. To do so just copy and paste the following set of command in your terminal:
Command 1: Create the file repository configuration:
sudo sh -c 'echo "deb http://apt.postgresql.org/pub/repos/apt $(lsb_release -cs)-pgdg main" > /etc/apt/sources.list.d/pgdg.list'
Command 2: Import the repository signing key
wget --quiet -O - https://www.postgresql.org/media/keys/ACCC4CF8.asc | sudo apt-key add -
Command 3: Update the package lists
sudo apt-get update
Command 4: Install the PostgreSQL 12 version in order to not have any issue when integrating later with Grafana
apt-get install postgresql-12
Note: During the running of this last command you might be asked by the terminal to confirm your command in that case just type Y and press enter.
Alright and now let’s just make sure that everything is operational by checking our installed psql version.
psql -V

And that’s it! You succesfully created and set up your first very own cloud server using Digital Ocean 🥳🥳
So give yourself a pat on the back and don’t hesitate to play around with this new server in order to familiarise yourself with the terminal since next time, we’ll use it intensively in order to create our database architecture.
⚠️ ⚠️
Also don’t forget to exit your remote DO server by typing the following command in the terminal
exit
See you next time 🖖