
ViaWallet, launched in 2019, is a multi-asset decentralized wallet under ViaBTC Group. Offering one-stop blockchain asset management services, the wallet aims to build itself into an app for managing all assets across different chains. Through four years of steady operations, ViaWallet has acquired users across over 100 countries and regions worldwide.
ViaWallet now offers:
-
Support for 49 blockchain networks, over a million tokens, multiple public-chain NFTs, and full compatibility with EVM;
-
Built-in staking, convenient swapping, and a range of asset management services;
-
Advanced tools including transaction acceleration, signature verification, and authorization checks;
-
Integration with DApp browsers for over 10 public chains, providing a comprehensive gateway to the Web3 ecosystem.
ViaWallet is very beginner-friendly, as it features a detailed beginner’s guide, as well as a help center and blog that offer straightforward, intuitive content to equip newbies with wallet and blockchain know-how in no time. In this guide, we are going to show you how ViaWallet is used step by step.
Creating New Wallets
To get started, you need to download the ViaWallet app on your smartphone. iOS users can find the app on the App Store, while Android users can get ViaWallet from Google Play or download the APK file at https://viawallet.com/.
Once the app is downloaded, you can begin creating your blockchain wallet, which is the account for storing your blockchain assets. Creating a blockchain wallet on your own can be quite complicated, which is why most users choose to register an account through wallet apps.
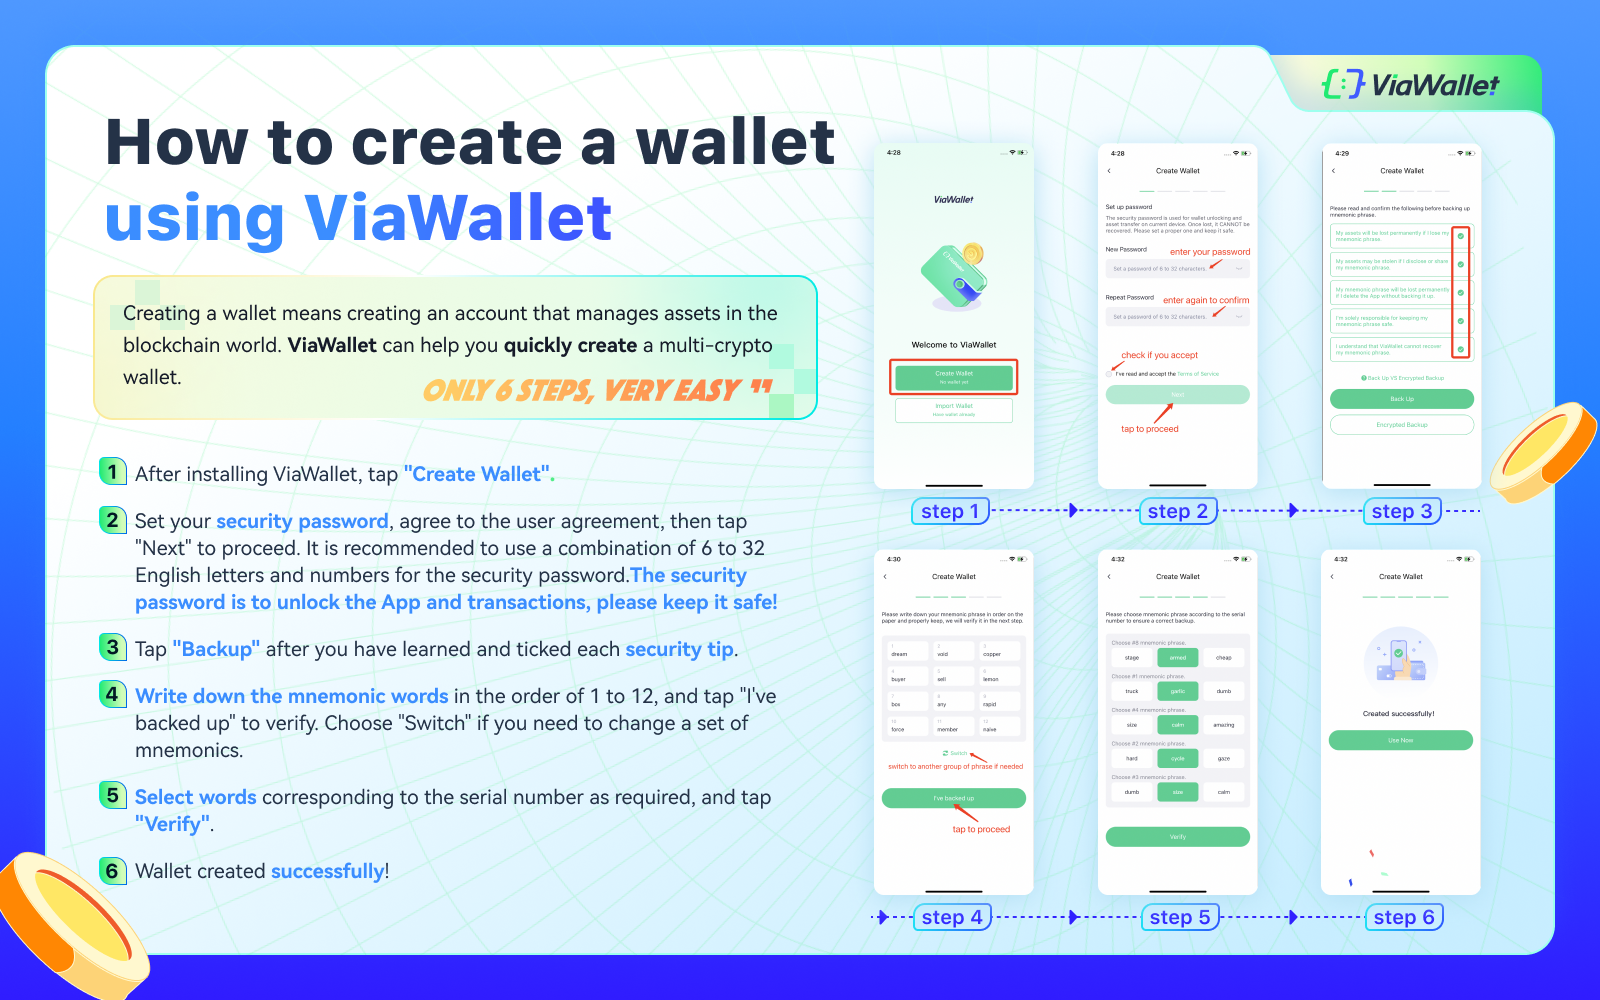
After installing the app, tap “Create Wallet” to start creating your blockchain account:
-
First of all, set your security password, agree to the user agreement, then tap “Next” to proceed. We recommend a combination of 6 to 32 English letters and numbers. It should be noted that this password is used for unlocking and managing the app on the current device, and a new security password should be created if the wallet is imported to another device.
-
Tap “Backup” after you have learned and ticked each security tip. Write down the mnemonic words in the order of 1 to 12, and tap “I’ve backed up” to verify. Choose “Switch” if you need to change a set of mnemonics. Mnemonics are crucial, as anyone with access to your mnemonics can import your wallet and transfer your assets. A wallet has only one set of mnemonic words, and they cannot be changed. Losing the mnemonics means losing access to your cryptos stored in the wallet, and neither ViaWallet nor anyone else can have them recovered. To prevent loss or theft, therefore, it is vital to keep the mnemonic words secure.
-
Select the words corresponding to the serial number as required, and then tap “Verify” to create your wallet.
Importing Existing Wallets
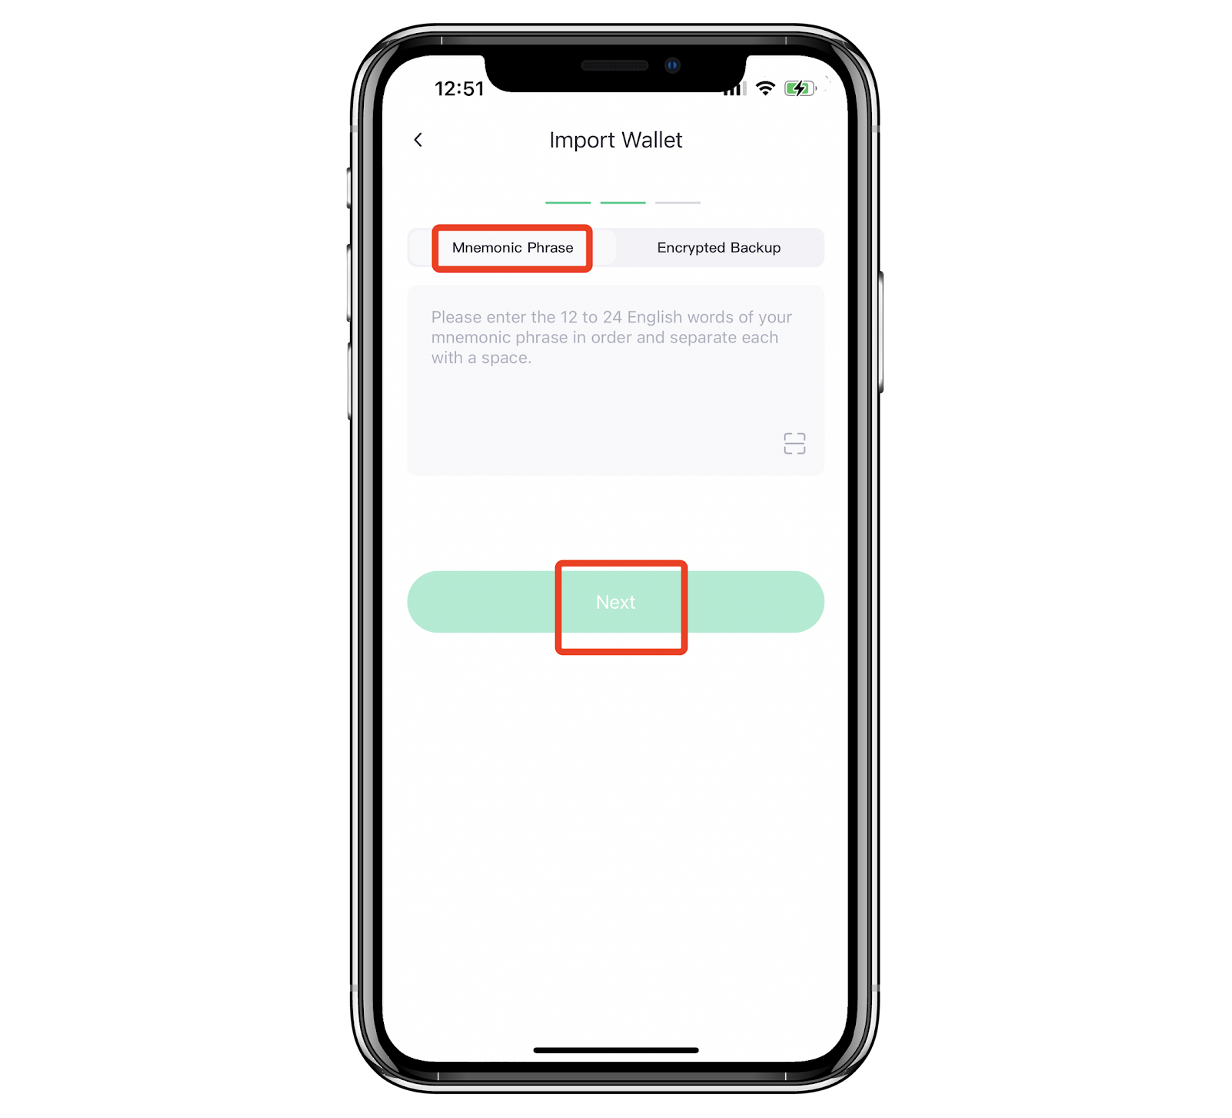
If you already have a wallet before using ViaWallet, you’re likely familiar with the wallet import process. Upon opening ViaWallet for the first time, tap “Import” or go to “Me” -> “Manage Wallet” -> “Import” to access the wallet import page. From there, select the multi-chain wallet or the single-chain wallet for the crypto you wish to import and enter the previously backed-up mnemonics or private key to import your wallet.
This is all the information you need to get started with ViaWallet. With our step-by-step guide, you will be able to manage and trade your cryptos and interact with all kinds of Web3 apps. Have fun in the world of Web3!