Hello fam!
Welcome to the Hemi Network Node Management system! This guide will walk you through the steps to efficiently manage your node, including installation, wallet setup, service management, and more. Follow the instructions below to get started.
1. First of all, purchase a server from AEZA, Contabo or Spacecore.
Server specifications:
• 6 vCPU Cores
• 16 GB RAM
• 400 GB SSD
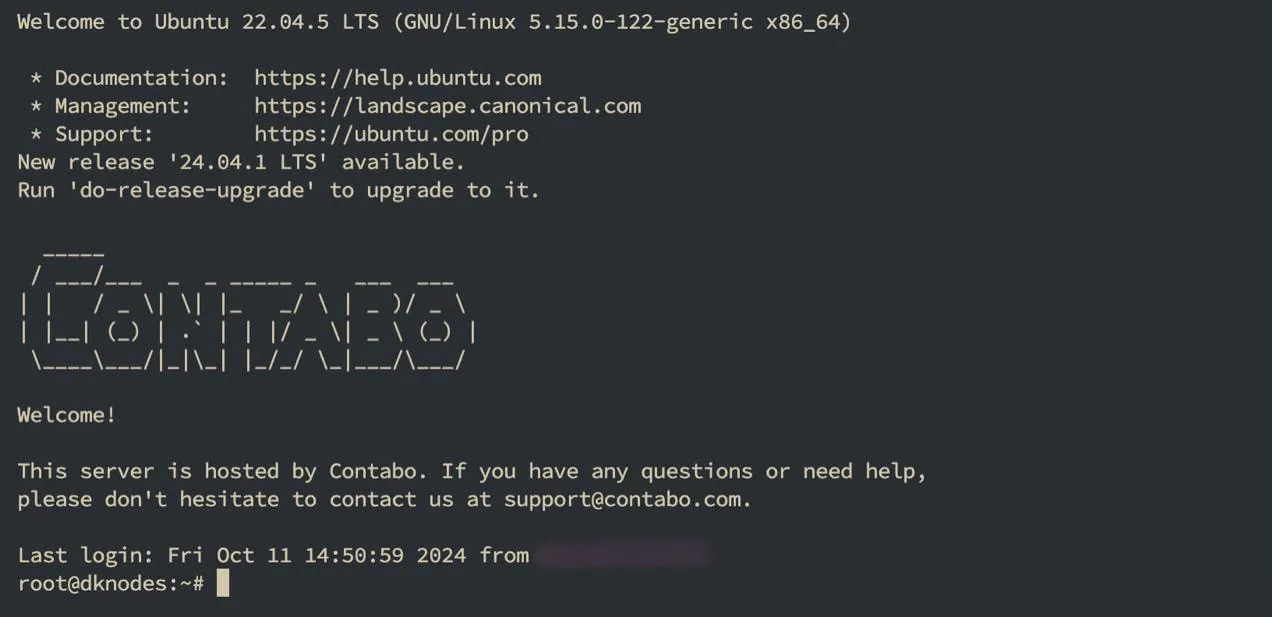
2. Set up the server on your PC. Log in using the command root@ip.
But before that, we recommend securing your server. Read more in our article.
3. Install the script.
Download and run the script with the command:
sudo bash -c "curl -L https://raw.githubusercontent.com/dknodes/heminetwork/master/hemiDK.sh -o hemiDK.sh && chmod +x hemiDK.sh && ./hemiDK.sh"
4. Access Node Management.
To begin managing your Hemi Network node, access the Node Management Interface. This interface provides a user-friendly menu to perform various actions related to your node.
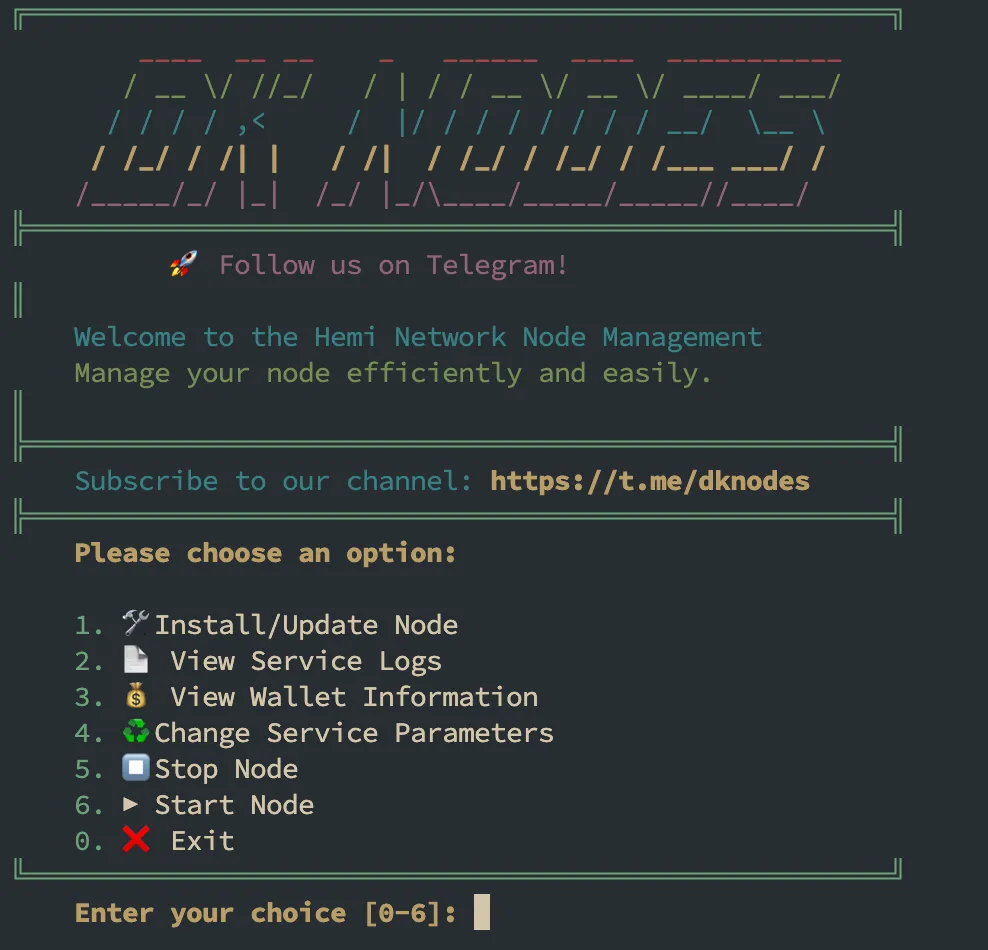
To use the commands, press the appropriate number and then the “enter”.
5. To install the node, press the first command and then “enter.”
Step 1: Select Install/Update Node
From the main menu, enter 1 to choose the Install/Update Node option.
You will receive feedback indicating the installation or update process:

Step 2: Choose Wallet Option
Next, you’ll be prompted to select how you want to handle your wallet for PoP mining.
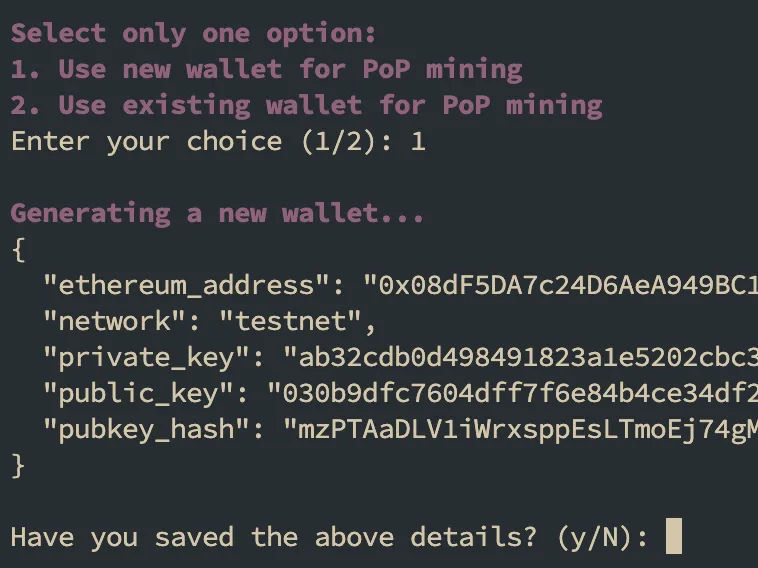
Option 2: Use an existing wallet for PoP mining
Important: Safeguard Your Wallet Information
-
Save the above details securely.
-
Do not share your private key with anyone.
Step 3: Save Wallet Details
Confirm that you have saved your wallet details.
Step 4: Faucet Request
Join the Hemi Network Discord and request funds from the faucet to your new wallet address.

Once you’re verified, head over to the “faucet” channel.
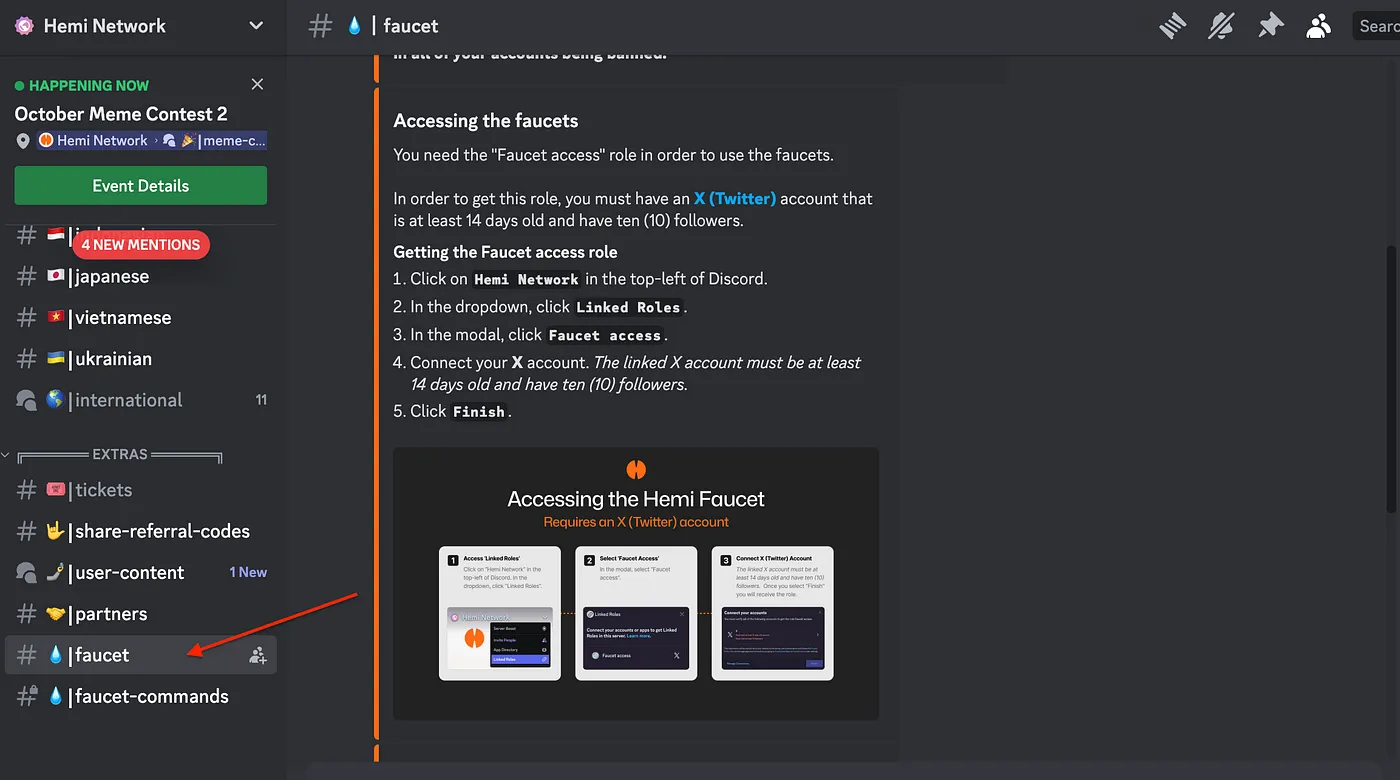
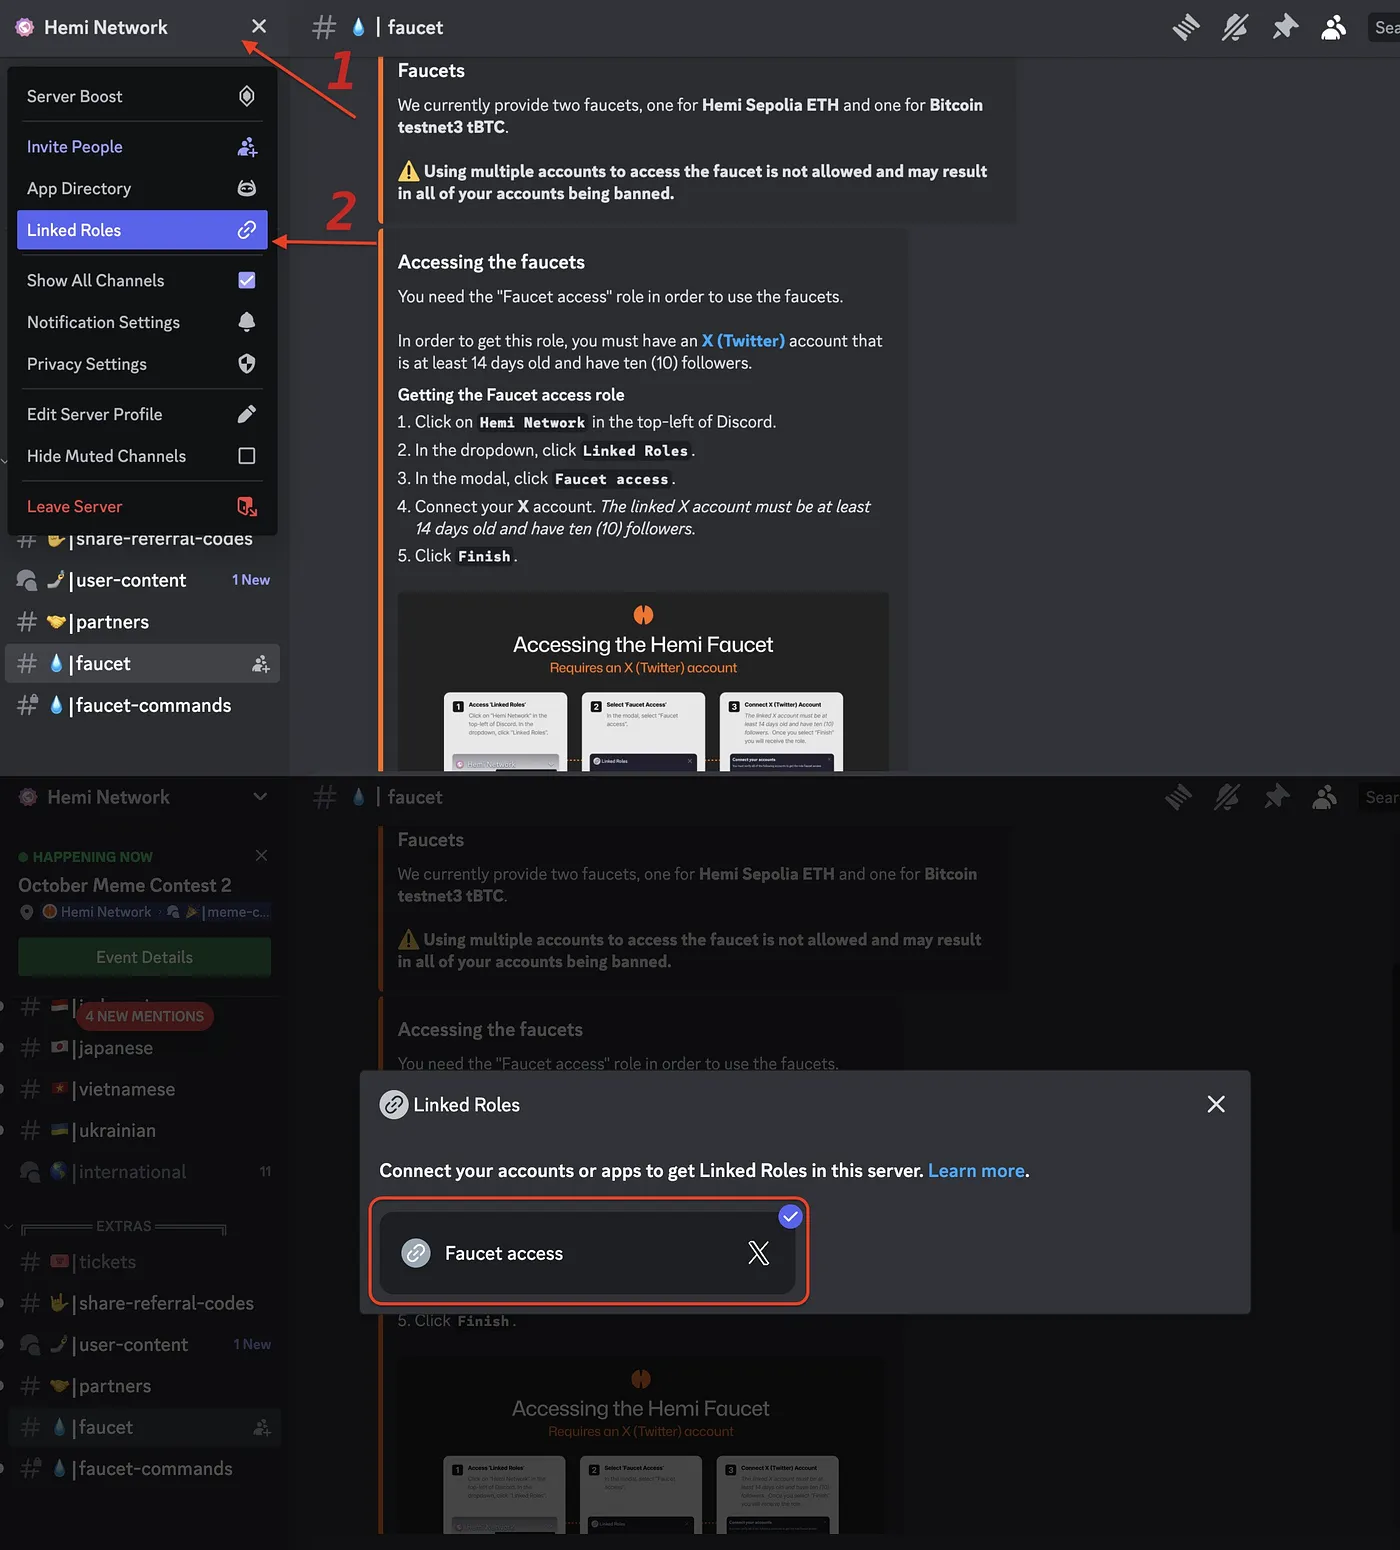
Getting the Faucet access role
-
Click on
Hemi Networkin the top-left of Discord. -
In the dropdown, click
Linked Roles. -
In the modal, click
Faucet access. -
Connect your X account. The linked X account must be at least 14 days old and have ten (10) followers.
-
Click
Finish.
Step 5: Enter Static Fee
Specify a static fee for transactions. It is recommended to enter a value between 100-200.

Note: Enter a numerical value. In this example, 550 is entered.
Step 6: Installation complete

Step 7: Viewing Service Logs
To monitor your node’s activity and troubleshoot issues, you can view the service logs.
- From the main menu, enter
2to select View Service Logs.
Enter your choice [0-6]: 2
2. The system will display the latest logs generated by the hemi.service.
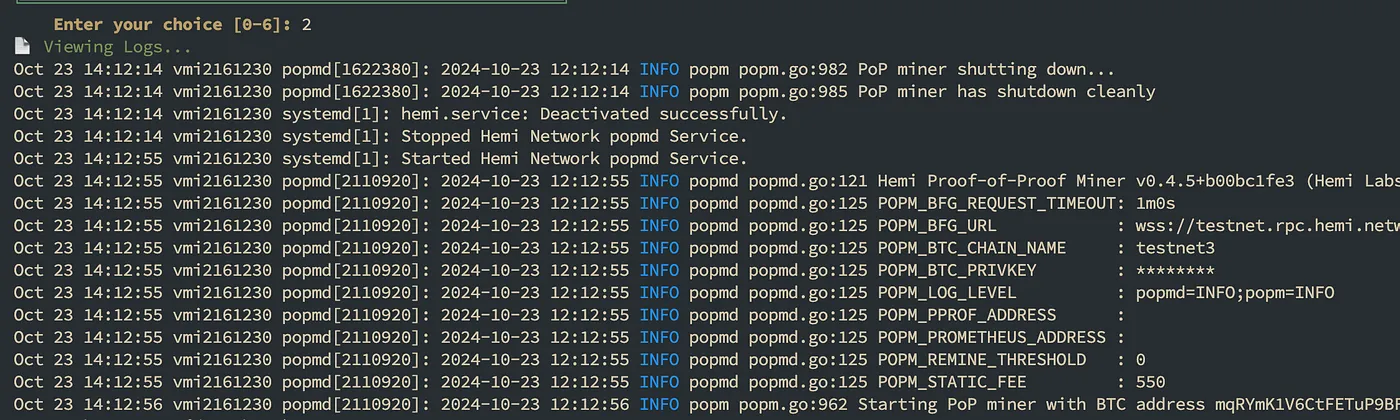
3. CTRL+C and press Enter to return to the main menu after reviewing the logs.
Step 8: Viewing Wallet Information
Access your wallet details used for PoP mining.
1. From the main menu, enter 3 to select View Wallet Information.
Enter your choice [0-6]: 3
2. The system will display your wallet information.
💰 Wallet Information:
Ethereum Address: 0xf4f9D6FCeC078CeBB6187e632E121673e1731
Network: testnet
Public Key: 02fc2515cc6ca13baa5be6e53db0b9acbd68ad2a6bf03d01ec2c1c8c47bc4f Pubkey Hash: mpG9xsvsGcNhUPdajDRVvXF7Dhg33qq
Press Enter to return to the main menu...
3. Press Enter to return to the main menu.
Step 9: Changing Service Parameters.
Modify settings related to your node’s operation.
From the main menu, enter 4 to select Change Service Parameters.
Enter your choice [0-6]: 4
You will be prompted to enter new parameters. Follow the on-screen instructions to update settings such as static fees, network configurations, or other service-related parameters.
Press Enter to return to the main menu.
Step 10: Stopping the node
Safely stop the node service to perform maintenance or updates.
From the main menu, enter 5 to select Stop Node.
Enter your choice [0-6]: 5
The system will stop the hemi.service.
⏹️  Stopping Node...
hemi.service has been stopped.
Press Enter to return to the main menu...
Press Enter to return to the main menu.
Step 11: Starting the Node Start the node service if it is not currently running.
- From the main menu, enter 6 to select Start Node.
Enter your choice [0-6]: 6 2.
The system will start the hemi.service.
Starting Node...
hemi.service has been started successfully.
Press Enter to return to the main menu... 3. Press Enter to return to the main menu.
Step 12: Exiting the Interface
To exit the Node Management Interface:
1. From the main menu, enter 0 to select Exit.
Enter your choice [0-6]: 0
2. The system will terminate the session.
❌ Exiting...
Previous articles:
Nodes Guide:
🗺️ All the info on nodes, giveaways, educational content, and research will be on our sources — DKNODES, GitHub, and X (Twitter).
Thanks for your attention, node runners!