
Pryzm, formerly known as Prism, is a new layer-1 blockchain designed to be a key player in the DeFi (Decentralized Finance) space. It focuses on making it easier and safer to earn returns (yield) on your cryptocurrency holdings.
Built using Cosmos SDK and Tendermint consensus, Pryzm acts as a cross-chain hub. This means it can connect with other blockchains, allowing users to manage the risks associated with changing prices and yields of Proof-of-Stake (PoS) and DeFi assets all in one place.
To fuel this ambitious vision, Pryzm secured $3 million in seed funding from leading investors like North Island Ventures and Polychain Capital.
Pryzm, which is currently in testnet, has announced an airdrop for users who delegate their tokens to validators on the network. This guide will walk you through setting up your own Pryzm node and becoming a validator yourself!
Step 1 - Get Ready with Rapid Nodes Create a Rapid Nodes Account:
Head over to our platform and sign up for an account Fund Your Account with credits to purchase the node
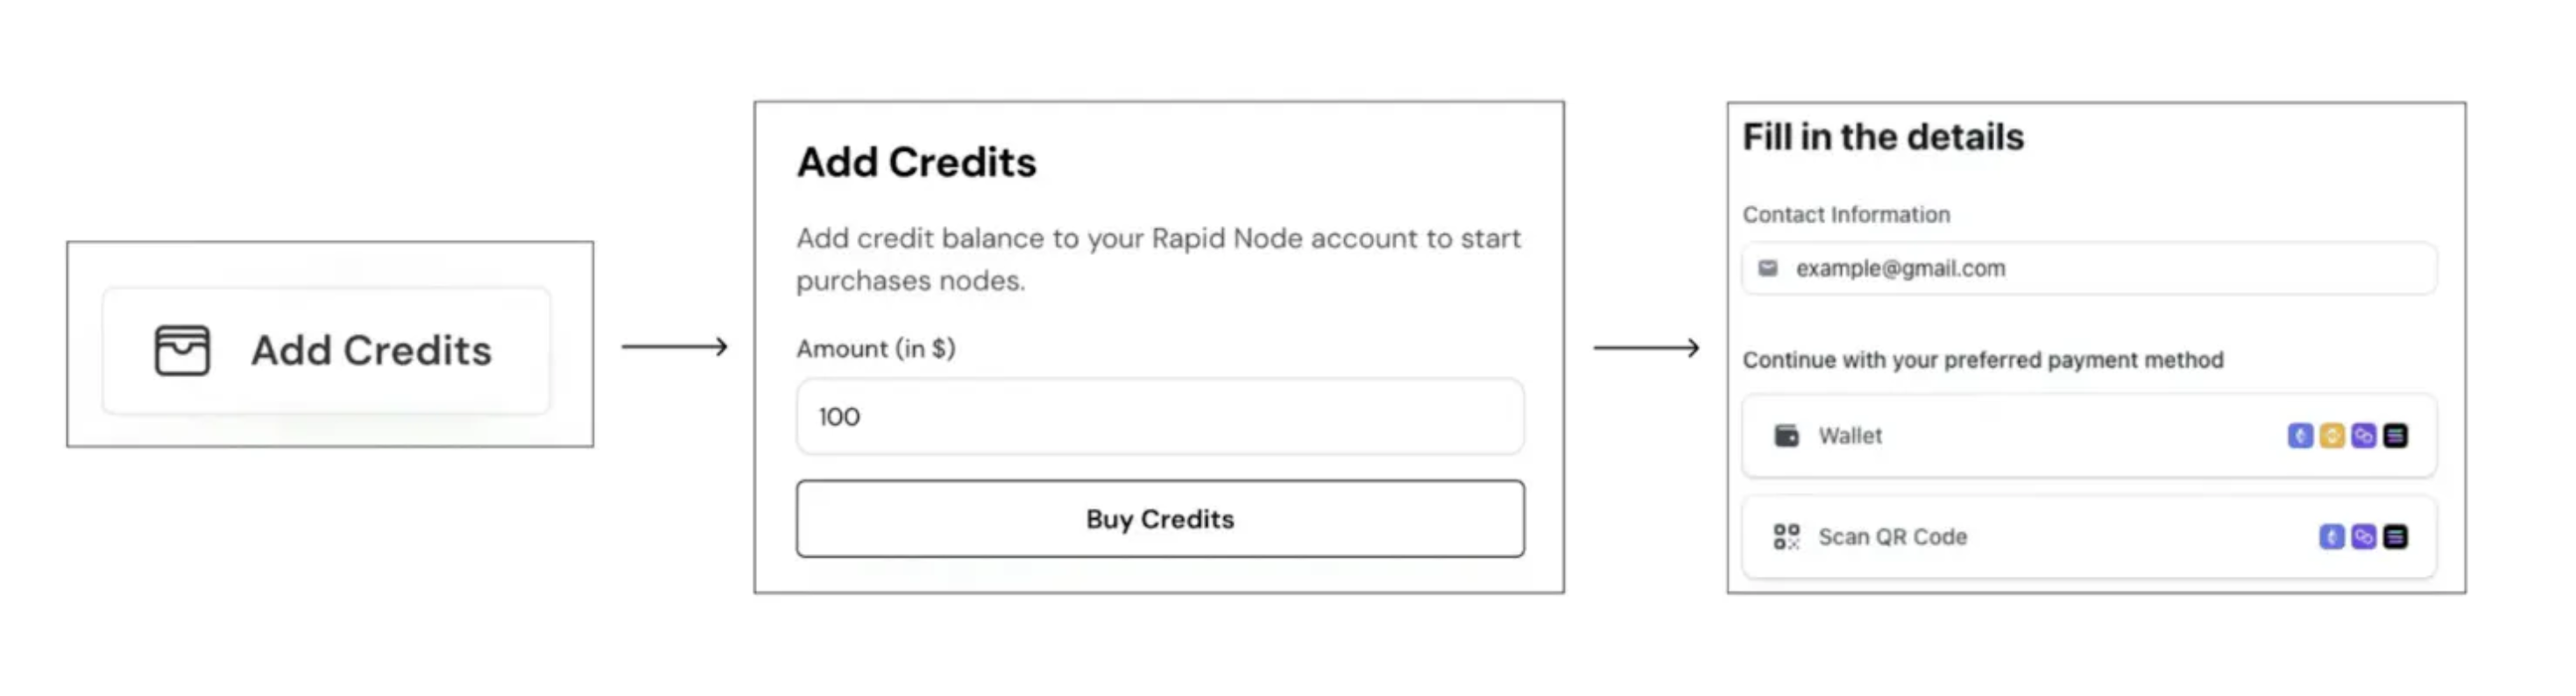
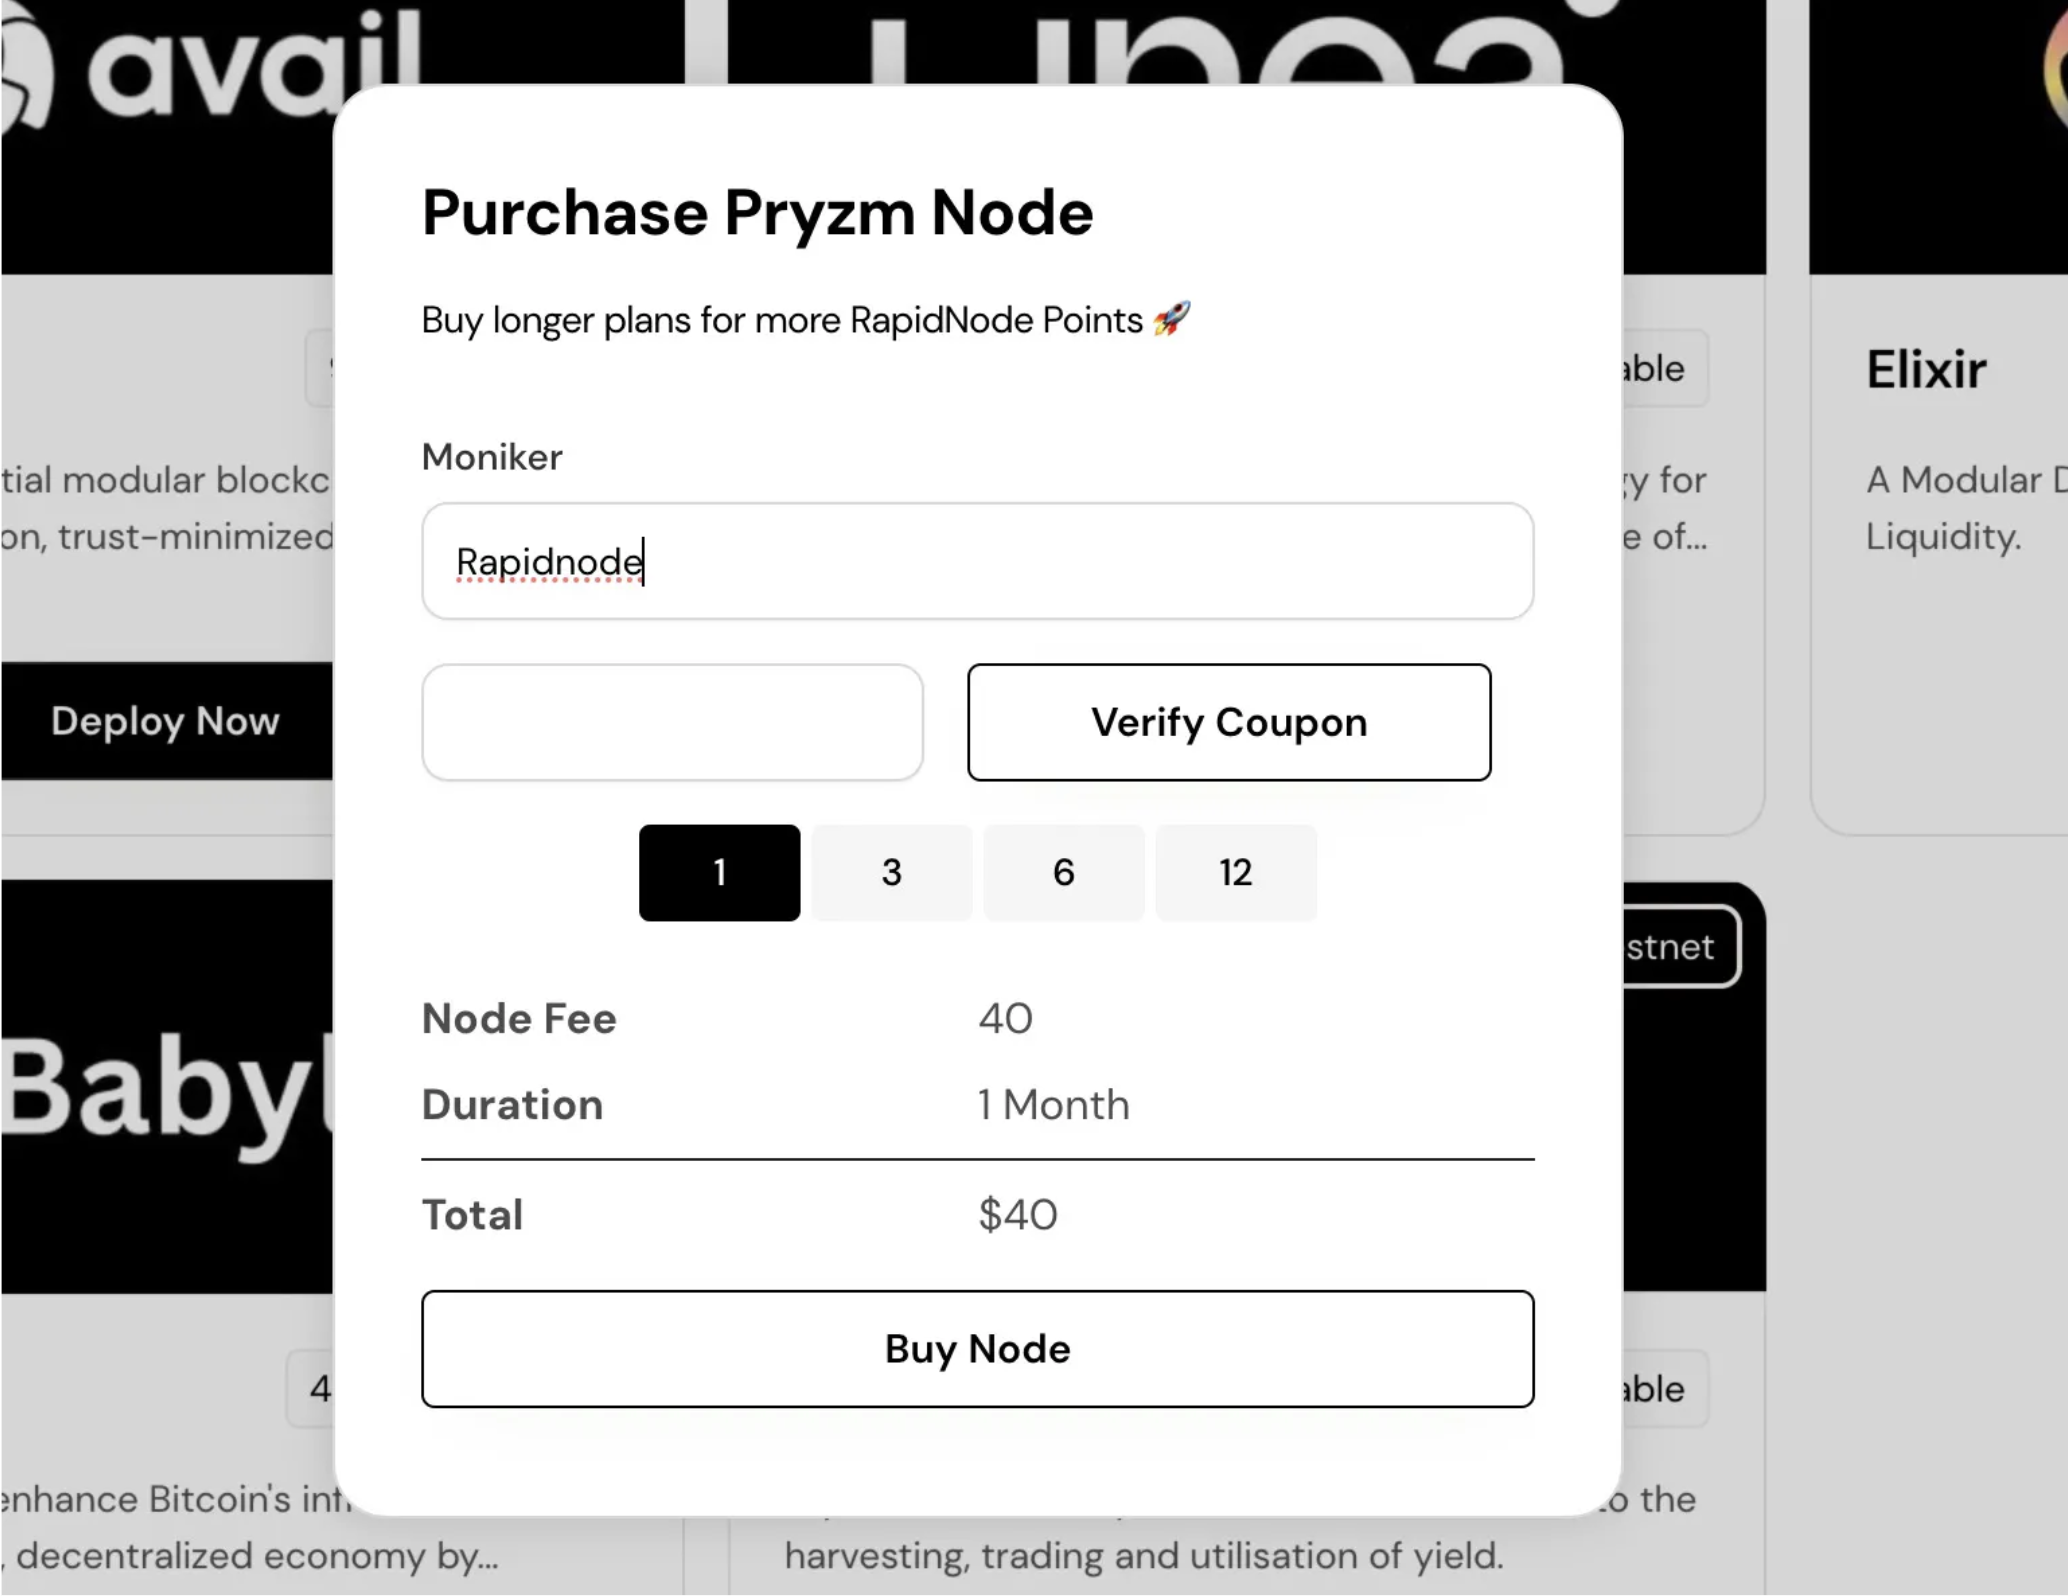
Step 2 - Purchasing Pryzm node
-
Head to your Rapid Nodes dashboard.
-
Select "Pryzm" and choose your desired rental duration.
-
Pick a unique name for your validator profile (your Moniker).
-
Confirm your purchase.
-
Monitor the "Active Nodes" section to verify deployment
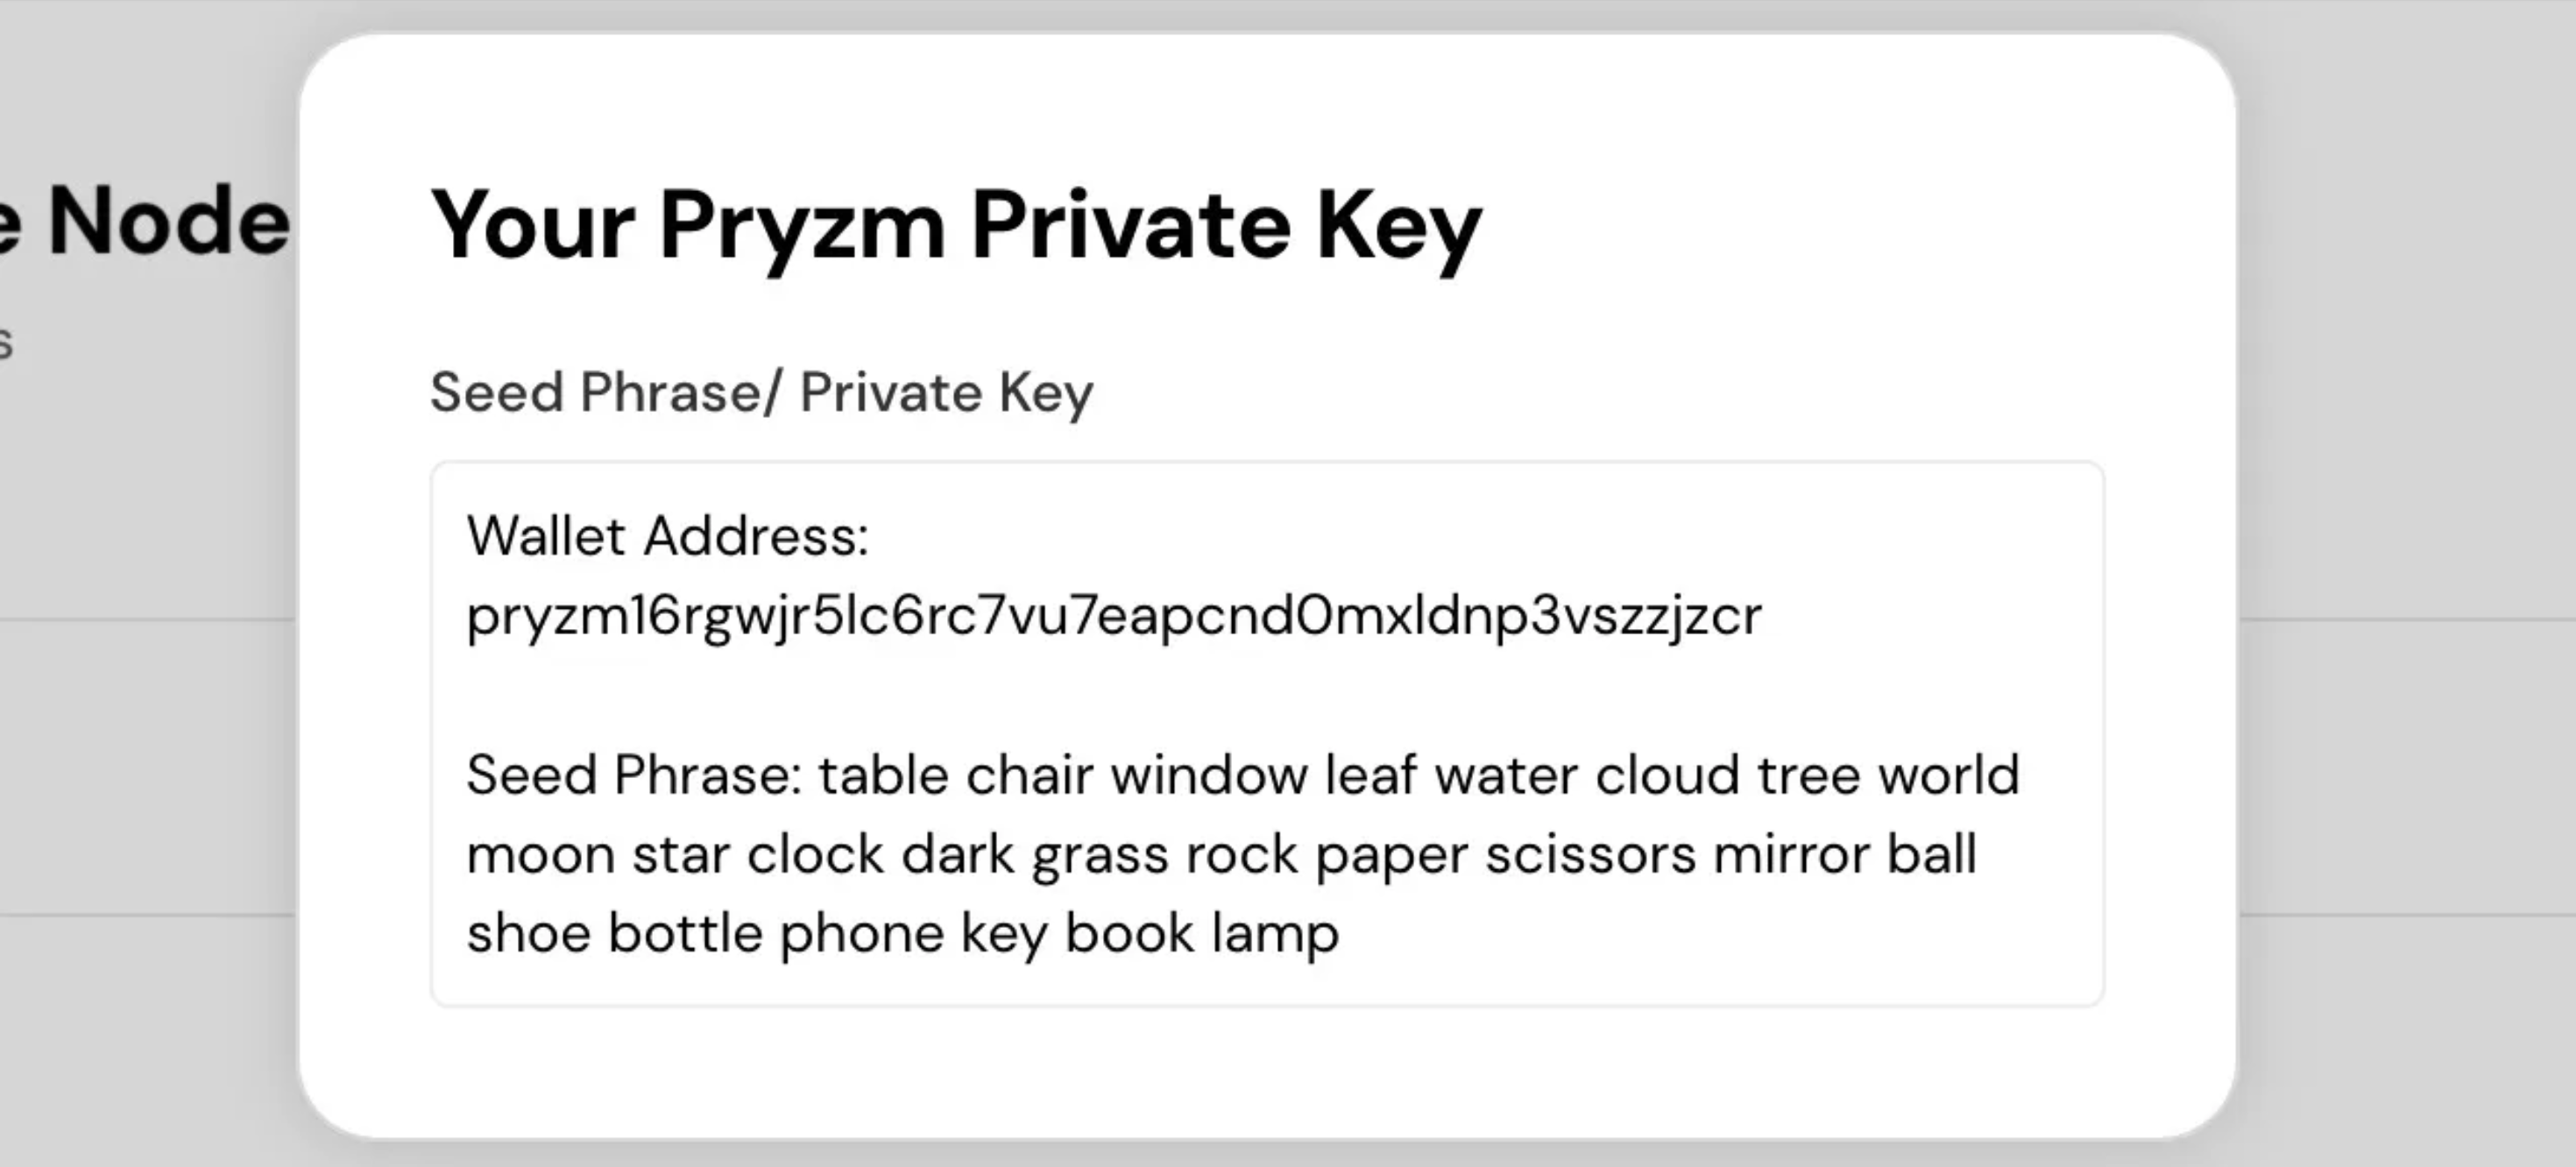
Step 3: Grab Your Keys and Claim Tokens
Once your Pryzm node is up and running on Rapid Nodes, you'll need to retrieve some key information:
-
Wallet Address: Use this address to claim tokens from the Pryzm faucet.
-
Seed Phrase: This phrase will be used to import your account into a compatible wallet like Keplr, allowing you to interact with the Pryzm network.
Step 4: Grab Some Testnet Tokens
Before you proceed, you'll need some Pryzm testnet tokens to interact with the network. Here's how to get them:
-
Visit the Pryzm Testnet faucet here
-
Paste your Pryzm wallet address into the designated field.
-
Claim the faucet tokens.
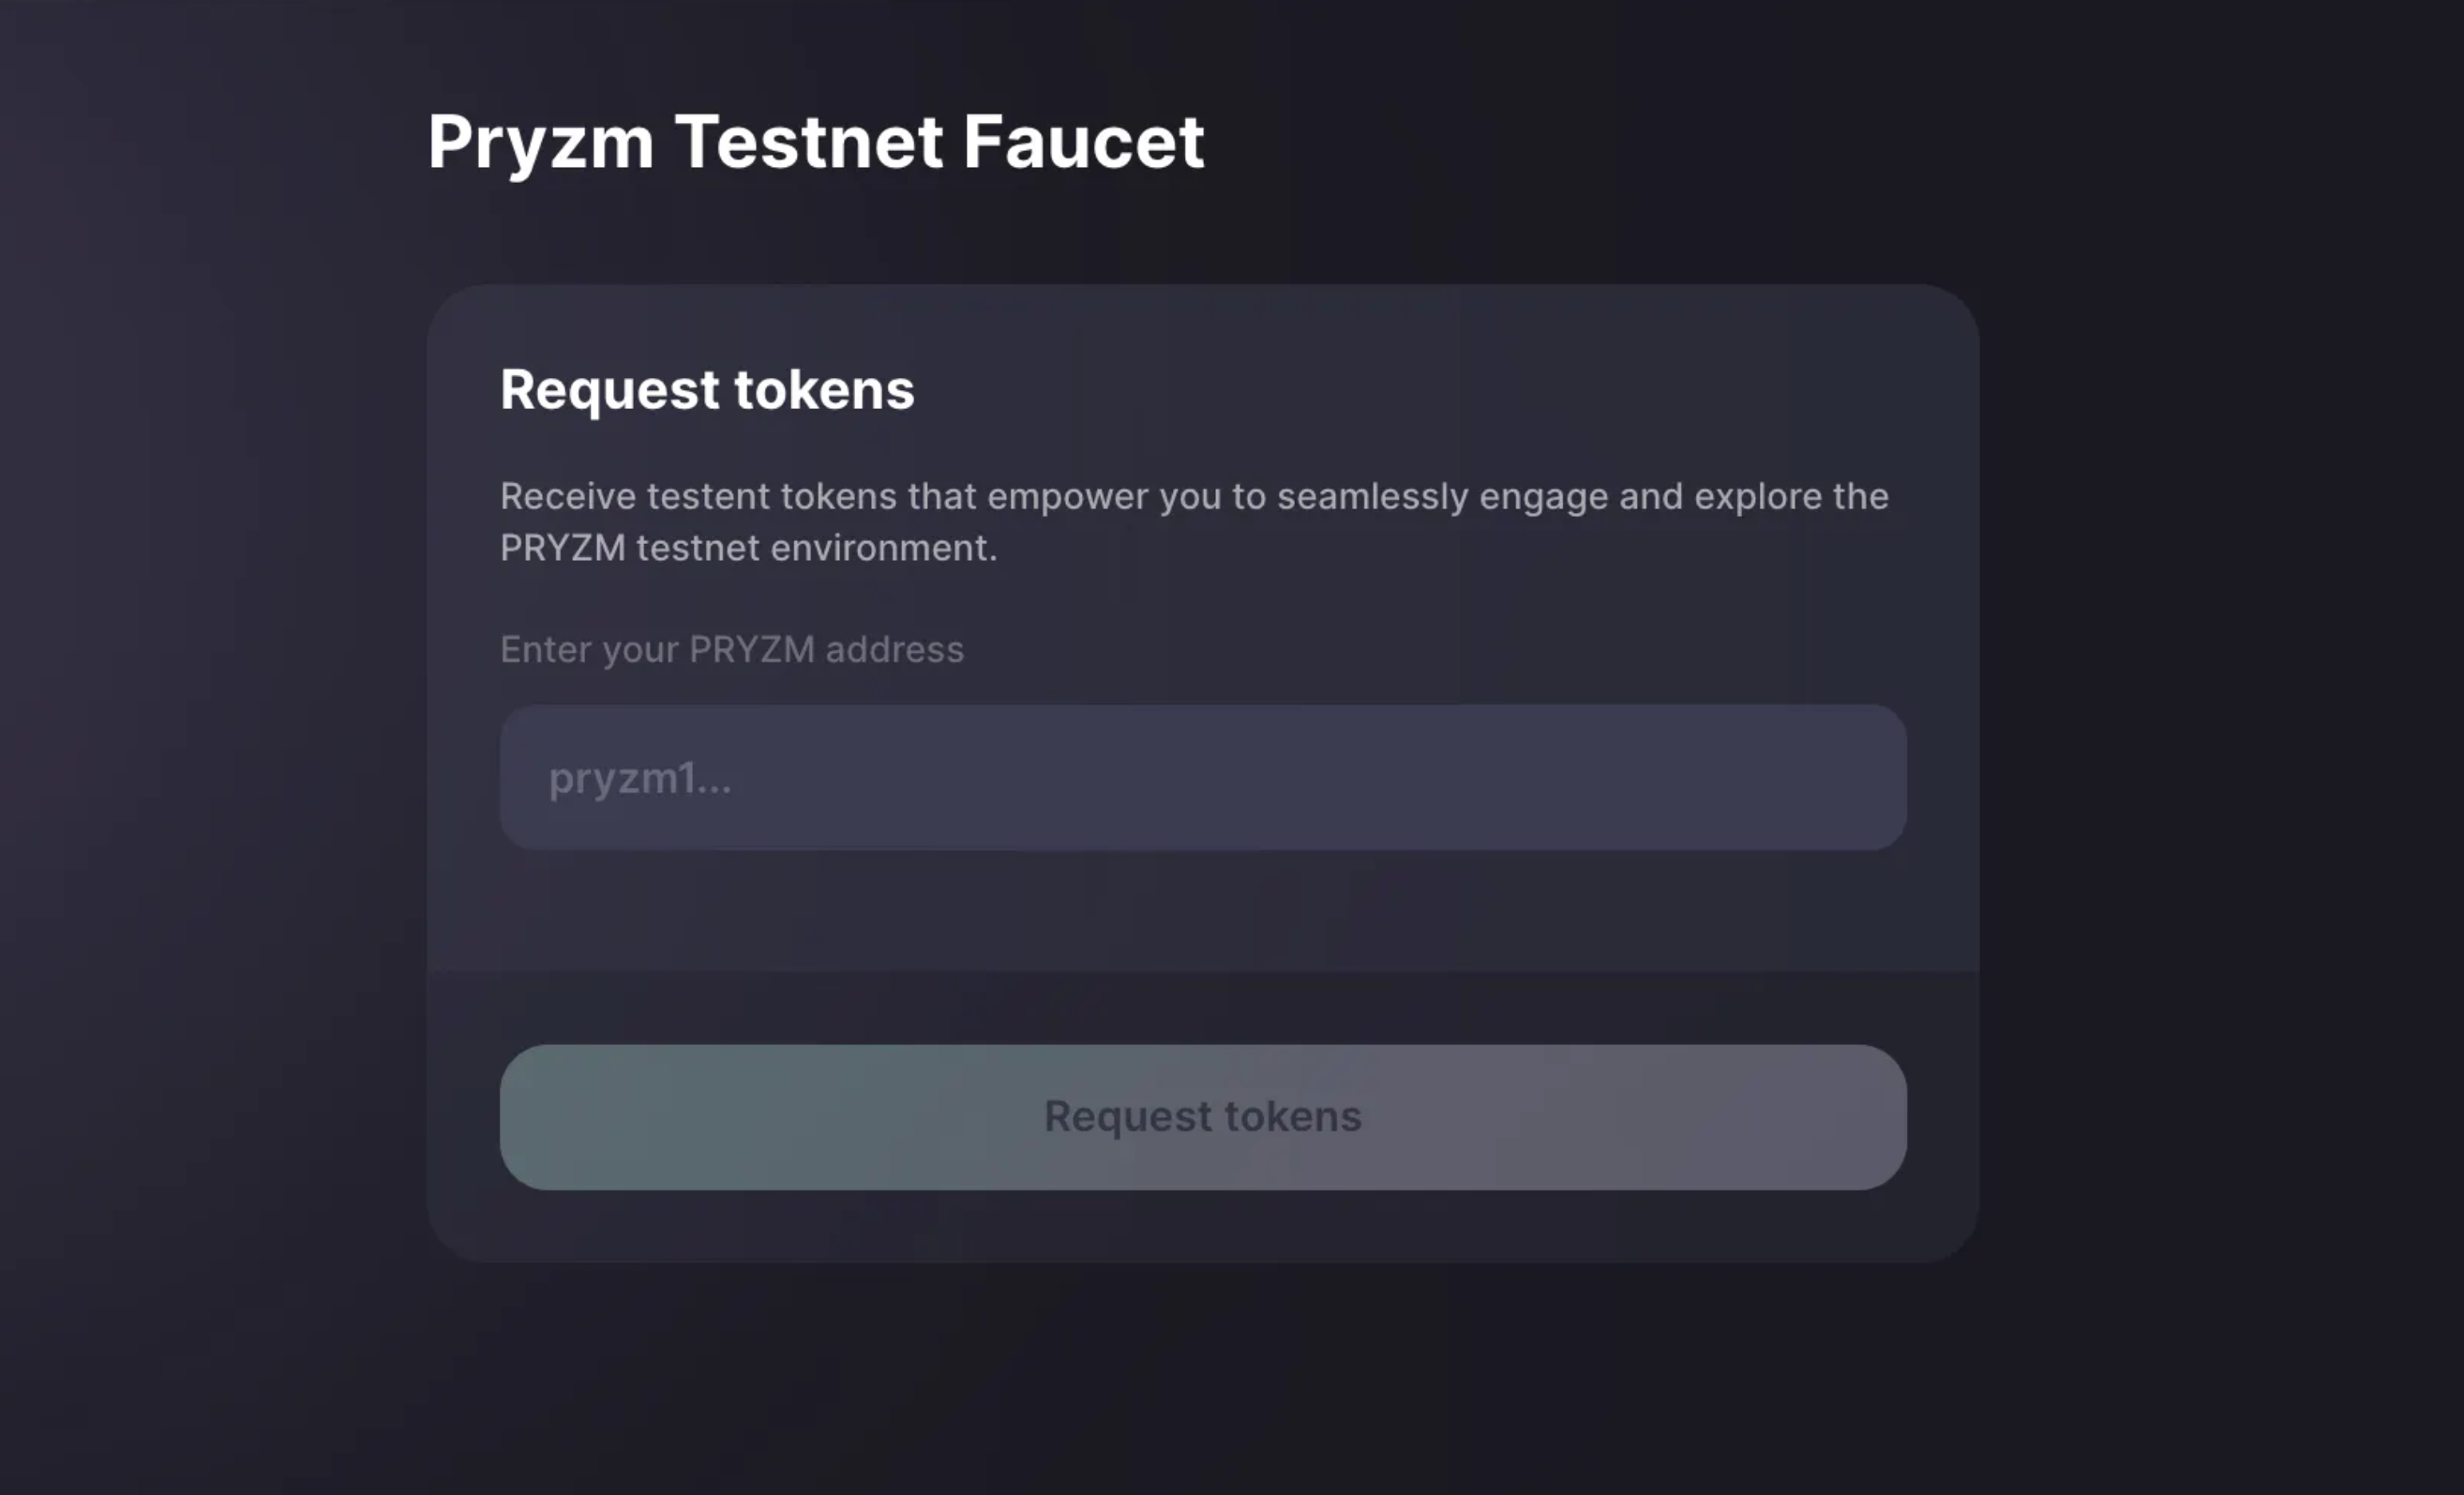
Note: You can only claim tokens once per month. Upon successful claim, you should see roughly 2 PRYZM and 10 USDsim tokens in your wallet (USDsim is the testnet stablecoin).
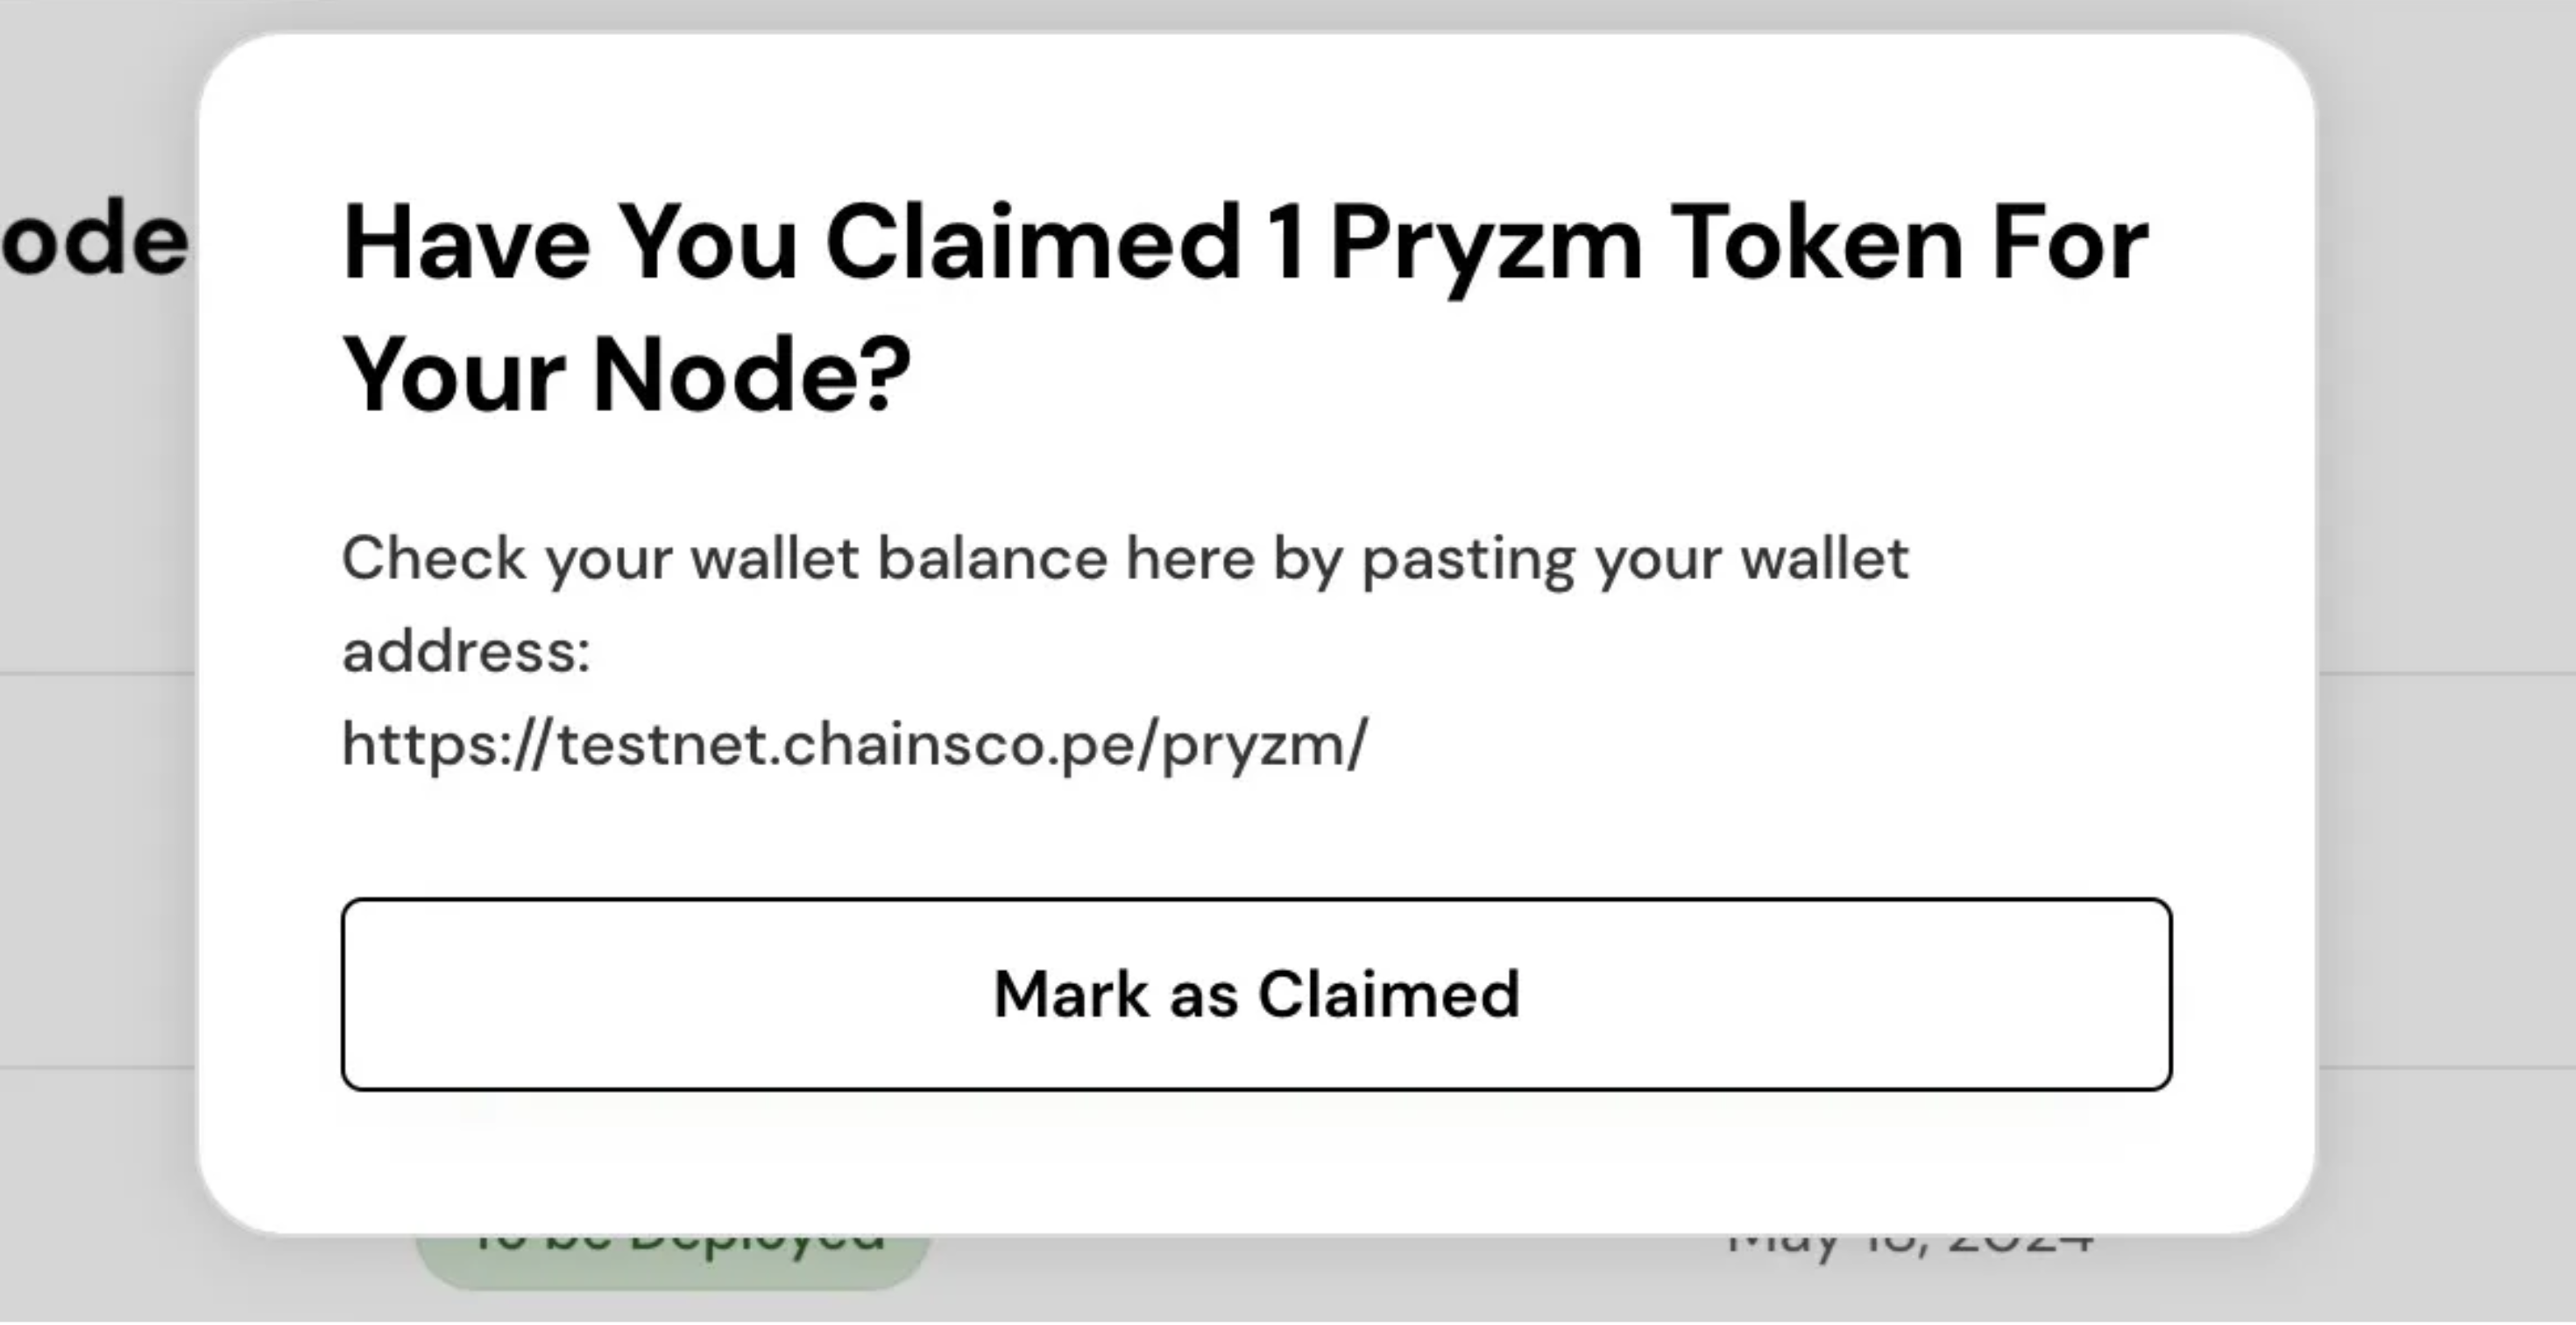
Step 5: Claim Faucet Tokens and Mark "Claimed"
Once you've claimed the faucet tokens, mark your node as "claimed" to proceed with validator creation.
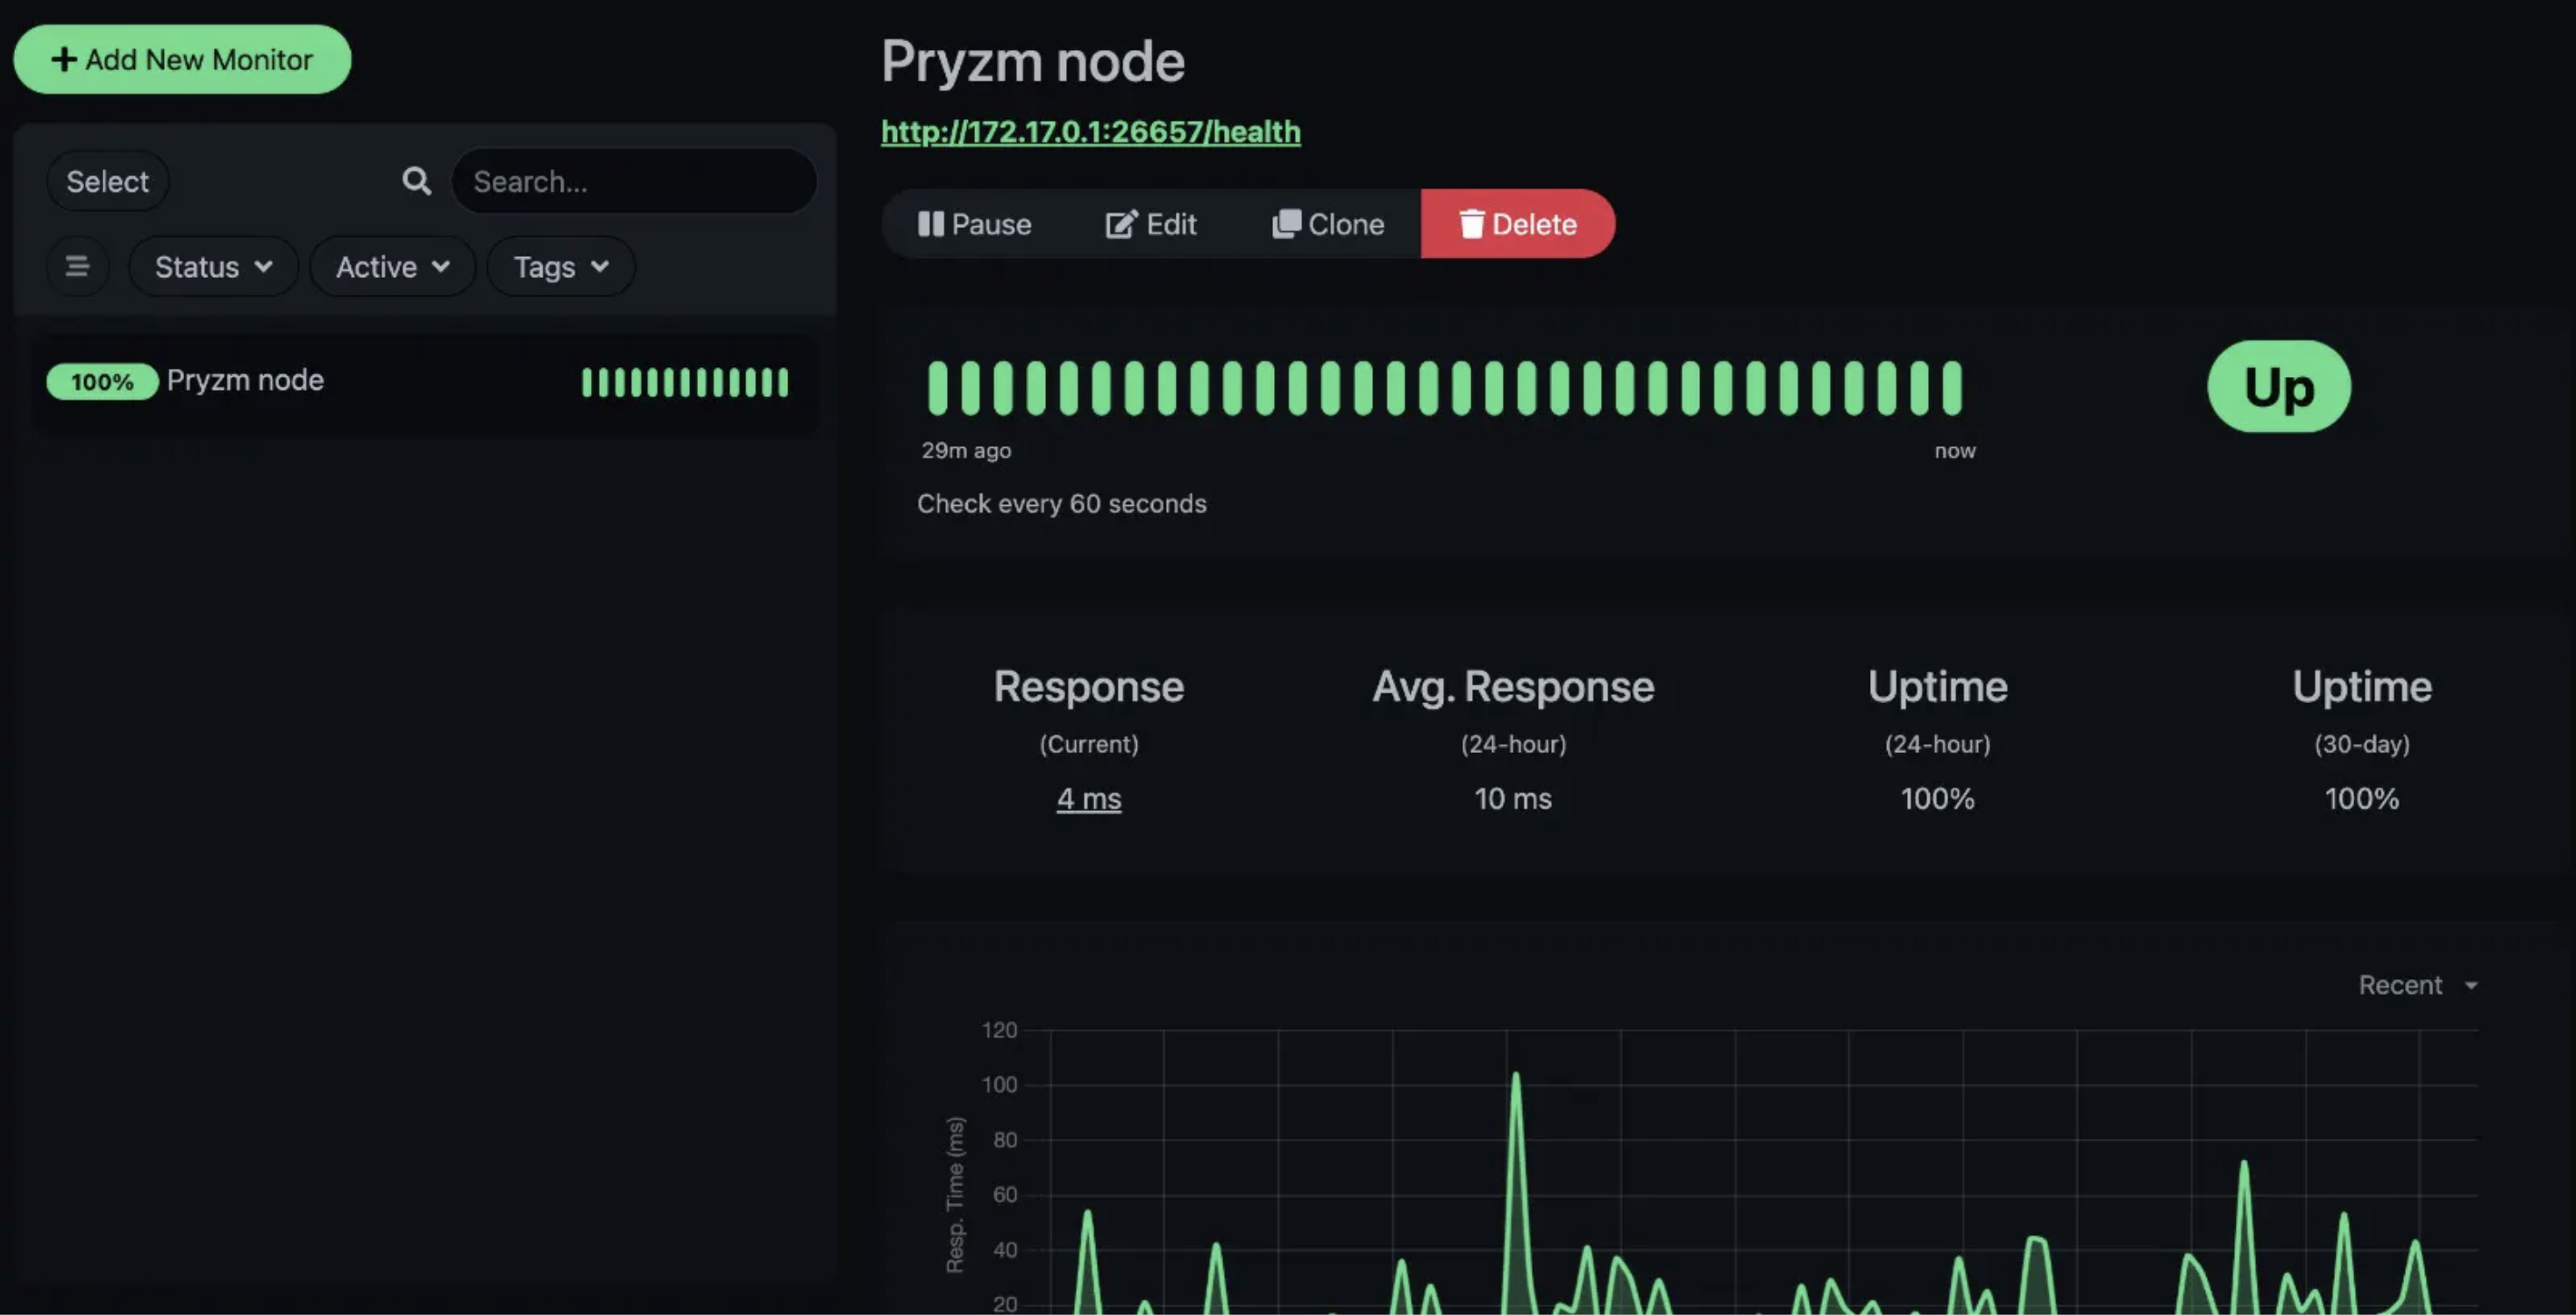
Step 6: Monitor Your Node Deployment
Once your Pryzm validator is set up, you can track its status here
While your validator might currently be inactive because it's ranked outside the top 70, you can still delegate your tokens to it to contribute to the network.

You can also monitor your Node Deployment by going to UptimeKuma. Your login credentials will be revealed then.
Thank you for setting up your node! You're now an active participant in the Pryzm Testnet.
If you have any questions or need further assistance, please don't hesitate to reach out to our discord.
We're excited to have you on board, happy deploying!