This doc acts as a guide/workflow on how to set up a relay, autotask, and sentinel to watch and act on certain responses from a smart contract.
Prerequisite
In order to follow through, you’ll need a Defender account, head over to Defender to sign up for a new account.
Overview
This doc offers an example of how a sentinel watches a contract and triggers an autotask using a relayer to call a pause function in the smart contract.
Making use of openzeppelin product; sentinel goes handy with openzeppelin other products; autotask and relay, so we’d be setting them up.
The contract we’d be interacting with has three functions pause(), unpause(), and a test().
Relayer
Once you’ve logged into your account click on Relay as shown in the picture below in section 1.

Once you do, you’ll be taken to the relay dashboard shown above in section 2. The next step is to click on the add first Relayer button as shown above in section 3**.**
After clicking the button you’ll be taken to a page as shown below, for this example, we’d name our relayer Test Relayer and use Goeril testnet.

Upon clicking create you’ll be taken to a new page with your relayer address, API key, and API secret as shown below.

Ensure you keep your API secret key is secure as your relayer can be accessed with these keys. Lastly, click Go to relayer which takes you to the image below.

Openzeppelin automatically sends 1.0 testnet ETH to your address upon creation. Now we have created our relayer next is to create our Autotask. You can learn more about relayers here.
Autotask
Click on Autotask as shown in the picture below in section 1.

Once you do, you’ll be taken to the autotask dashboard shown above in section 2. The next step is to click on the Add first Autotask button as shown above in section 3.
Once the button in section 3 is clicked a page that allows you to configure your autotask comes up like the one in the image below.

For this example we’d name our autotask Test Autotask, given we’d be connecting to the sentinel our trigger will be coming from the webhook openzeppelin provides for us upon creation of autotask.
To make our relayer address interact with our new autotask, we ensure our relayer is connected to the autotask as shown above. In the code section, we write the action we want the autotask to undergo.
We want our new autotask to pause our contract whenever it’s triggered. To achieve that we’d be using the code below.
const { DefenderRelayProvider, DefenderRelaySigner,} =
     require("defender-relay-client/lib/ethers");

const { ethers } = require("ethers");

exports.handler = async function (event) {
  // @event the event gotten when the sentinel is called

  const evt = event.request.body.events[0];
  const contractAddress = evt.matchReasons[1].address;

  const matches = [];
  const abi = evt.sentinel.abi;

  const provider = new DefenderRelayProvider(event);
  const signer = new DefenderRelaySigner(event, provider,
        {   speed: "fast", });

  const testContract =
          new ethers.Contract(contractAddress, abi, signer);

  await testContract.pause();

  matches.push({   hash: evt.hash, });

  // return matches to enable the sentinel notification get triggered using the hash
  return { matches };
};
The DefenderRelayProvider and DefenderRelaySigner gotten from defender-relay-client npm package provided by the openzeppelin team help get the provider and signer and enable the relayer address to sign a contract transaction.
The event parameter is gotten when the sentinel is activated carrying the details of the action that was taken on the smart contract. We return the event hash in a matches array to enable the sentinel notification to be triggered. Next, paste the code above into the code section and click create as shown below.

If done correctly the page on your screen should be like the one below.

You can learn more about autotask here
Sentinel
Click on Sentinel as shown in the picture below in section 1.

Once you do, you’ll be taken to the sentinel dashboard shown above in section 2. The next step is to click on the Add first Sentinel button as shown above in section 3.
Next, we choose our sentinel type, name, and network as shown below.

Next, we pass the contract address 0x36305dfb6f2613Be99BfA30dfE6C322738eA1479 we intend to watch. Once we do openzeppelin will automatically fetch the abi of the contract if it’s verified on etherscan as shown below.
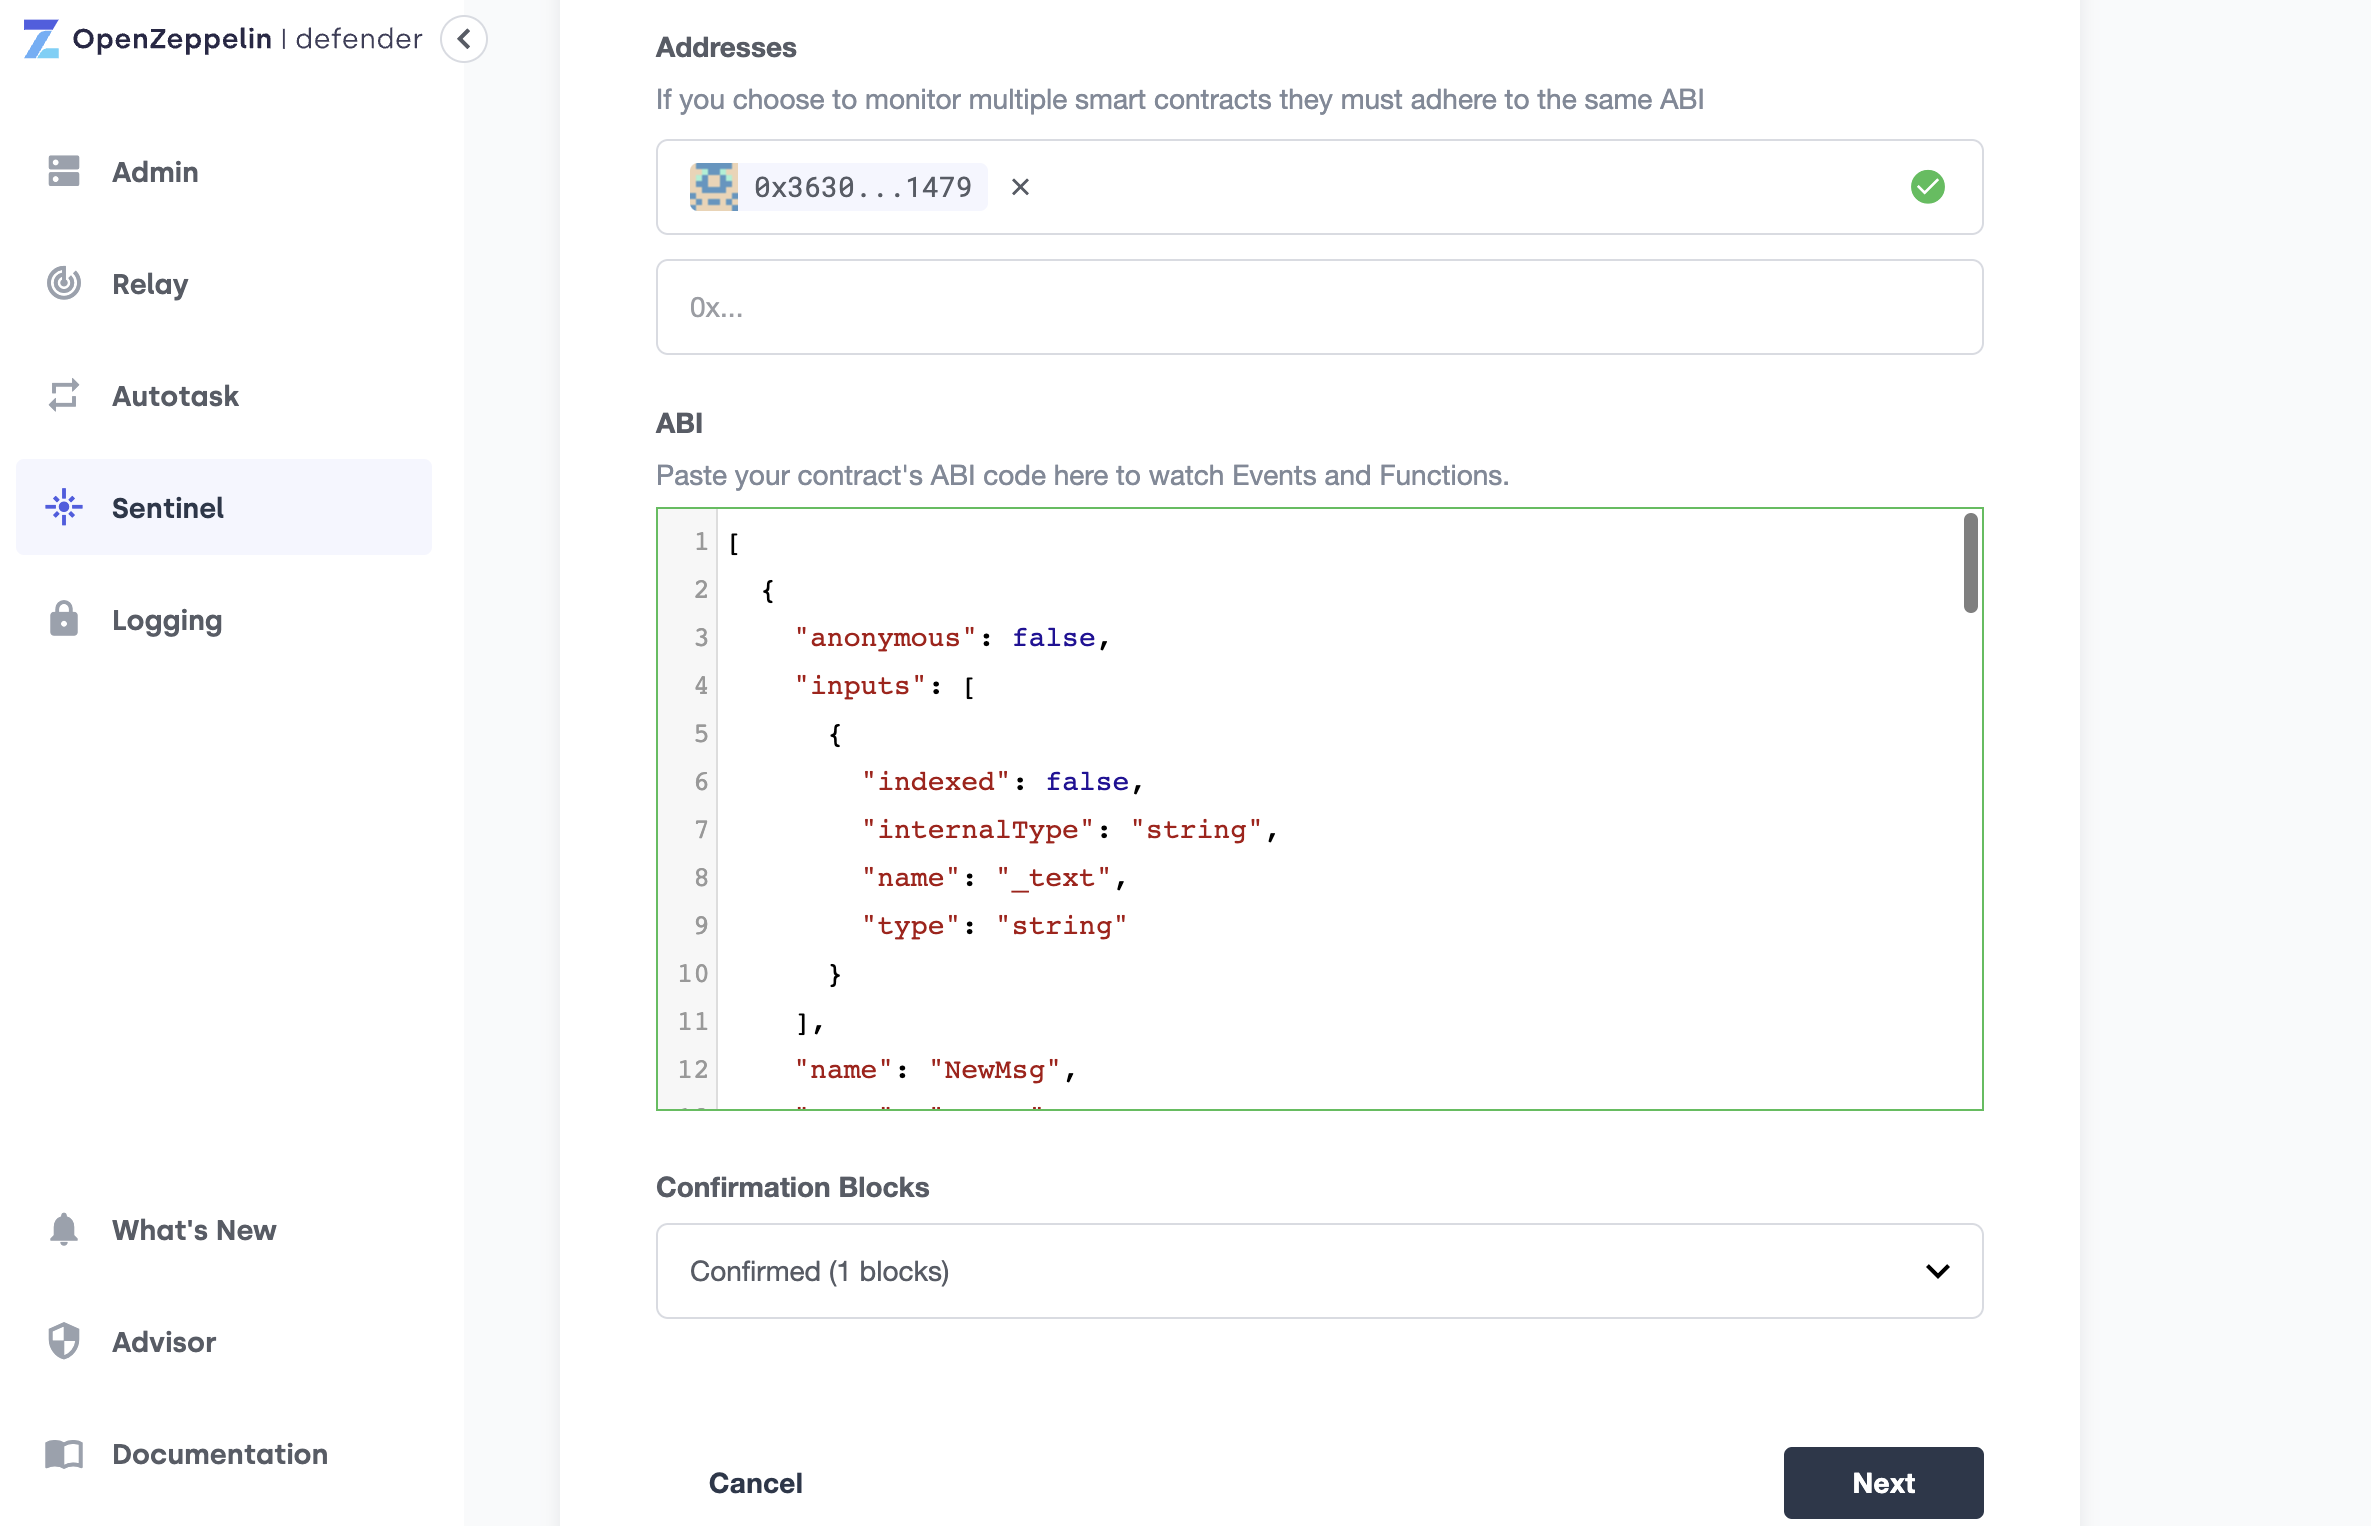
Simply click next.
Here, we get to configure 3 things the sentinel will be looking out for;
First is the transaction status, we can either want the sentinel to lookout for failed transactions or successful ones, for this guide we’d be looking at a successful transaction as shown below
Second, a sentinel can watch an event, functions, and more. Here we’d watch the text() function, whenever the word black is passed as a parameter the sentinel will be triggered which then calls the autotask as shown below.
In order for the sentinel to know which autotask it should call when a trigger happens we’ve to select one as shown below.


Simply click Next.
The next page lets you create the type of notification you’ll like to receive. Sentinel offers notifications to be sent to different platforms. We’d be making use of the email notification just for simplicity.
Click on create new notification and create an email notification as shown below


Simply click Save then scroll down and click on create sentinel. We can do further configuration here but our current setting we’d allow us to achieve our goal. After clicking create sentinel, you should be taken to your newly created sentinel as shown below.

Now we’re all set to test out our newly built sentinel.
We can run our test by passing black as a parameter in the test() function. When you do and everything works as expected you should get an email notification and a successful transaction log on the autotask like the ones below.


**
**
**
**