Getting started with NFT development but don't know where to start?
We at Onecdot are here to help you integrate NFTs into your platform.
To get you started, we've put up step-by-step explanations on how to build your own NFT minter like this in less than an hour.
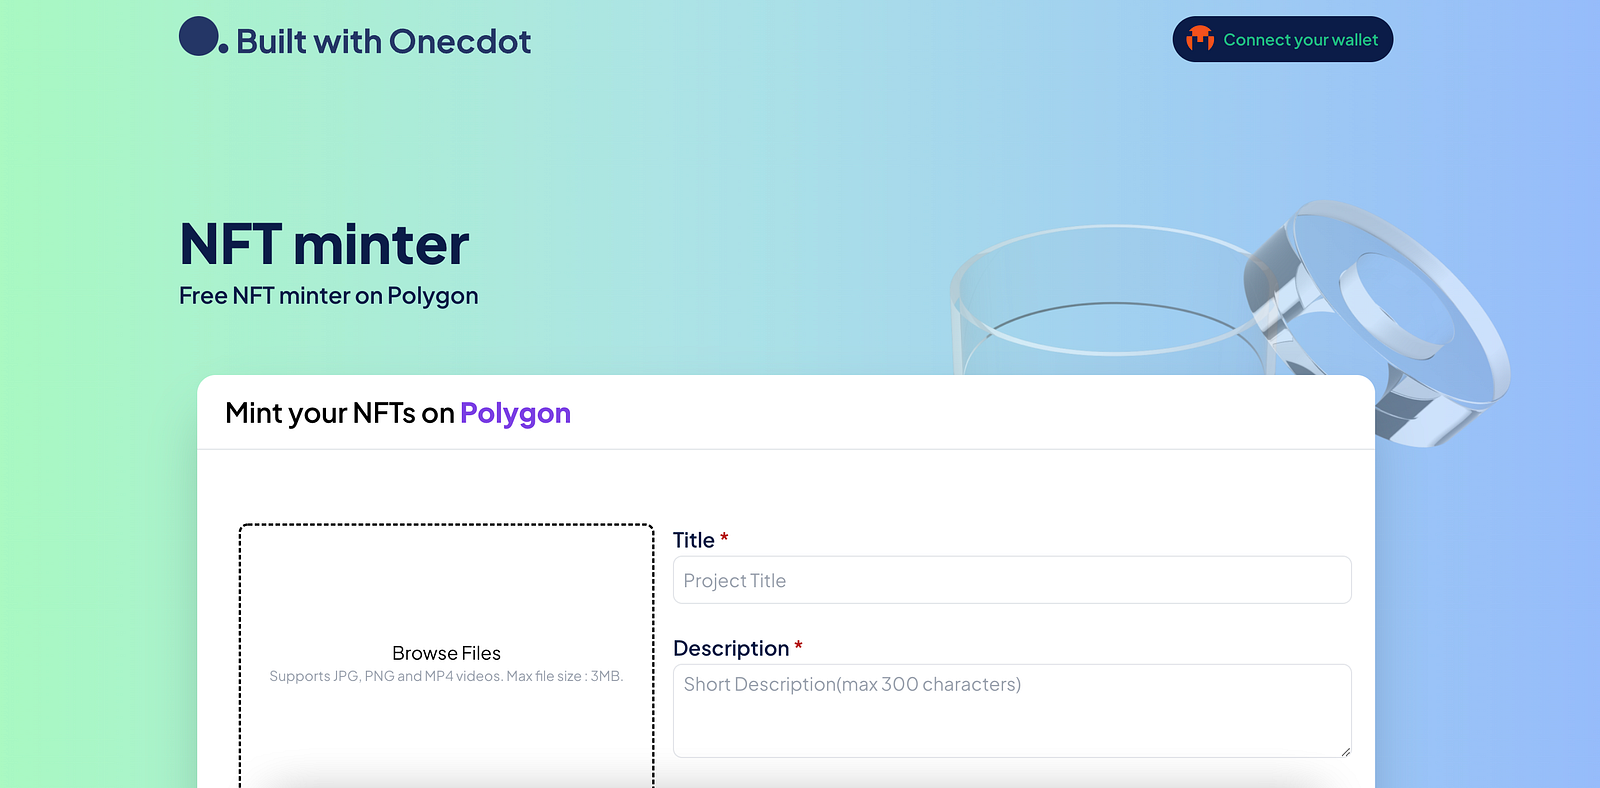
In this article, we’ll learn how we can build a zero gas fee Polygon supercharged NFT Minter(Github)
Prerequisites knowledge:
- Web development frameworks and tools like React, TailwindCSS, using SDK etc.
- Solidity, Web3js, ethers.js etc. ❌ Not required when using Onecdot.
Here's what you'll be using:
⚛️ The JavaScript library used to create user interfaces: React JS
💨 The CSS framework used TailwindCss
🛠️ API and SDK infrastructure for NFTs used Onec Dev Tools
Project Setup
-
Open the terminal and create a react app
npx create-react-app myapp -
To take care of the CSS part we would be requiring tailwindcss and you can visit here for installation
-
For notifications, we would be using toast and you can install notistack with
npm install notistack -
For minting NFTs, we are using Onec Dev tools 🛠. Go to Onec Dashboard, Login in with your Google account.
🚀 Reasons for using Onec Dev Tools:
-
Developers don’t need prior solidity coding or blockchain experience.
-
Gas fee is maintained on their side. So neither devs nor your users need to worry about getting fiat on-ramp to pay for the transaction cost.
-
The tools are chain agnostic. Currently supporting Ropsten, Polygon-Mumbai and BSC-Testnets.
-
You get custom smart contracts, owned by you.
-
Other additional features that are coming include but are not limited to bridging, meta txns, indexing, metrics etc. are super useful.
-
Create a New project → choose your favourite chain (We choose Polygon💜).

- Create API Key → Key information → Submit
- The Key will be displayed only once, for safety purposes. Copy it and keep it save somewhere.
MAKE SURE NOT TO PUSH THE KEYS ON GITHUB!

Setting up the Folder Structure
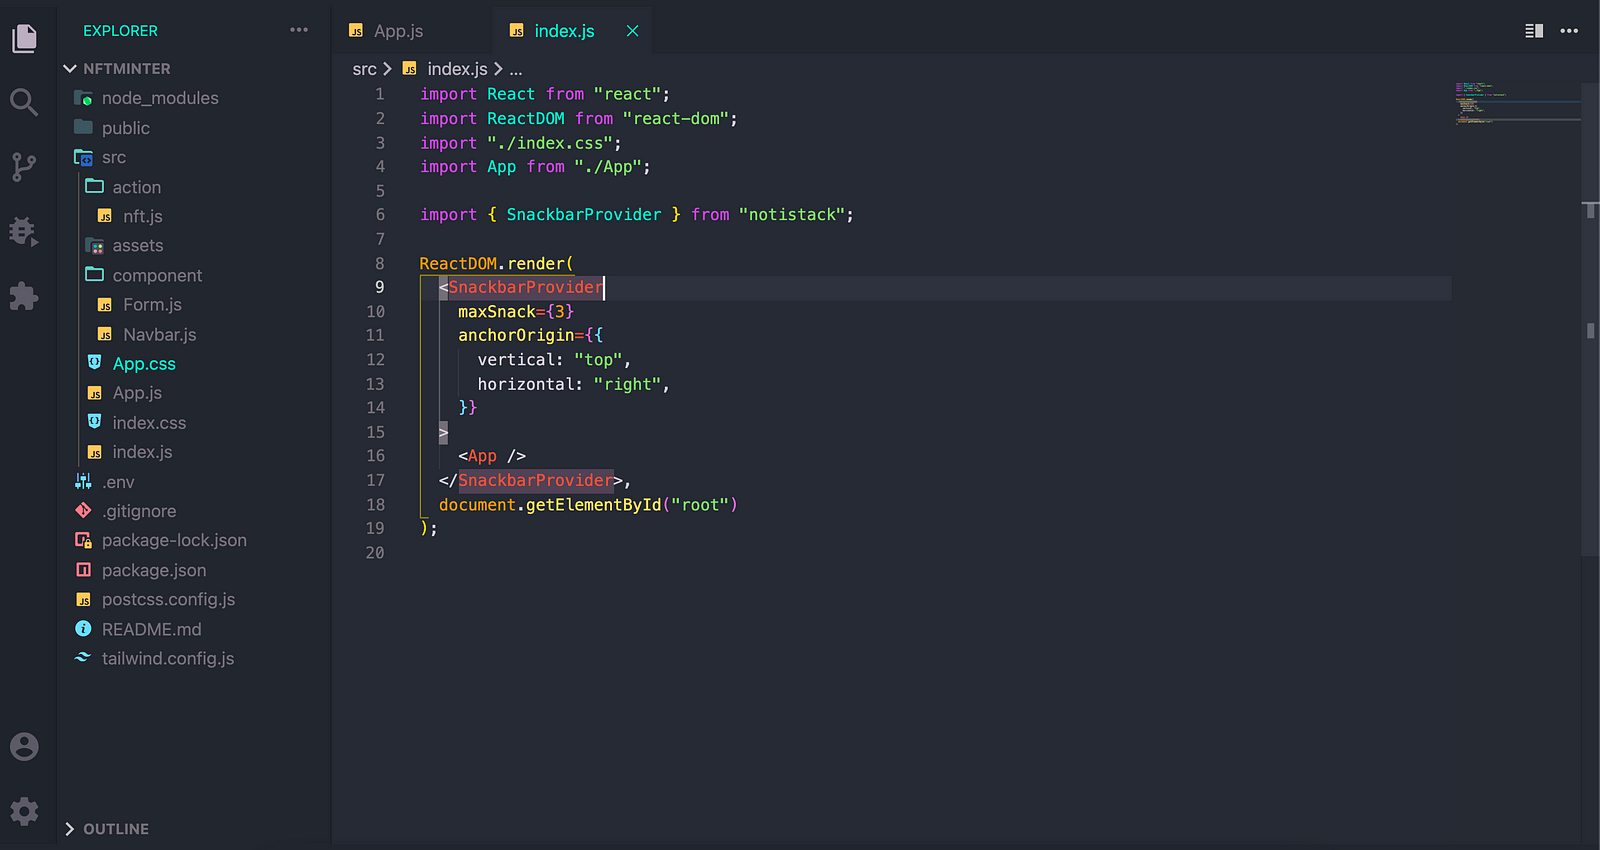
Once the project is all set 🆙, here is what your folder structure might look like.
Using Onec-SDK to connect metamask wallet
You must know that in Web3, wallets are the primary source of authentication.
For web3 wallet integration, we would be using Onec-SDK.
-
To Install the Onec-SDK use
npm install onec-sdk -
To Import it into the application
import Onec from “onec-sdk” -
Once you have imported it we would be Creating a button to which once we click on wallets can be connected.

- Following this create a WalletAuthenticate function as shown👇

Yeaaah 🥳, Wallet is now connected.
Uploading Image to IPFS
Blockchain cannot store big files, like pictures, videos, gifs, or any other file due to storage capacity constraints. So in web3, these files are stored on distributed storage like IPFS, Filecoin etc. The files uploaded to these distributed storages are stored permanently on a fixed address. The address is then stored on the blockchain to link some data with the file.
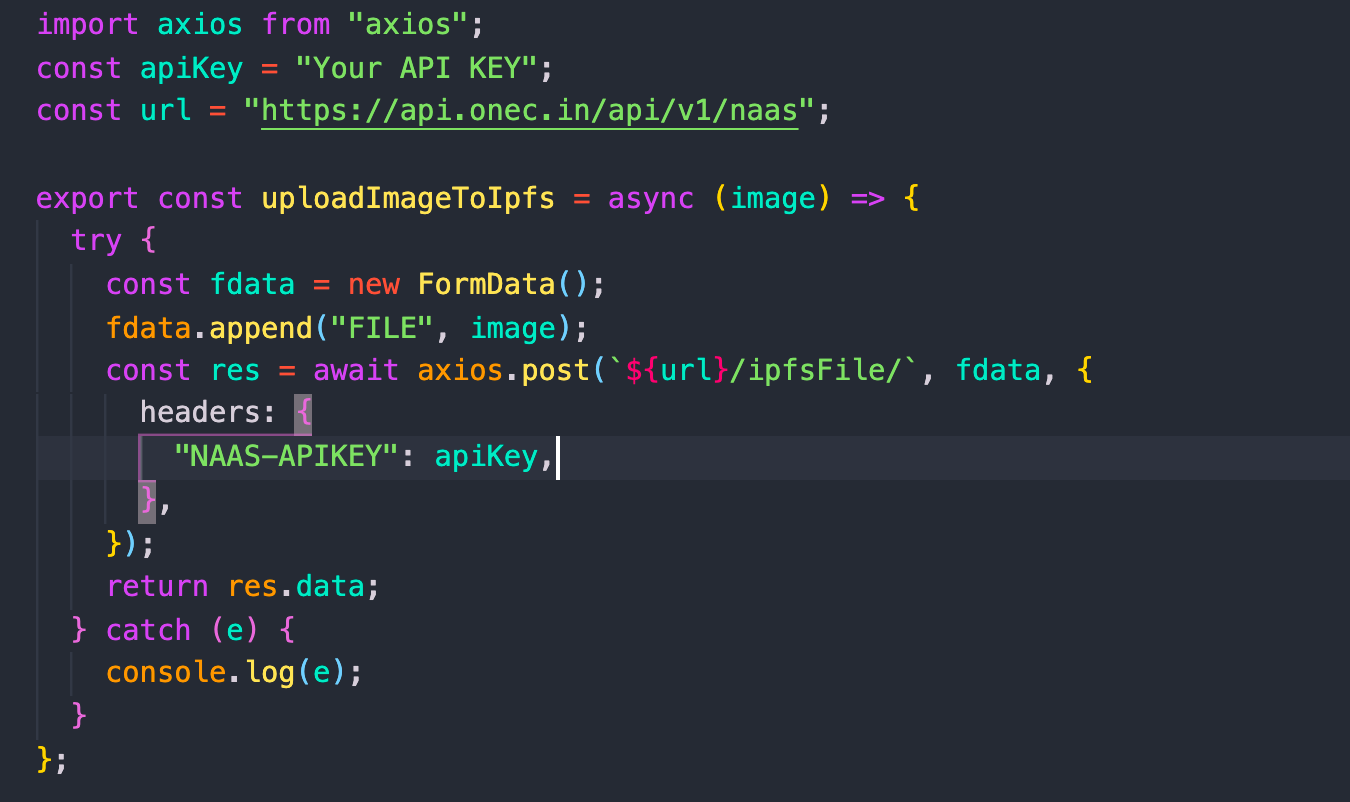
Onec-NAAS provides an API function to upload images to IPFS(Interplanetary File System)
- Next, would be uploading the file to IPFS, Below is a function to upload the Image to IPFS, this function will return the IPFS hash of the uploaded image.
Minting NFTs 😎
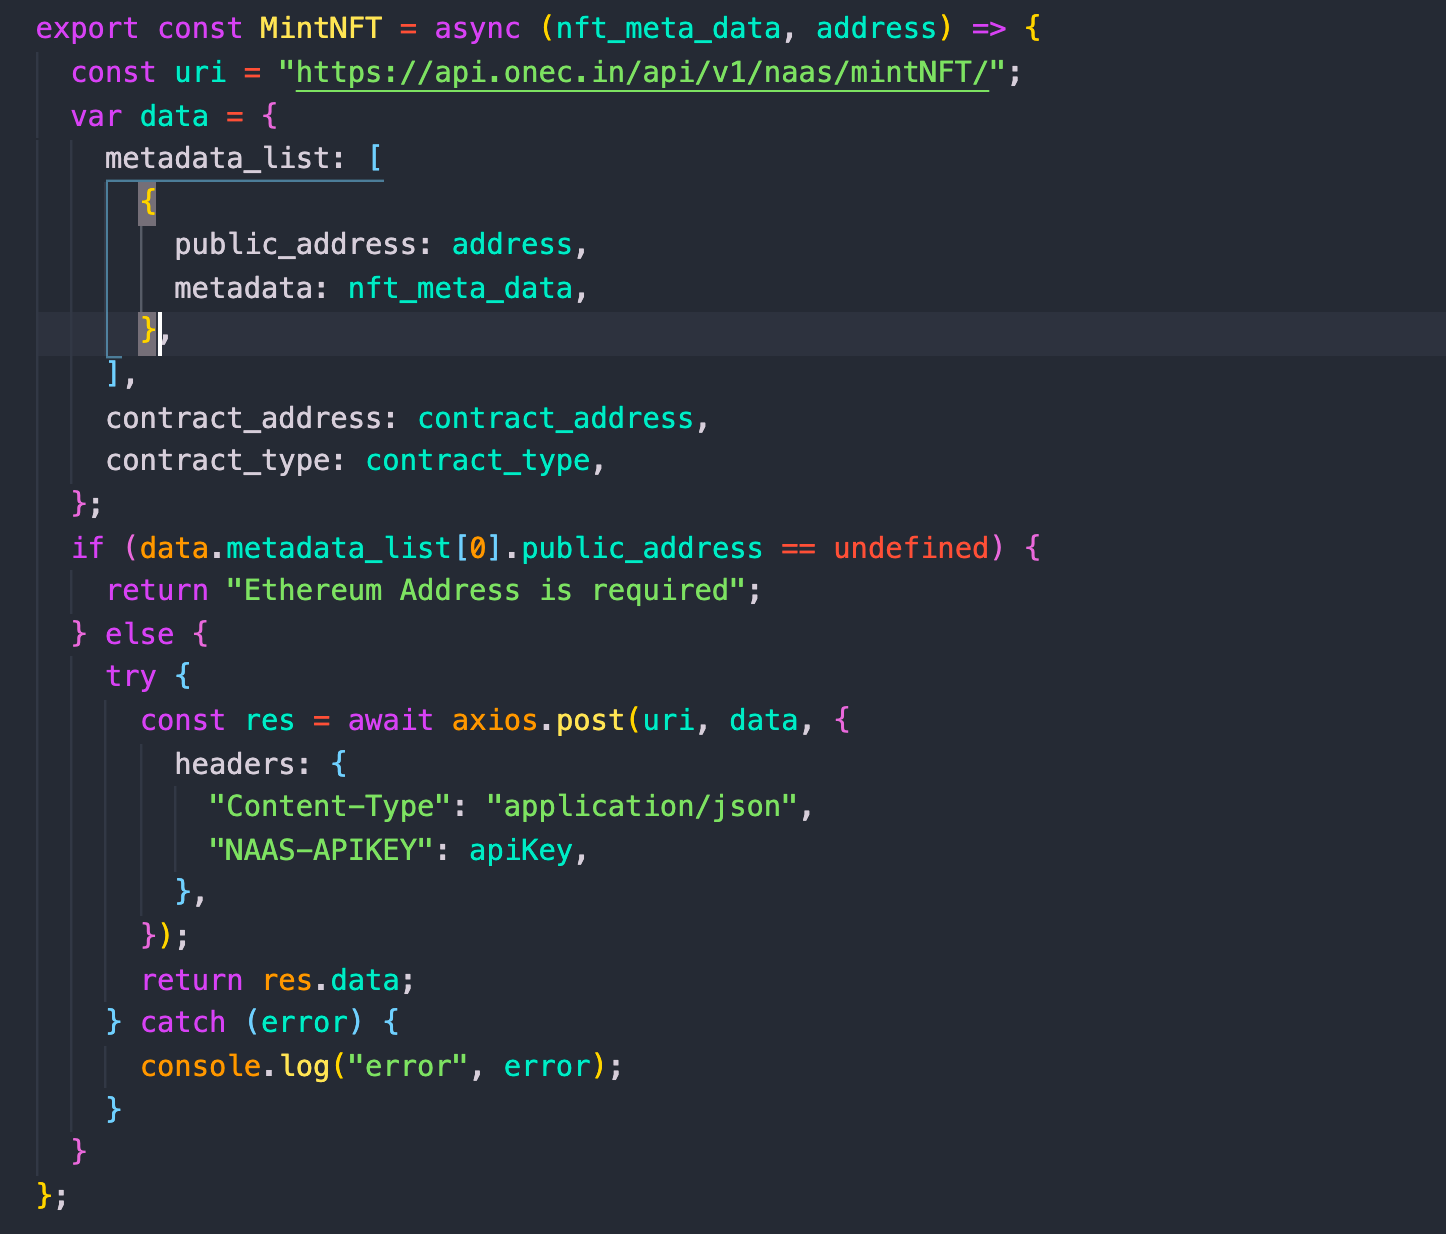
To mint NFTs, First, you’ll have to deploy your own Contract, you can check the onec docs for the contract deployment and get the contract address and contract type of your type and requirements. Or Follow the Contract deployment guide here.
Below is the sample function that is addressing the inputs to the values. Pass the nft_meta_data, **address, contract_adress (**that you’ve deployed, if not provided NFT will be minted at global contract owned by Onecdot) and contract_type(721 or 1155) .
Now ****this function will return the nft_id which you can use to check the mint status of the NFTs.
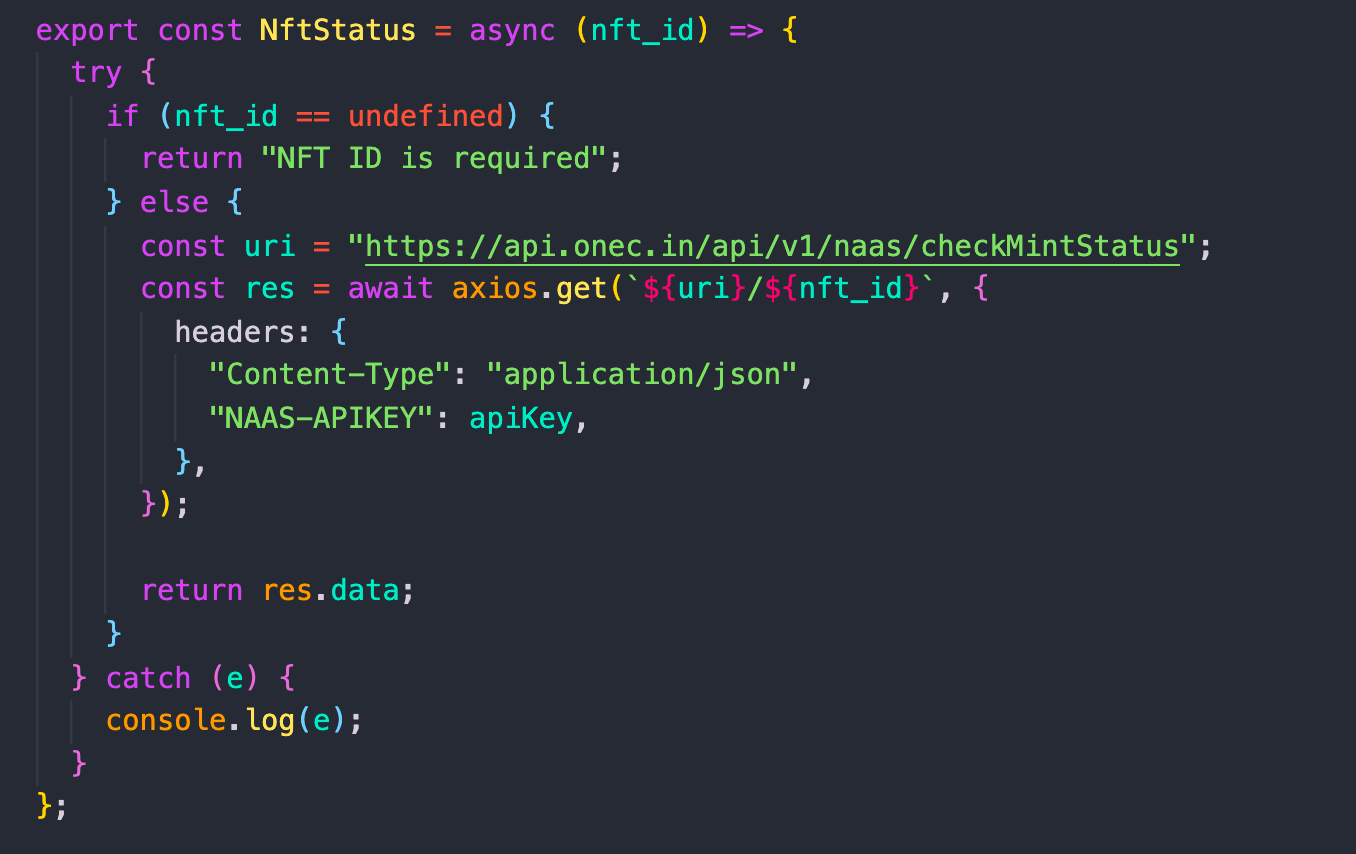
Checking status of the NFT Mint
To check the Mint status you’ll have to pass the nft_id that you get from the MintNFT function declared above 👆 and it will return the Status of the NFT, if the status is success then you will get the transaction id and token id, which you can use on https://polygonscan.com/ to get all the information.
You can use the Token IDs to get the Metadata for the minted NFT, and your NFTs is now Minted 🌈.
Tadah! the minting stuff’s done. 🚀
So now your NFTs are being minted, and to make it even better, you can see NFTs being minted to your address on opensea (if you follow their metadata standards, refer onecdot’s docs), the largest NFT marketplace. With zero gas fees and removing the hassle of writing your smart contracts and dealing with the blockchain side of things.
Onec invites you to begin building and utilising the power of NFTs and other systems of tools with us.
Check out the products here:
Onec-NAAS 👉 https://api.onec.in/docs/
Onec-SDK 👉 https://www.npmjs.com/package/onec-sdk
Onecdot functions as a LAB where the Developers, Advocates, Product Managers, Marketing people etc. are invited to build and ship cool products and write a great thesis.