A how-to tutorial for deployment and basic management of ERC-20 tokens using OpenDApps Cloud with an overview of the available configurations and token templates.
Table of contents
-
Introduction
-
Deployment on OpenDApps Cloud2.1 Basic configuration2.2 Tax2.3 Owner rewards2.4 Inflation
-
Tokenomics
-
Inflation Rewards
-
Treasury
Introduction
In this blog post, we will go through the process of deploying an ERC-20 token using OpenDApps Cloud on DeFiChain MetaChain Testnet. We will show and describe all the available deploy configurations as well as give a quick overview of the available tools available after deployment.
If you want to read more about our Token-as-a-Service solution which we are showcasing here today make sure to check out our blog post covering the concept:
Before the deployment of any services using OpenDApps Cloud, we need to connect to the dApp on our selected blockchain. We have a tutorial on how to do that available here:
Let’s dive in.
Deployment on OpenDApps Cloud
The deployment of ERC-20 tokens on OpenDApps Cloud is simple. If the user has used any of the other services available in our dApp, they should not have any issues with the deployment of tokens.
After we have connected to OpenDApps Cloud dApp we will see our dashboard. From there, we have to click the “Create Token” button to start our deployment:
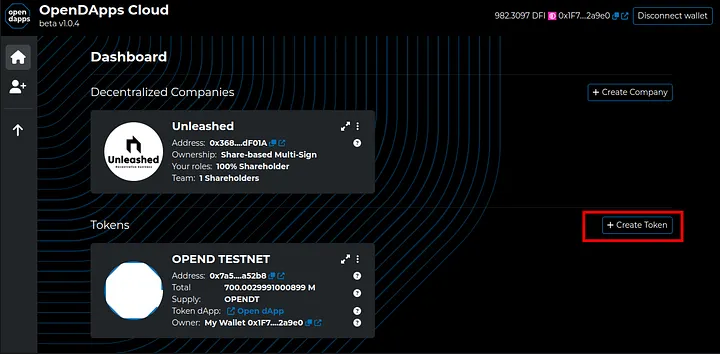
This opens up the “Create New Token” form where we will see a 3-step wizard for the deployment of our ERC-20 smart contract:

Basic configuration
Tokens created on OpenDApps Cloud are owned by a single wallet or entity like a decentralized company. The ownership is represented by an NFT from an ERC721 collection, part of OpenDApps Cloud infrastructure. The NFT is transferable and tradeable allowing change of ownership for the token.
To mint the ownership NFT we have to select the initial owner, input a name and ticker for the token, as well as provide a logo for the token. After we input the basic NFT configuration we can move to the next step using the “Sign Metadata” button:
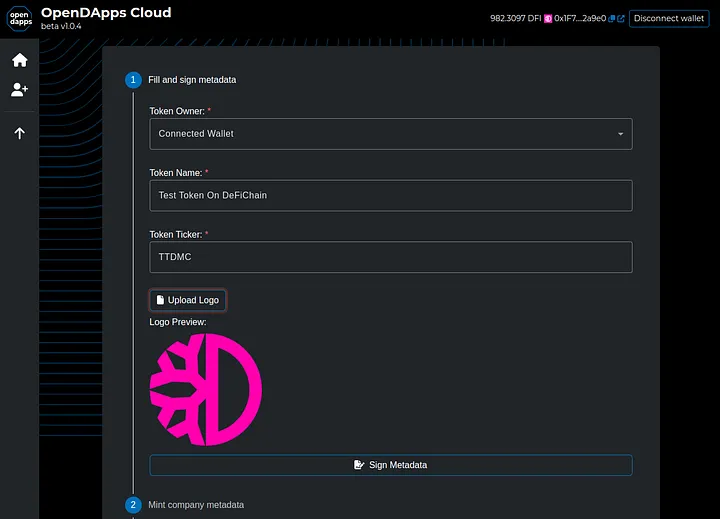
The name and ticker will also be used for the on-chain configuration of the token and will be seen in explorers and other services related to tokens.
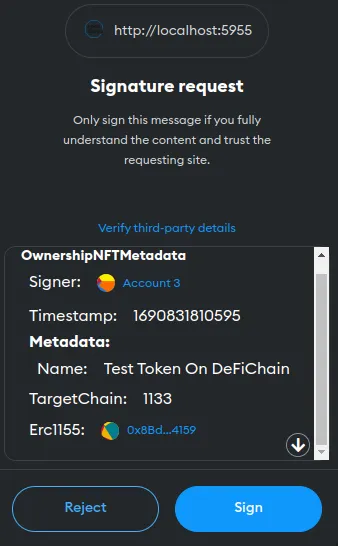
When we click on Sign Metadata, our wallet will ask us to create a signature for the metadata using the eth_signTypedData_v4 method. You can read more about signature types in wallets here: Click me!We are using MetaMask for this guide and the signature looks like this in the wallet UI:
Once we sign the metadata the wizard will move to step 2 where we can mint the metadata for our token. We can do that by clicking the “Mint Metadata” button to upload it to IPFS:
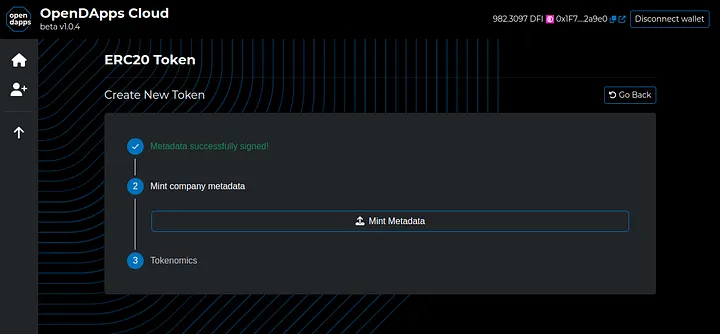
After the successful upload of the metadata to IPFS, we will have access to the configuration of the token, including tax, inflation, and owner rewards.
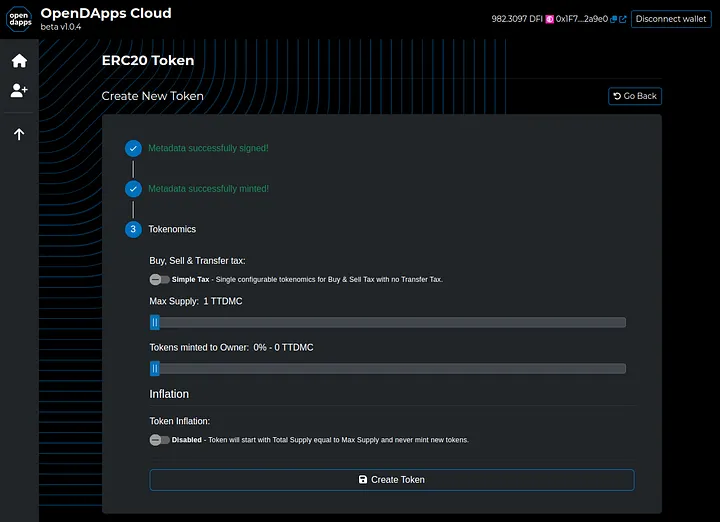
Tax
One of the main points for customization for tokens is the tax for buying, selling, or transferring the token. The way the tax is handled by the team or by the token smart contract is usually called tokenomics and it is one of the main differences between all the ERC-20 tokens.
On OpenDApps Cloud there are two modes available for the taxation of token transfers — a simple tax and a complex tax. Both tax modes enable a maximum of 10% taxation for any type of supported transfers making it fair and secure for holders buying tokens deployed using our services.
Simple tax mode enables taxation ONLY on buys and sells of the token on any DEX where the liquidity was published using OpenDApps Cloud, while in complex mode there is an option to enable taxation for transfer between wallets. Transfers to contracts (like for staking, asset backing, etc) are never a taxable event for tokens deployed using OpenDApps Cloud!
Simple tax mode allows for a single configuration for buy and sell tokenomics while complex tax mode allows individual taxation sizes and tokenomics configurations for buy, sell, and wallet transfers making tokens flexible.
To select the mode for the token tax we can use the switch available in step 3 of the token creation wizard:

Owner rewards
When ERC-20 tokens are created usually the whole supply is minted to the wallet of the owner and after that, they split the supply for liquidity, salaries, marketing, etc. This can easily create opportunities for project owners to keep a big chunk of the supply and later on dump on their holders which creates a bad image to ERC-20 tokens and any legitimate projects out there.
To fix this issue, tokens deployed using OpenDApps Cloud have some limitations and technical solutions to provide a safer and at the same time fair experience for the project owner and holders of the token.
Using our deployer, token owners can distribute to themselves between 0–10% of the max supply of the token and these tokens are not directly transferred to them and rather to a treasury. Once the rewards are in the treasury they are locked up and released in 12 equal batches through the next year. This way owners have a greater incentive to increase the value of the project without dumping huge bags on their holders after the first few days.
To configure the % of supply distributed as owner rewards we can use the slider in step 3 of the token deployment form:

Inflation
Most ERC-20 tokens are deflationary with some exceptions where token owners decided to have a mint function available to manually increase the supply of a token over a period of time (usually a month or year). The concept of inflationary ERC-20 tokens is not widespread usually because it is not easy to program in solidity and because most projects are not long-term.
Inflation in tokens can be beneficial for tokens aiming to support a project long-term providing rewards for owners, staking, liquidity, and more. OpenDApps Cloud is armed with a stable, long-term, and predictable inflation template inspired by native cryptocurrencies. If enabled, the supply of the token increases every few blocks with decreasing rewards size curve similar to Bitcoin until the max supply is reached.
To manage inflation we can enable it from the switch available in step 3 of the token deployment form:

After we enable inflation we can configure the initial supply available with the creation of the token, the time between new supply mints, and the average amount of rewards minted each cycle over the full time until max supply.
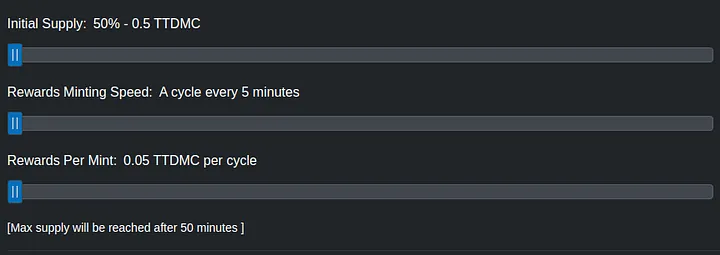
Finalization
After we configure all the tokenomics we can deploy the ERC-20 Token using the “Create Token” button:
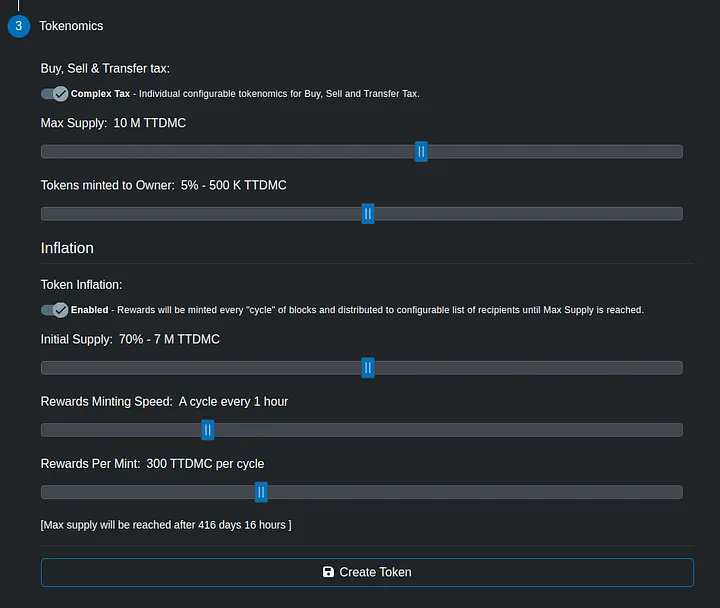
Deployment of tokens costs a one-time tax different on each chain but currently on DMC Testnet it is 0.01 DFI. We will see the transaction for deployment in our wallet. In MetaMask execution will look like this:
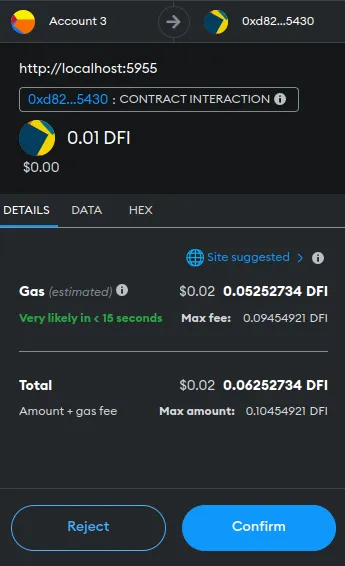
After confirmation of the transaction and its successful execution, we will be presented with a message for success and buttons to return to the dashboard or to check the transaction in a block explorer.
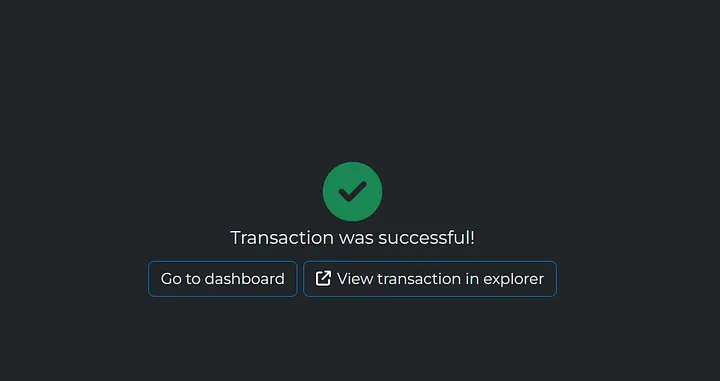
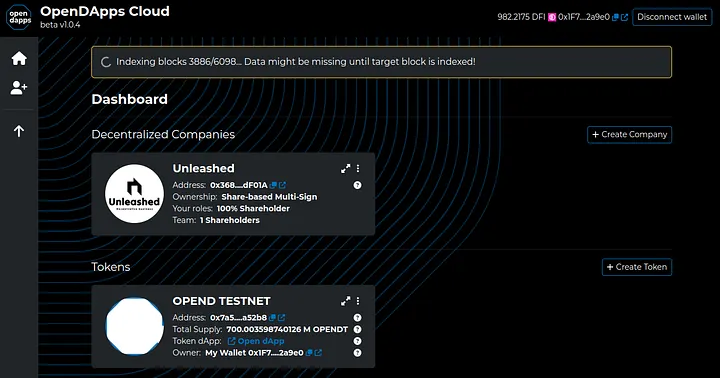
If we want to check out our token on the dashboard we can use the “Go to dashboard” button. After the deployment of tokens, the dApp requires the new blocks to be indexed before the token is visible. If the process is still ongoing you will see a message on your dashboard.
Once the blocks are indexed we can refresh our dashboard and the newly deployed token will be there.
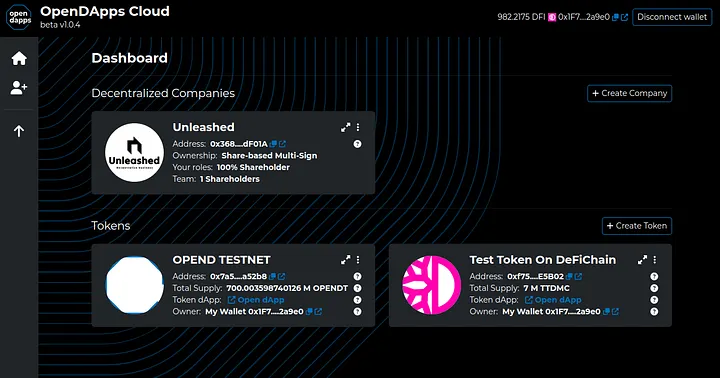
Congratulations! You deployed your first ERC-20 token!
Read the rest of the guide to learn what can you do with it once it is deployed and what additional services are available for tokens.
Tokenomics
All tokens deployed using OpenDApps Cloud have access to fully customizable tokenomics which can be changed and tweaked at any time using our dApp.
To manage the tokenomics of a token we can open the menu for the token and click on the “Manage Tokenomics” options:
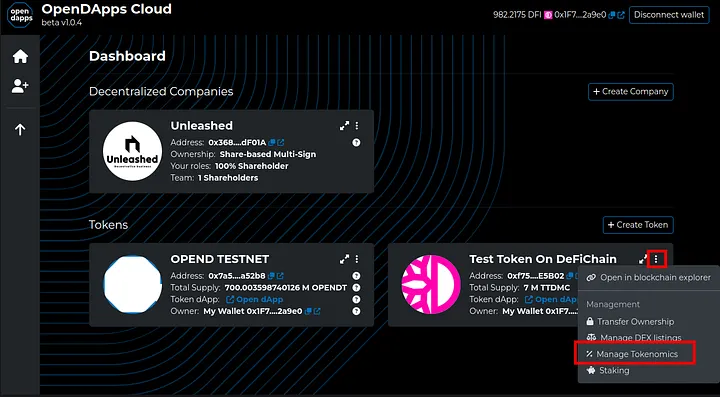
This will transfer us to the “Manage Tokenomics” page for the token. Here we can adjust the maximum amount of tokens that a wallet can own, the maximum amount of tokens each transaction can carry as well as the tokenomics executed on buy, sell, or wallet transfers:

As we can see because we used complex tax mode for our token we have individual configurations for buy, sell, and wallet transfers. To manage any of the tokenomics we select the tab and manipulate the slides available for the different presets.

Each token deployed using OpenDApps Cloud has a minimum buy/sell tax of 1% which is OpenDApps Cloud platform tax for providing the infrastructure and smart contract templates. The tax goes directly to OpenDApps Cloud decentralized treasury on the selected blockchain.
A more in-depth guide and how-to tutorial on managing tokenomics can be found in our dedicated blog post: TBD
Inflation
If inflation is enabled during token deployment, token owners will have access to the fully customizable inflation rewards which can be adjusted at any time using OpenDApps Cloud dApp.
To manage the tokenomics of a token we can open the menu for the token and click on the “Manage Tokenomics” options:

After that, we can click the “Inflation Rewards” tab on the tokenomics page and manipulate the slides available for the different presets.
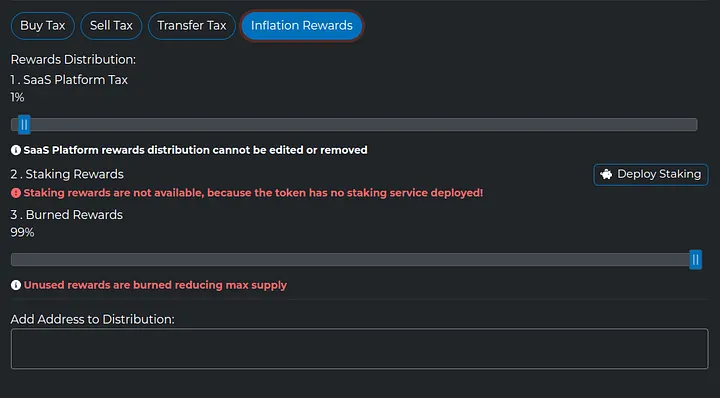
A more in-depth guide and how-to tutorial on managing inflation can be found in our dedicated blog post:
Treasury
Each token deployed using OpenDApps Cloud has access to an on-chain treasury. The treasury provides access to owner rewards minted during deployment and acts as a safe for liquidity tokens from DEX listing managed through OpenDApps Cloud dApp.
To access the treasury of a token we can open the menu for the token and click on the “Treasury” option:
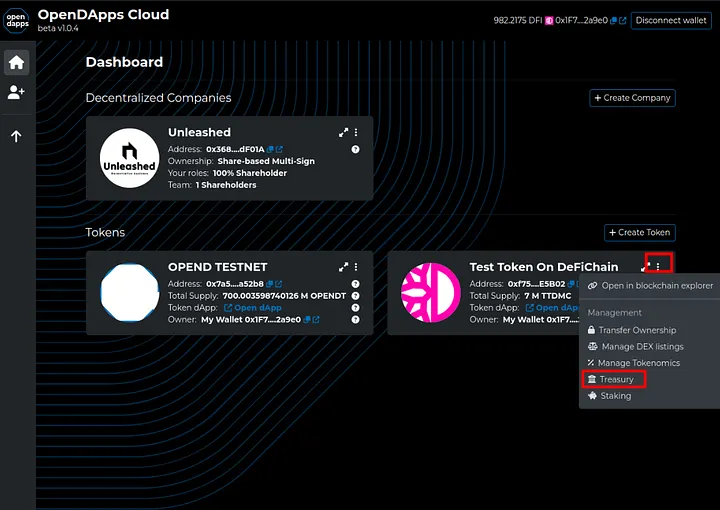
Here we can withdraw any rewards available and check when the next release period will be for owner rewards. Information for tokens liquidity held in treasury is available as well:
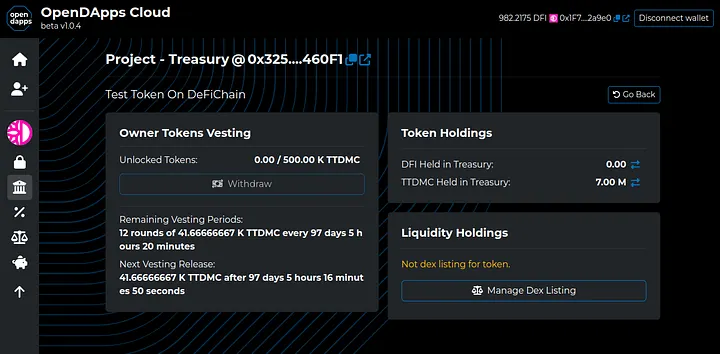
A more in-depth guide and how-to tutorial on managing the treasury can be found in our dedicated blog post: TBD
In-depth guides on available services and other SaaS-related information resources are available in this blog and any related content will be linked here: