
1. Get the Mint Runes for the BTC Wallet
1.1 Create a BTC wallet
Create a BTC legacy address (p2pkh) using the Unisat wallet

Select Legacy (P2PKH) Click and copy the address: 1xxxxxxxxxxxxxxxxxxxxx (beginning with 1)
PS: Unisat web page plug-in wallet download link please see Unisat official website at
1.2 Top-up BTC to Legacy (P2PKH) format BTC address
Transfer the BTC to the Legacy (P2PKH) address.
This address will later be used to initiate a cross-chain recharge operation to the layer 2
(Very important: layer 2 across the chain must use legacy address, otherwise layer2 will not arrive)
1.3 Export the Legacy (P2PKH) format BTC address private key
Export the private key for the 1xxxxxxxxxxxxxxxxxxxxx address from the Unisat wallet
Kxxxxxxxxxxxxxxxxxxxxxxxxxxxxxxxxxxxxxxxxxx (To be used in Step 2.2)

2. Get the Runes Mint Tool
2.1 Download the Runes tool
1.Download the layer 2 Runes tool for Xrpinals Mint Tool.
2.Windows users are strongly advised to download and install git bash, which provides a better user experience with XrpinalsMintTool.
After the installation, go to the XrpinalsMintTool directory, hold down shift while clicking the right mouse button, click "Git bash here", then you can open the git bash terminal interface.
Tips: In the terminal, CTRL-C stands for "interrupt", which means interrupting an executing process, not "copy" as we usually think. If you want to copy the content to the terminal, press the "right mouse button" to copy the content from the clipboard to the terminal.
2.2 Import the Legacy (P2PKH) BTC private key
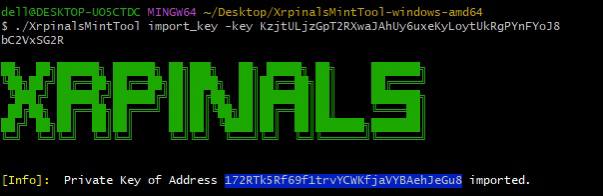
Using the private key exported in step 1.3, execute the import private key command in Xrpinals Mint Tool:
./XrpinalsMintTool import_key -key Kxxxxxxxxxxxxxxxxxxxxxxxxxxxxxxxxxxxxxxxxxx
(Very important, this step must be done before step 3.2, because the operation of this step will also do the binding operation of layer 1 address to layer2 address. Without this step, layer2 will not be able to reach the account after cross-chain recharge.)
2.3 Verify the BTC private key import successfully
Perform the check address command to ensure that the private key corresponding to the address is successful:
./XrpinalsMintTool check_address -addr 1xxxxxxxxxxxxxxxxxxxxx

3. L1 Cross-chain Transfer to the L2 BTC address
3.1 Query the L2 BTC transfer address
Query the recharge address, get the recharge address of 3xxxxxxxxxxxxxxxxxxxxxxxxxxxxxxxxxx, and enter the following instructions with it:
./XrpinalsMintTool get_deposit_address -addr 1xxxxxxxxxxxxxxxxxxxxx

3.2 Make L2 BTC transfer
Use the unisat wallet to recharge across the chain from 1xxxxxxxxxxxxxxxxxxxxx address to address 3xxxxxxxxxxxxxxxxxxxxxxxxxxxxxxxxxx (very important, this step must be done after operation 2.2, otherwise the layer2 will not reach the account)
Tips: Because the XPS Runes is set to a maximum of 10 per address, the interval between two Runess is not less than 1800 seconds, the cost of minting an Runes is only 100 satoshi, so for security reasons, there is no need to recharge too much BTC to layer2. again, we remind the user to carefully keep their private key, to prevent unnecessary loss of assets due to the leakage of the private key. Again, users are reminded to keep their private keys carefully to prevent unnecessary loss of assets due to leakage of private keys.
3.3 Wait for the L2 BTC to transfer to the account
After waiting for the transaction in step 8 to confirm on the chain (2 blocks are required), query the balance of the recharge address:
./XrpinalsMintTool get_balance -addr 1xxxxxxxxxxxxxxxxxxxxx -asset BTC

4. Runes Mint Process
4.1 Runes mint instruction
Enter the following instructions in the tool to cast the Runes:
./XrpinalsMintTool mint -addr 1xxxxxxxxxxxxxxxxxxxxx -asset XPS

If you see: mining success, txHash: 03d8216ce49753cbe6ae7a1a65e08b4fe841d5b6
Indicates the mint success
4.2 Query the Runes mint information
To query the Runes mint information instruction for the current address:
./XrpinalsMintTool get_mint_info -addr 1xxxxxxxxxxxxxxxxxxxxx -asset XPS

4.3 Using the GPU for mint commands
Modify the conf.json in the XrpinalsMintTool file directory and open it as a text file. Change the gpu item to true as follows

then
Download the mining tool. After executing the mint command (. /XrpinalsMintTool mint -addr 1xxxxxxxxxxxxxxxxxxxxx -asset XPS ) and execute XpsMiner.bat in the zip file. the program will start mining automatically.

5. Runes Transfer Instruction
5.1 Runes Transfer instruction
Transfer on layer2 can use the transfer command provided by the Runes tool:
./XrpinalsMintTool transfer -from 11xxxxxxxxxxxxxxxxxxxx -to 12xxxxxxxxxxxxxxxxxxxx -asset BTC -amount 1.1

(After the transfer Runes is completed, the account can be confirmed through the Runes instruction in 4.2)