
大家好,我是帝哥(推特:@CoinmanLabs),今天我们来介绍一个新项目,其实帝哥曾把这个buildspace的全部课程都做了一遍,也可以说从中学到了很多东西,只不过帝哥做的时候是没有NFT奖励的,今天帝哥就带着大家一起从头再来做一次吧。
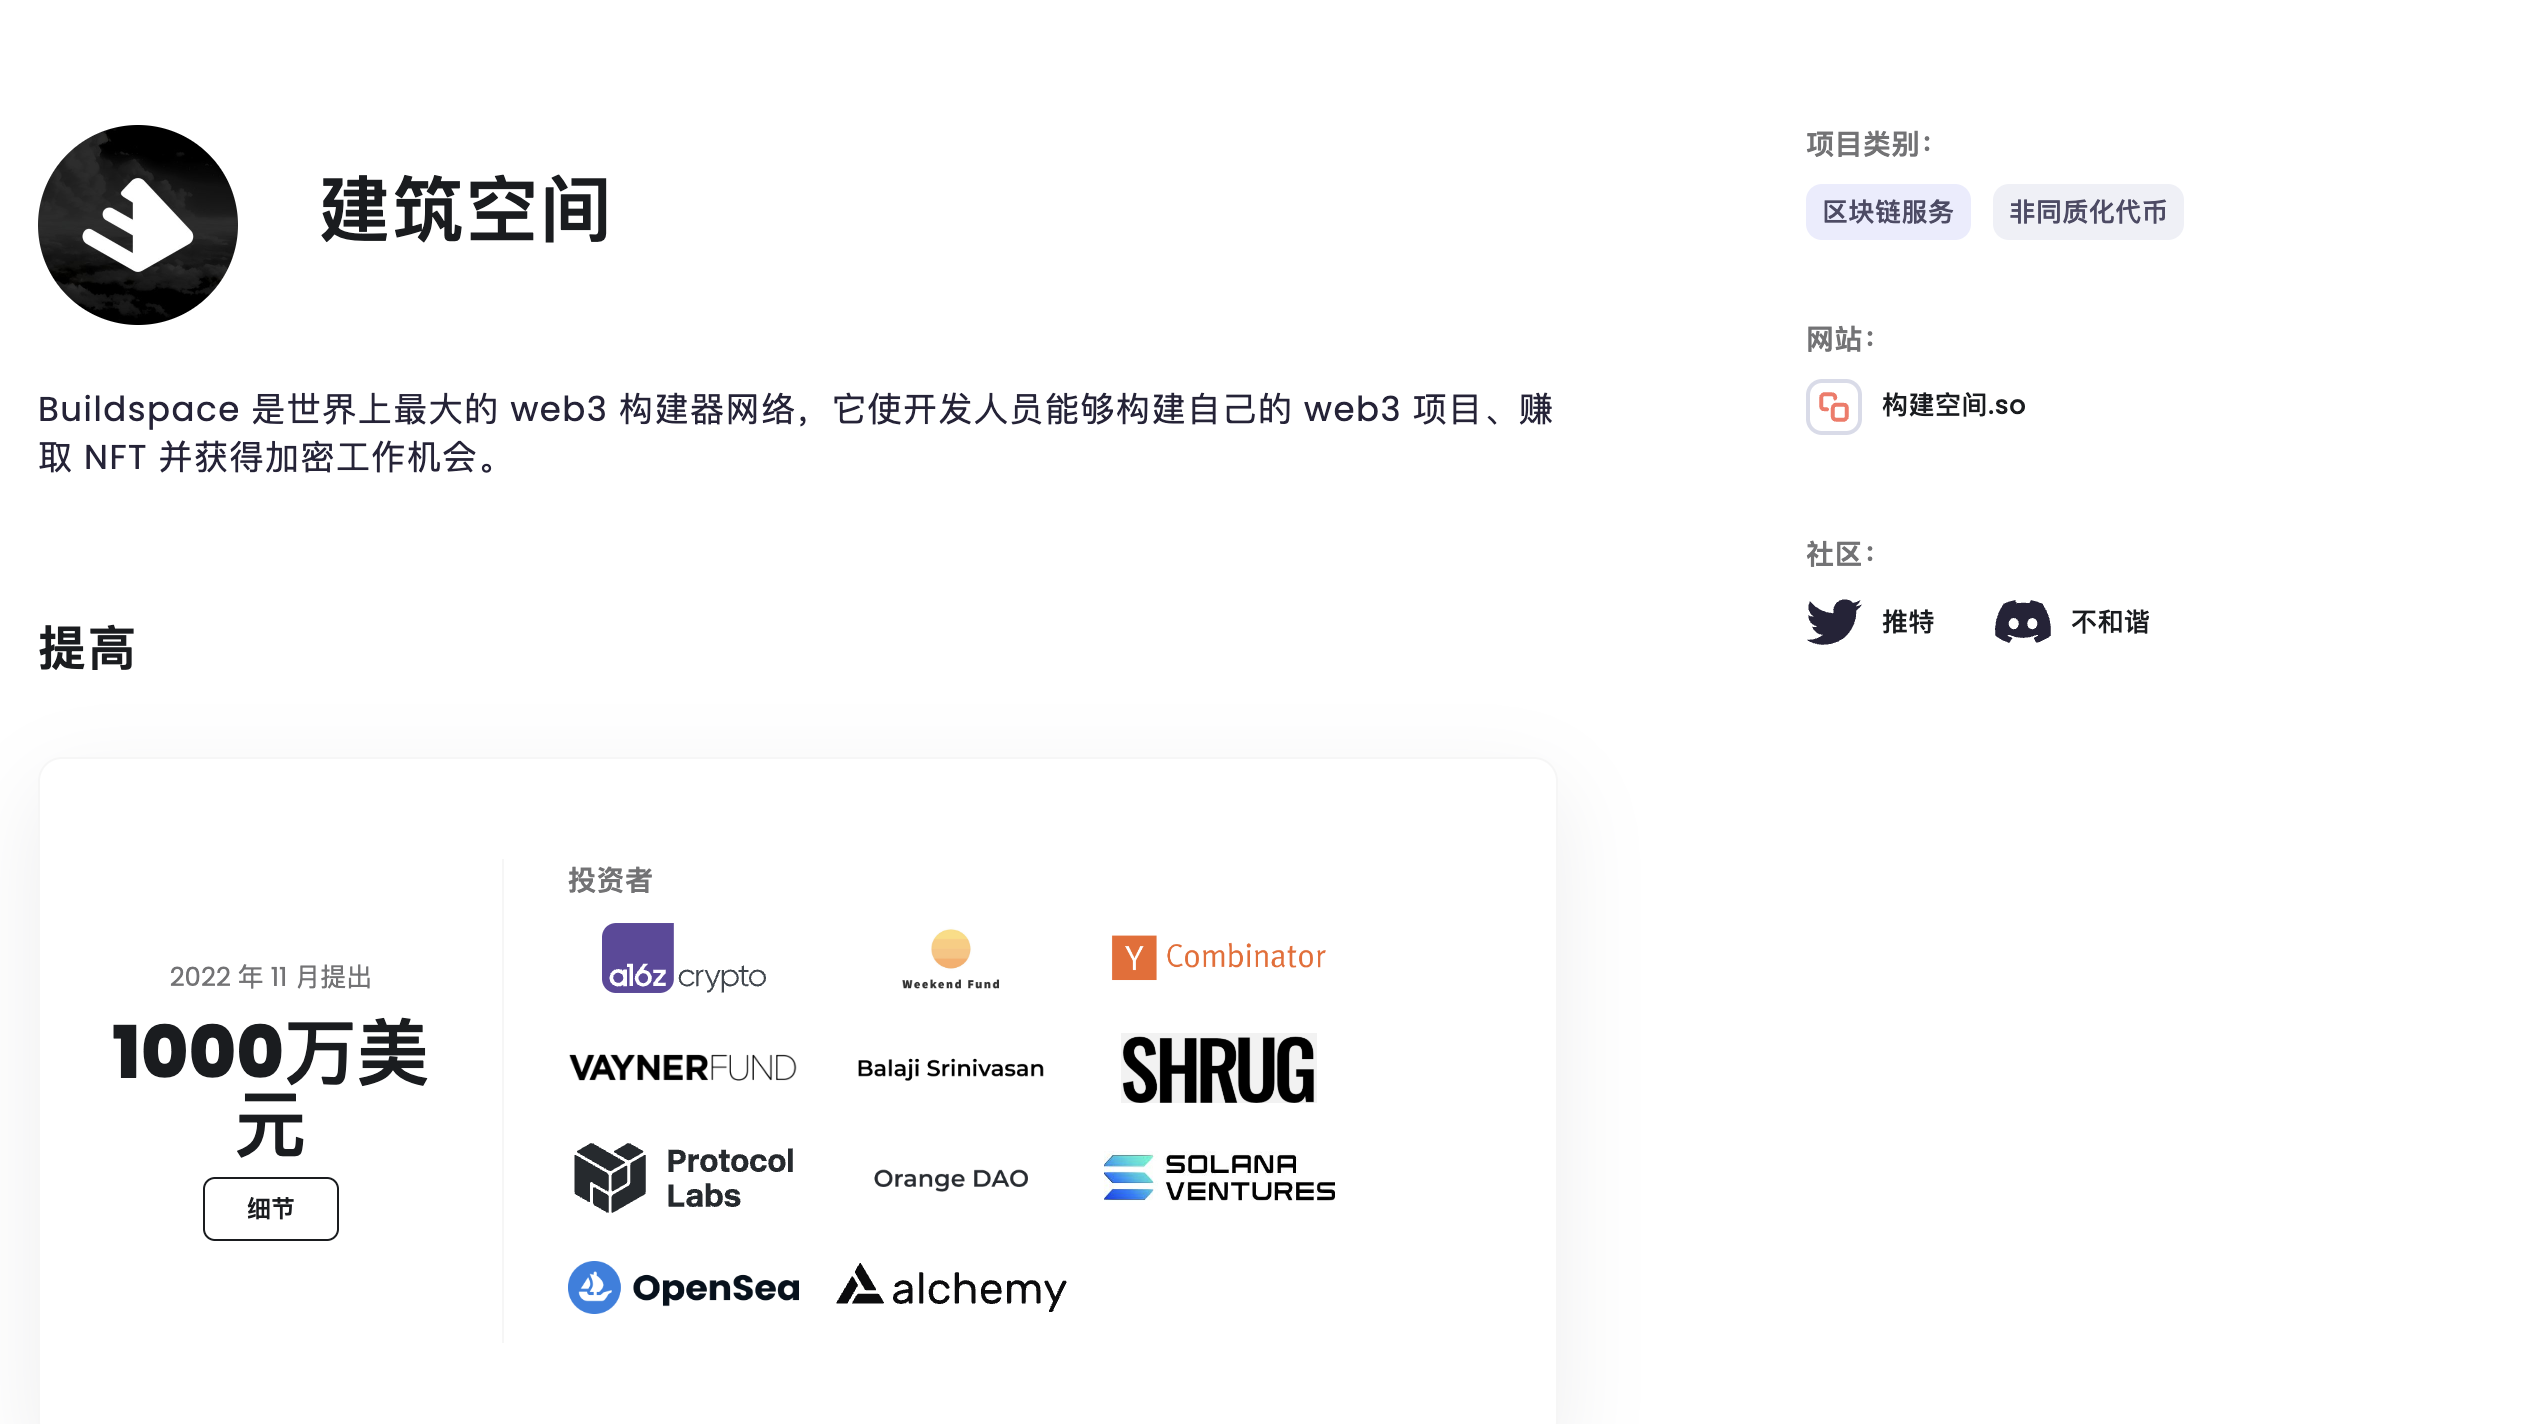
首先我们看下项目的介绍:
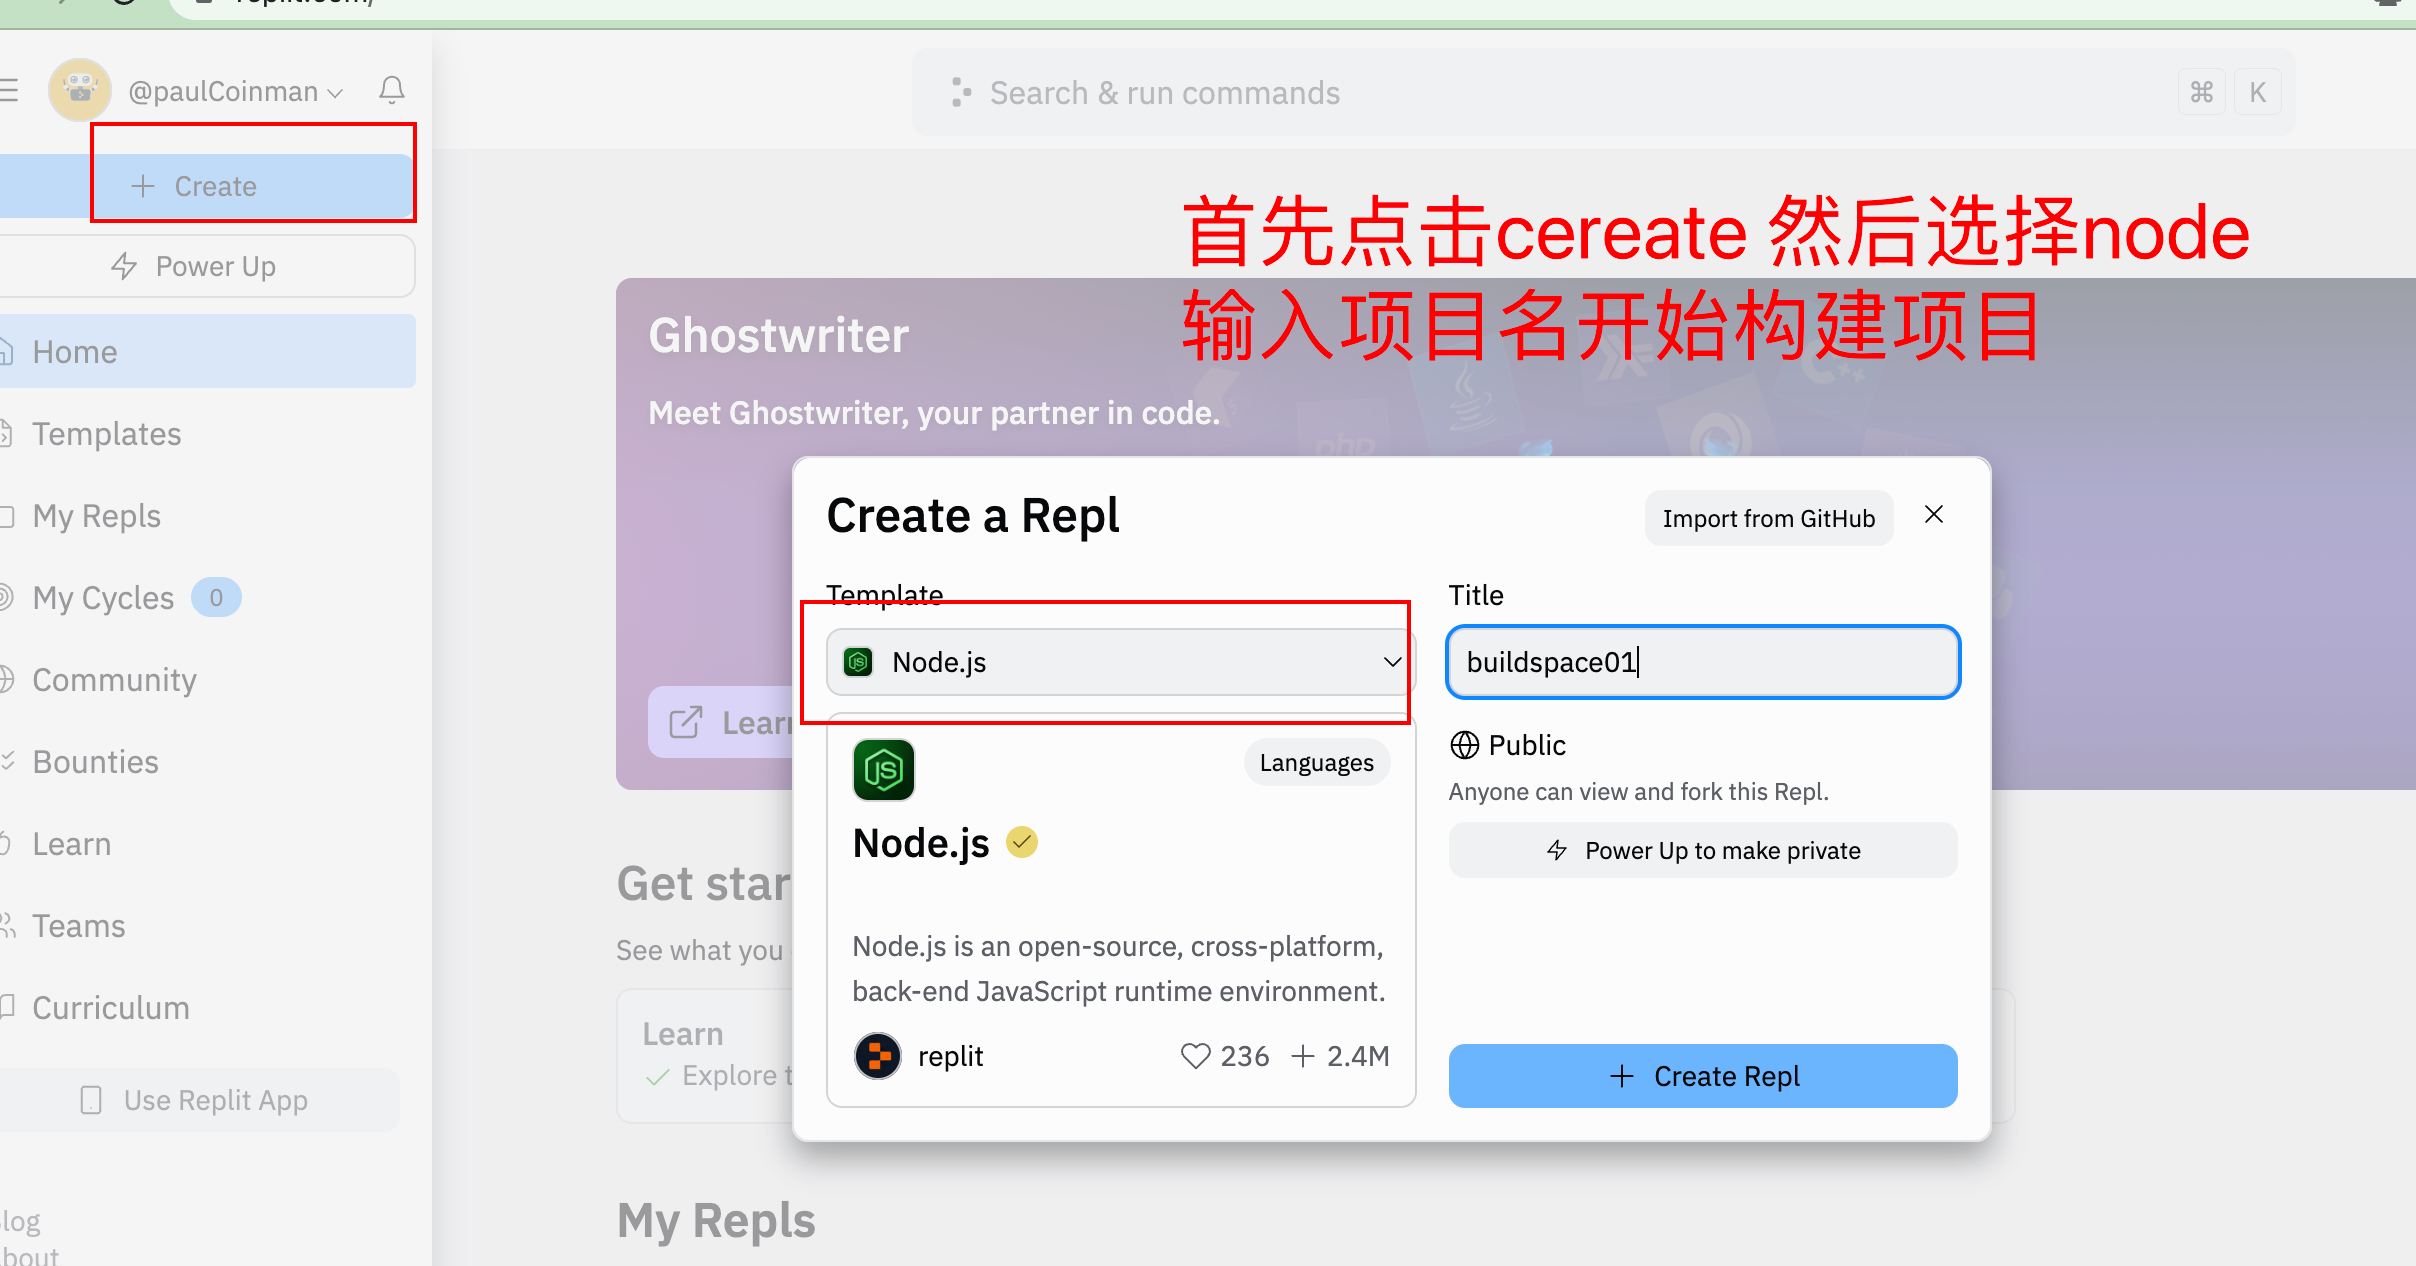
那就话不多说,直接开始上干货了,首先考虑到很多同学都不是程序员出身,没有专门的编译器,我们这里就直接使用replit了。
去到buildspace的网站开始我们的任务,可以直接使用谷歌邮箱登录。
我们登录后可以看到首页面是这样的,已经开始和可以做的。那我们就从第一个solidity的开始吧。

step1:开始编码
因为现在hardhat已经被普遍使用了,所以buildspace也是采用了他们,需要具备一个node的环境-这里就直接使用replit来进行编码。
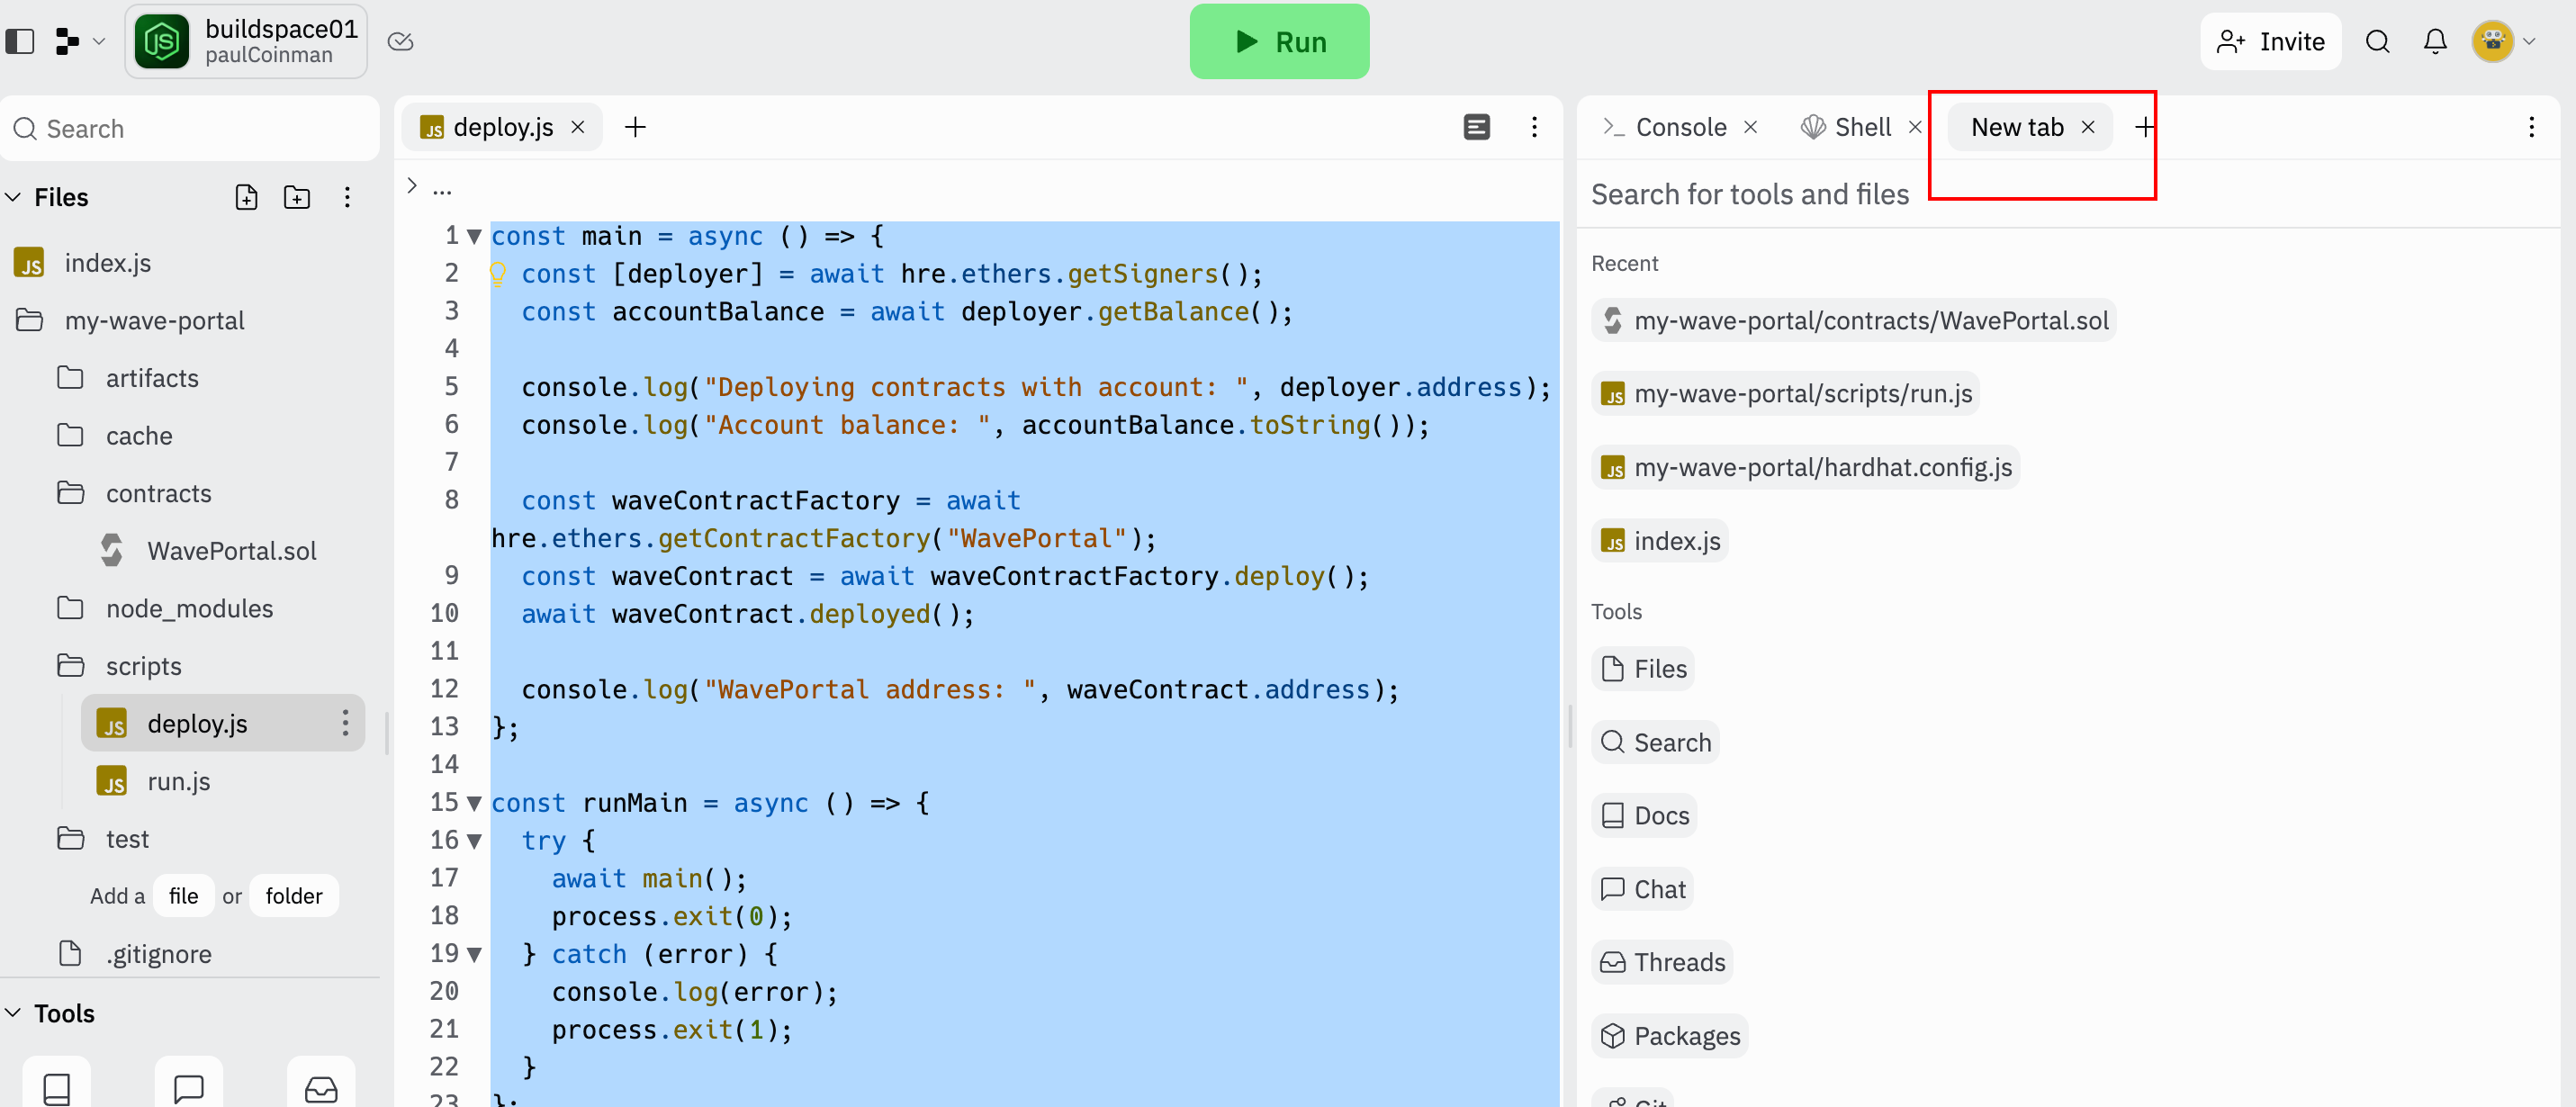
step2:在replit新建一个项目
当项目环境准备完成后,帝哥在这里再次跟大家介绍下,我们replit的操作页面,后面就直接说在哪个区域操作了。
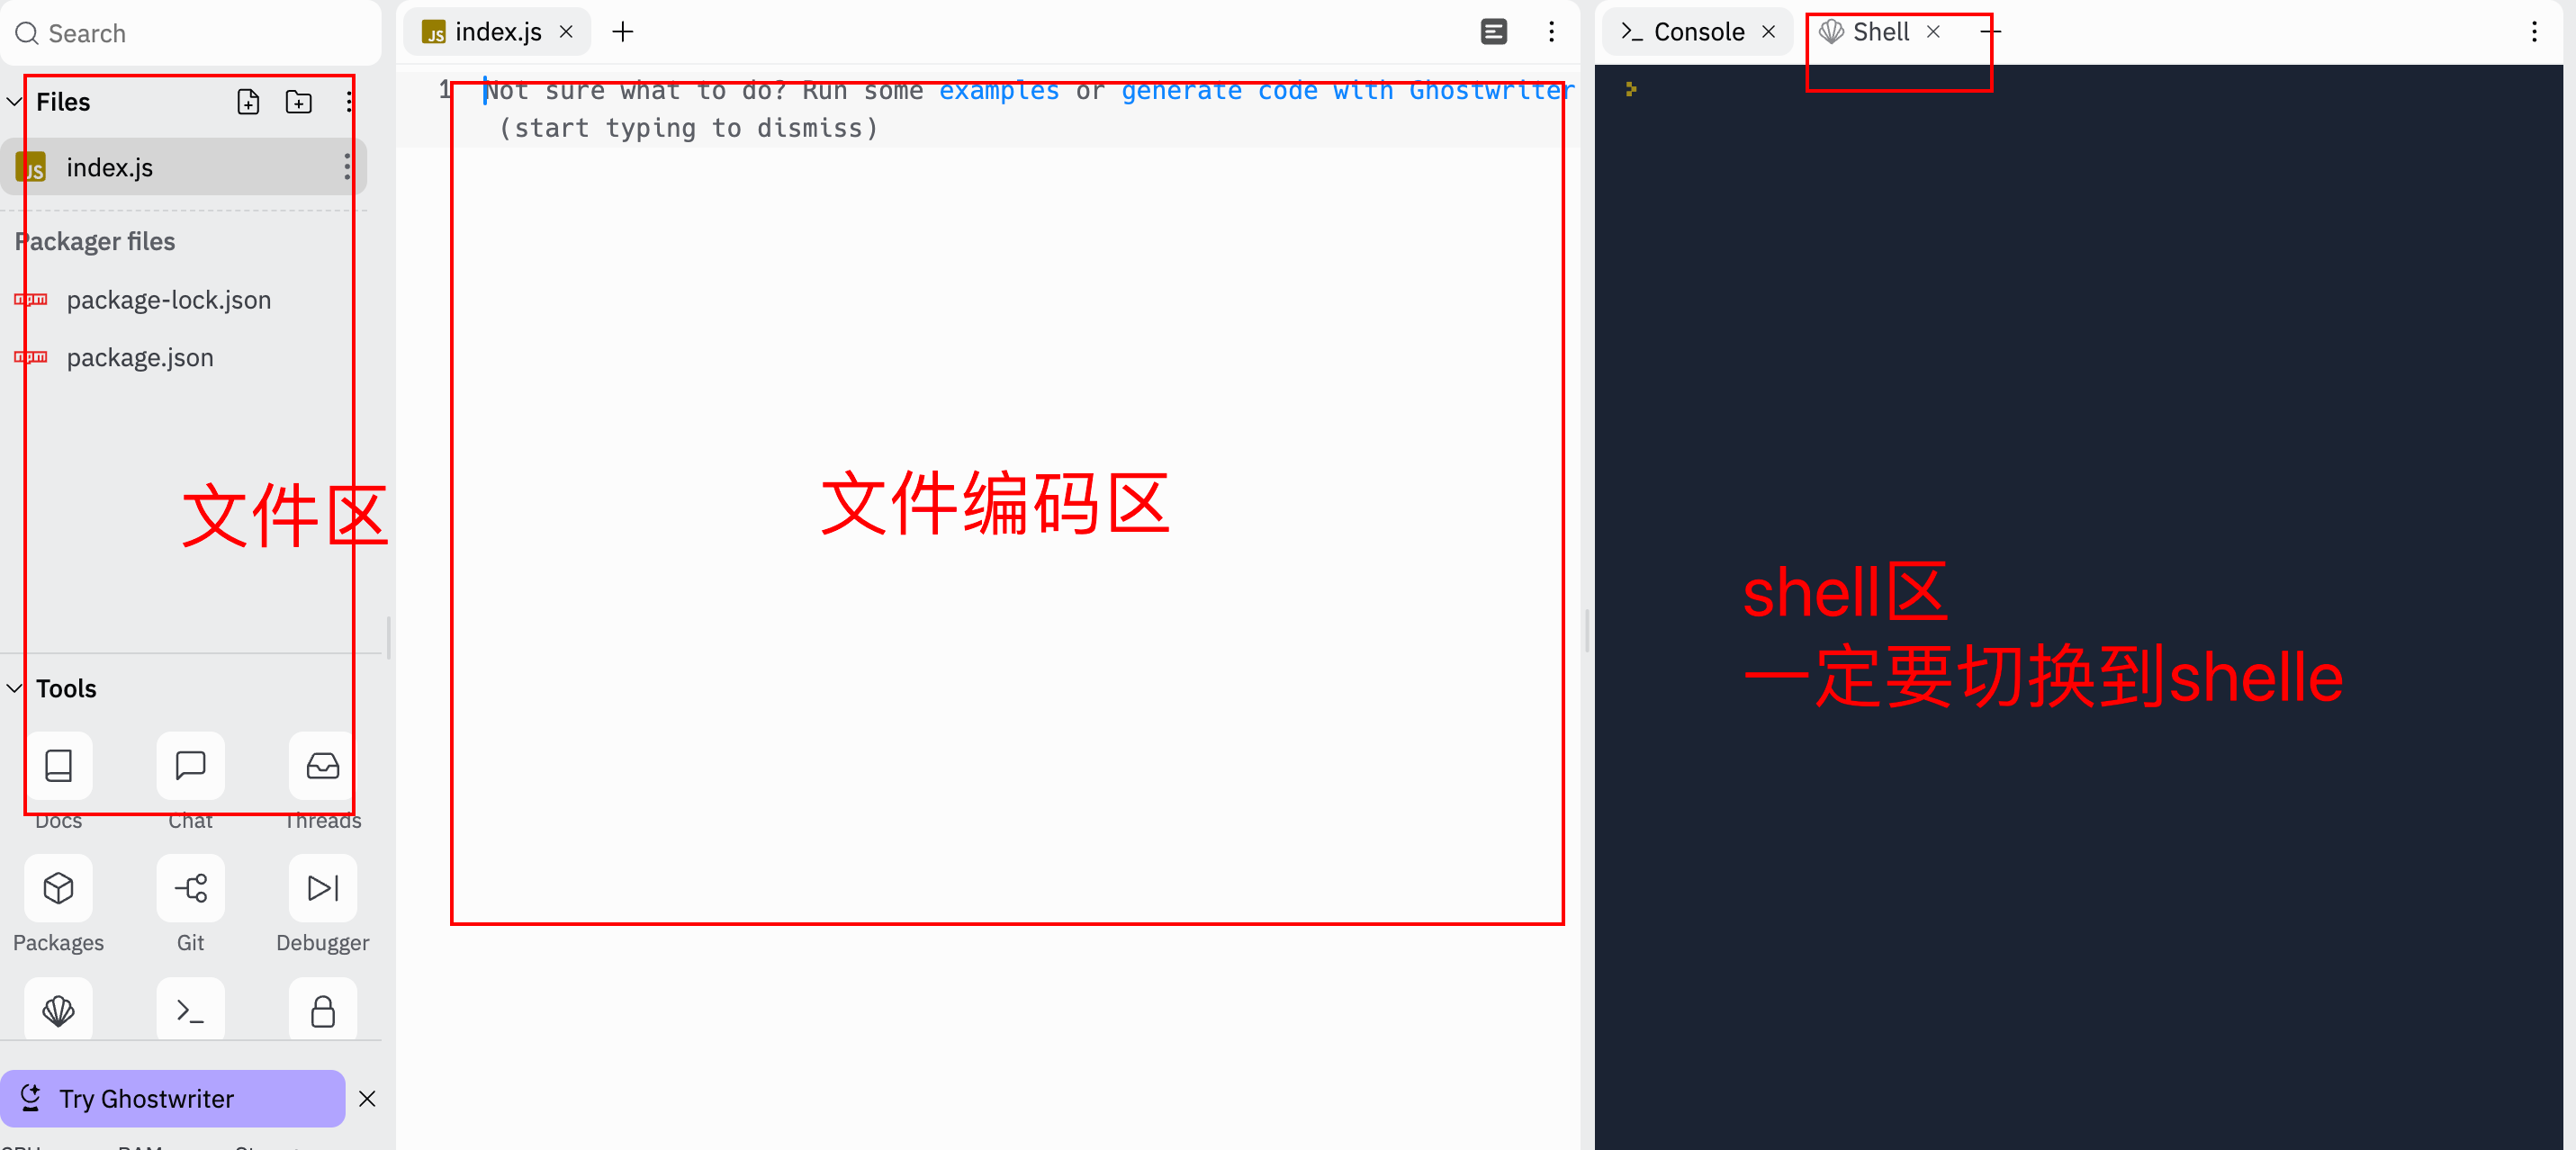
这里大家输入命令的时候一定要切换到shell区便于操作
# 在shell区输入下面代码
mkdir my-wave-portal
cd my-wave-portal
npm init -y
npm install --save-dev hardhat@latest
# 等待上面完成后,输入下面的命令
npx hardhat
# 再次等待完成
npm install --save-dev chai @nomiclabs/hardhat-ethers ethers @nomicfoundation/hardhat-toolbox @nomicfoundation/hardhat-chai-matchers
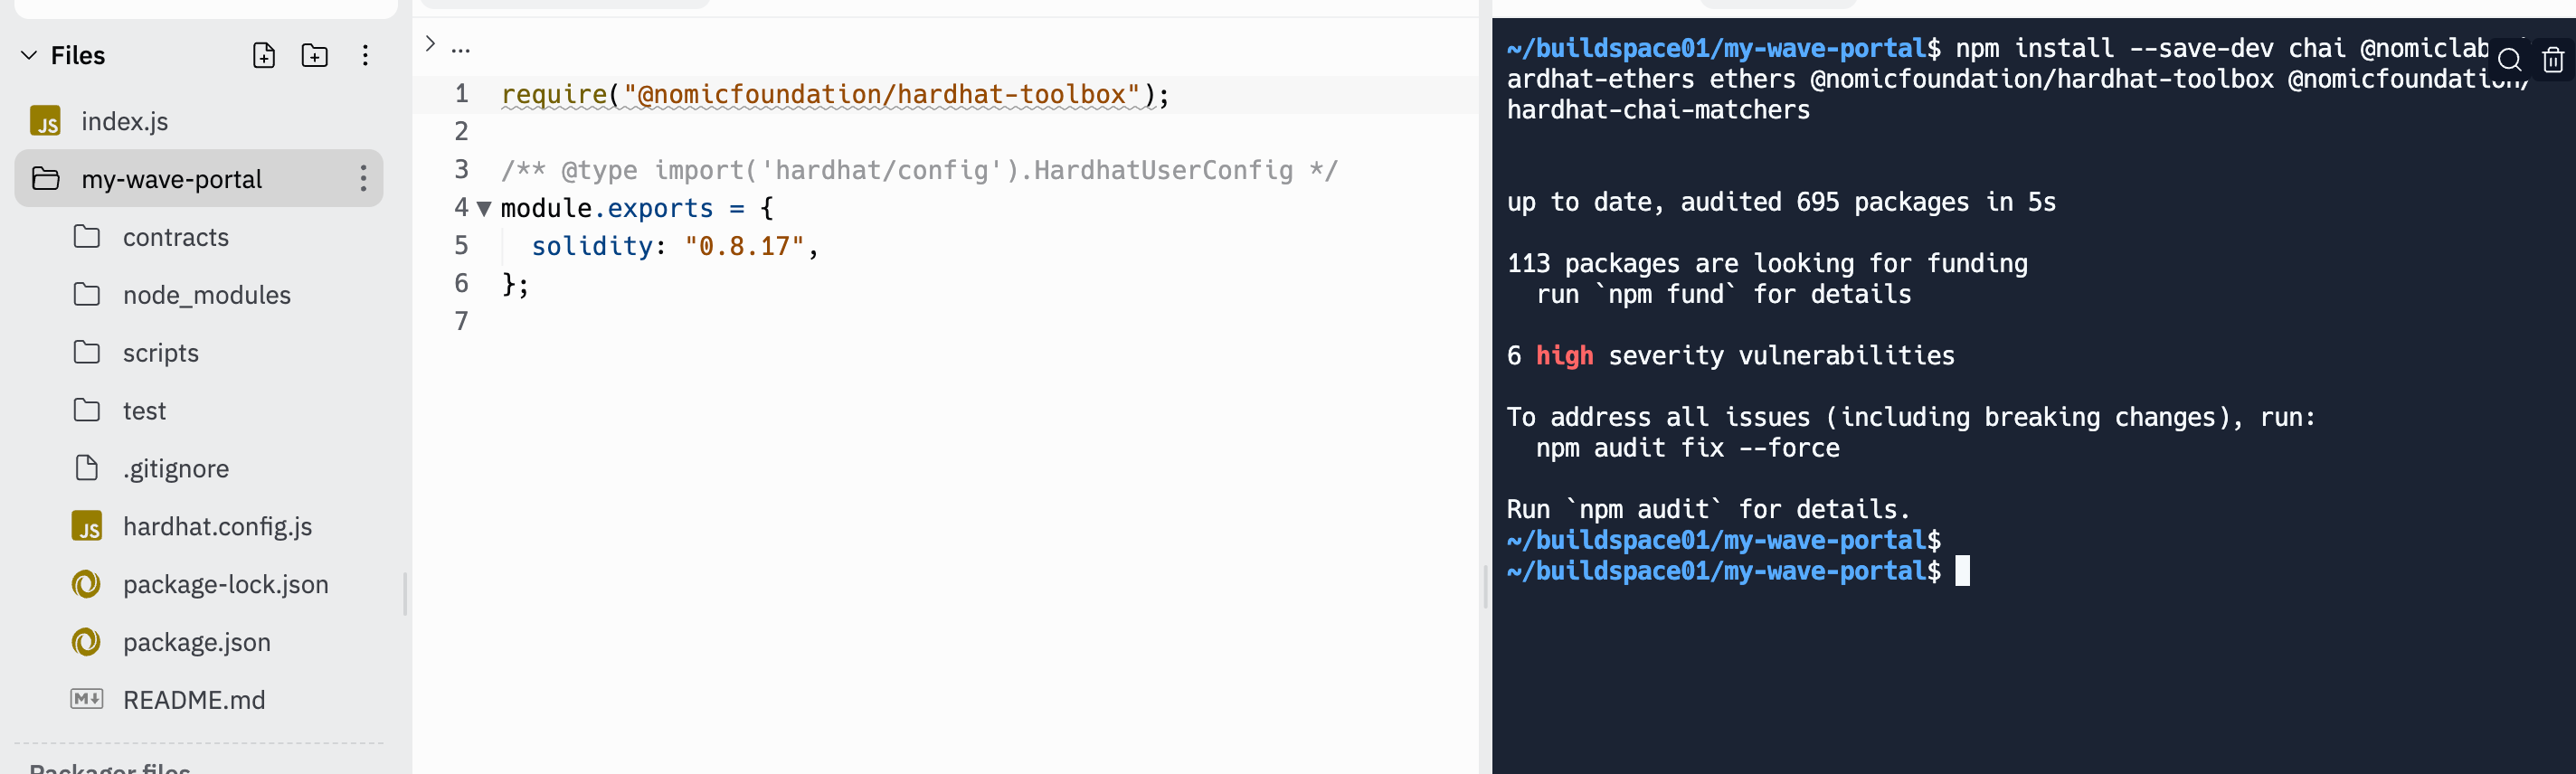
当执行完上面的命令,文件的目录应该是这样的,然后将hardhat.config.js用下面的文件替换
require("@nomicfoundation/hardhat-toolbox");

// This is a sample Hardhat task. To learn how to create your own go to
// https://hardhat.org/guides/create-task.html
task("accounts", "Prints the list of accounts", async (taskArgs, hre) => {
    const accounts = await hre.ethers.getSigners();

    for (const account of accounts) {
        console.log(account.address);
    }
});

// You need to export an object to set up your config
// Go to https://hardhat.org/config/ to learn more

/**
 * @type import('hardhat/config').HardhatUserConfig
 */
module.exports = {
    solidity: "0.8.17",
};
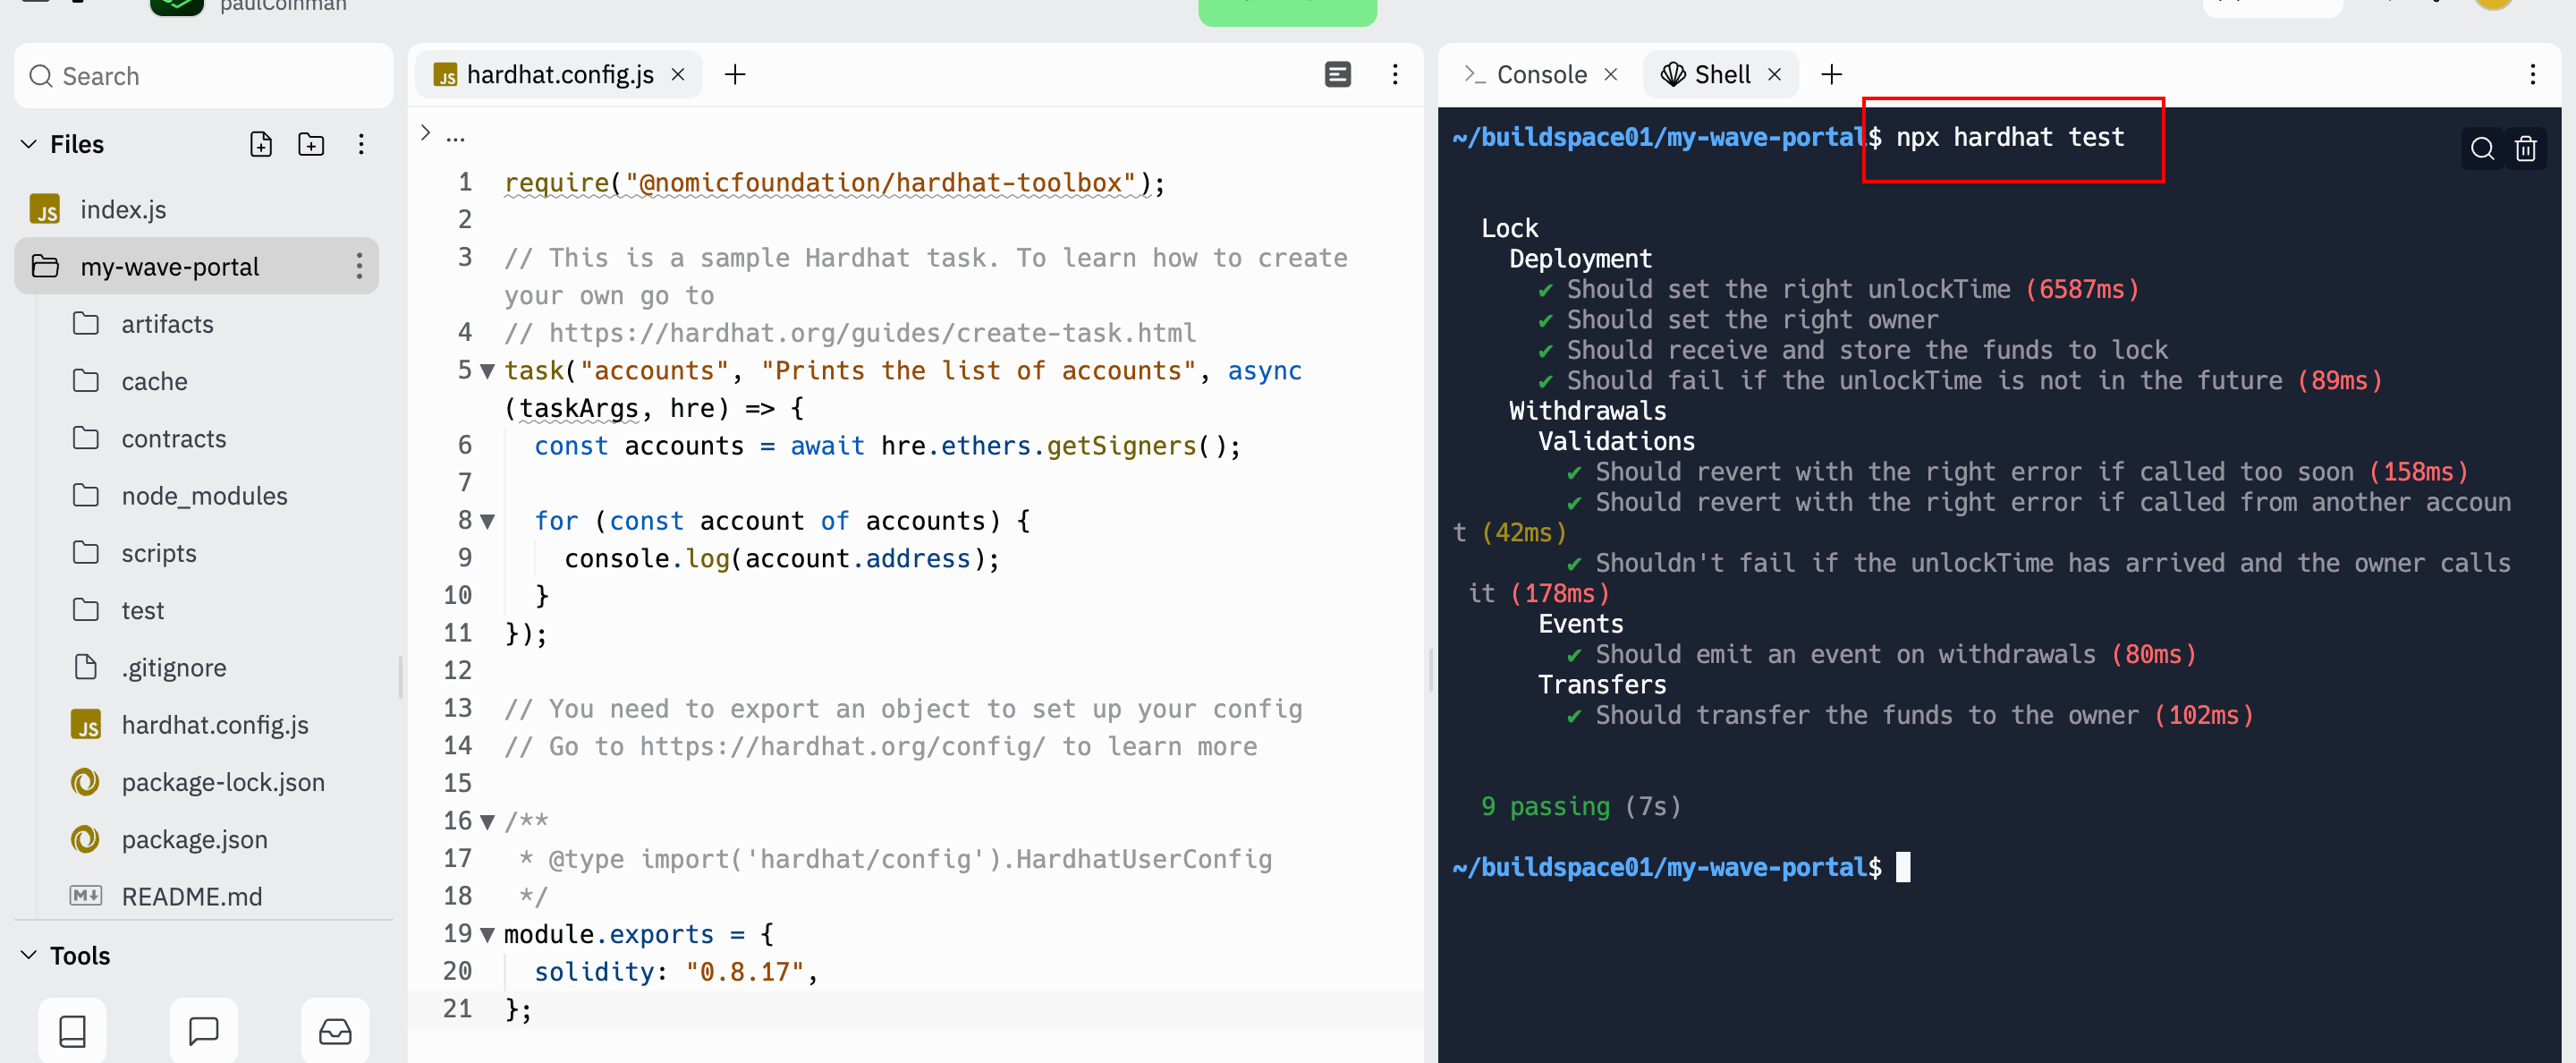
最后我们运行node命令和compile将结果输出
npx hardhat node
npx hardhat compile
npx hardhat test
重点来了,我们第一步需要提交的就是将我们的test的结果截图后提交
当我们将结果提交后,将test文件夹下Lock.js、scripts的deploy.js、contracts下面的Lock.sol的文件都删除了。
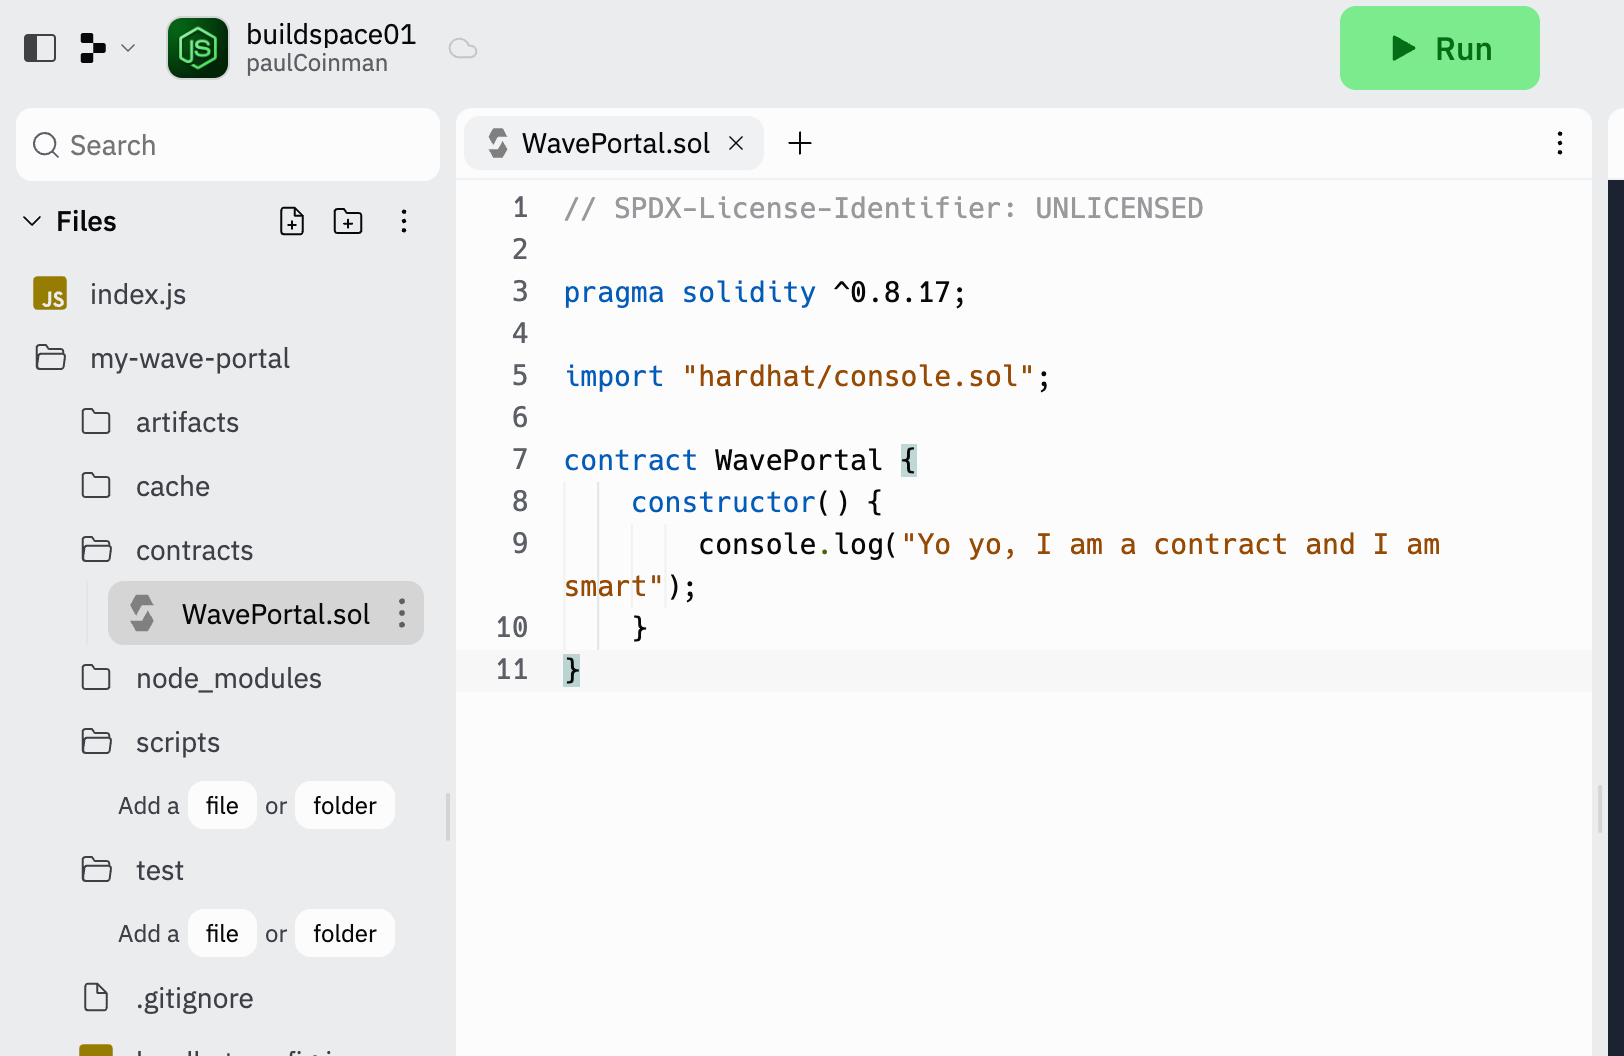
step3:新建合约
在 contracts下面新建 WavePortal.sol 文件,将下面的代码写入文件里面
// SPDX-License-Identifier: UNLICENSED

pragma solidity ^0.8.17;

import "hardhat/console.sol";

contract WavePortal {
    constructor() {
        console.log("Yo yo, I am a contract and I am smart");
    }
}
将代码的截图提交做了第二步的提交答案。
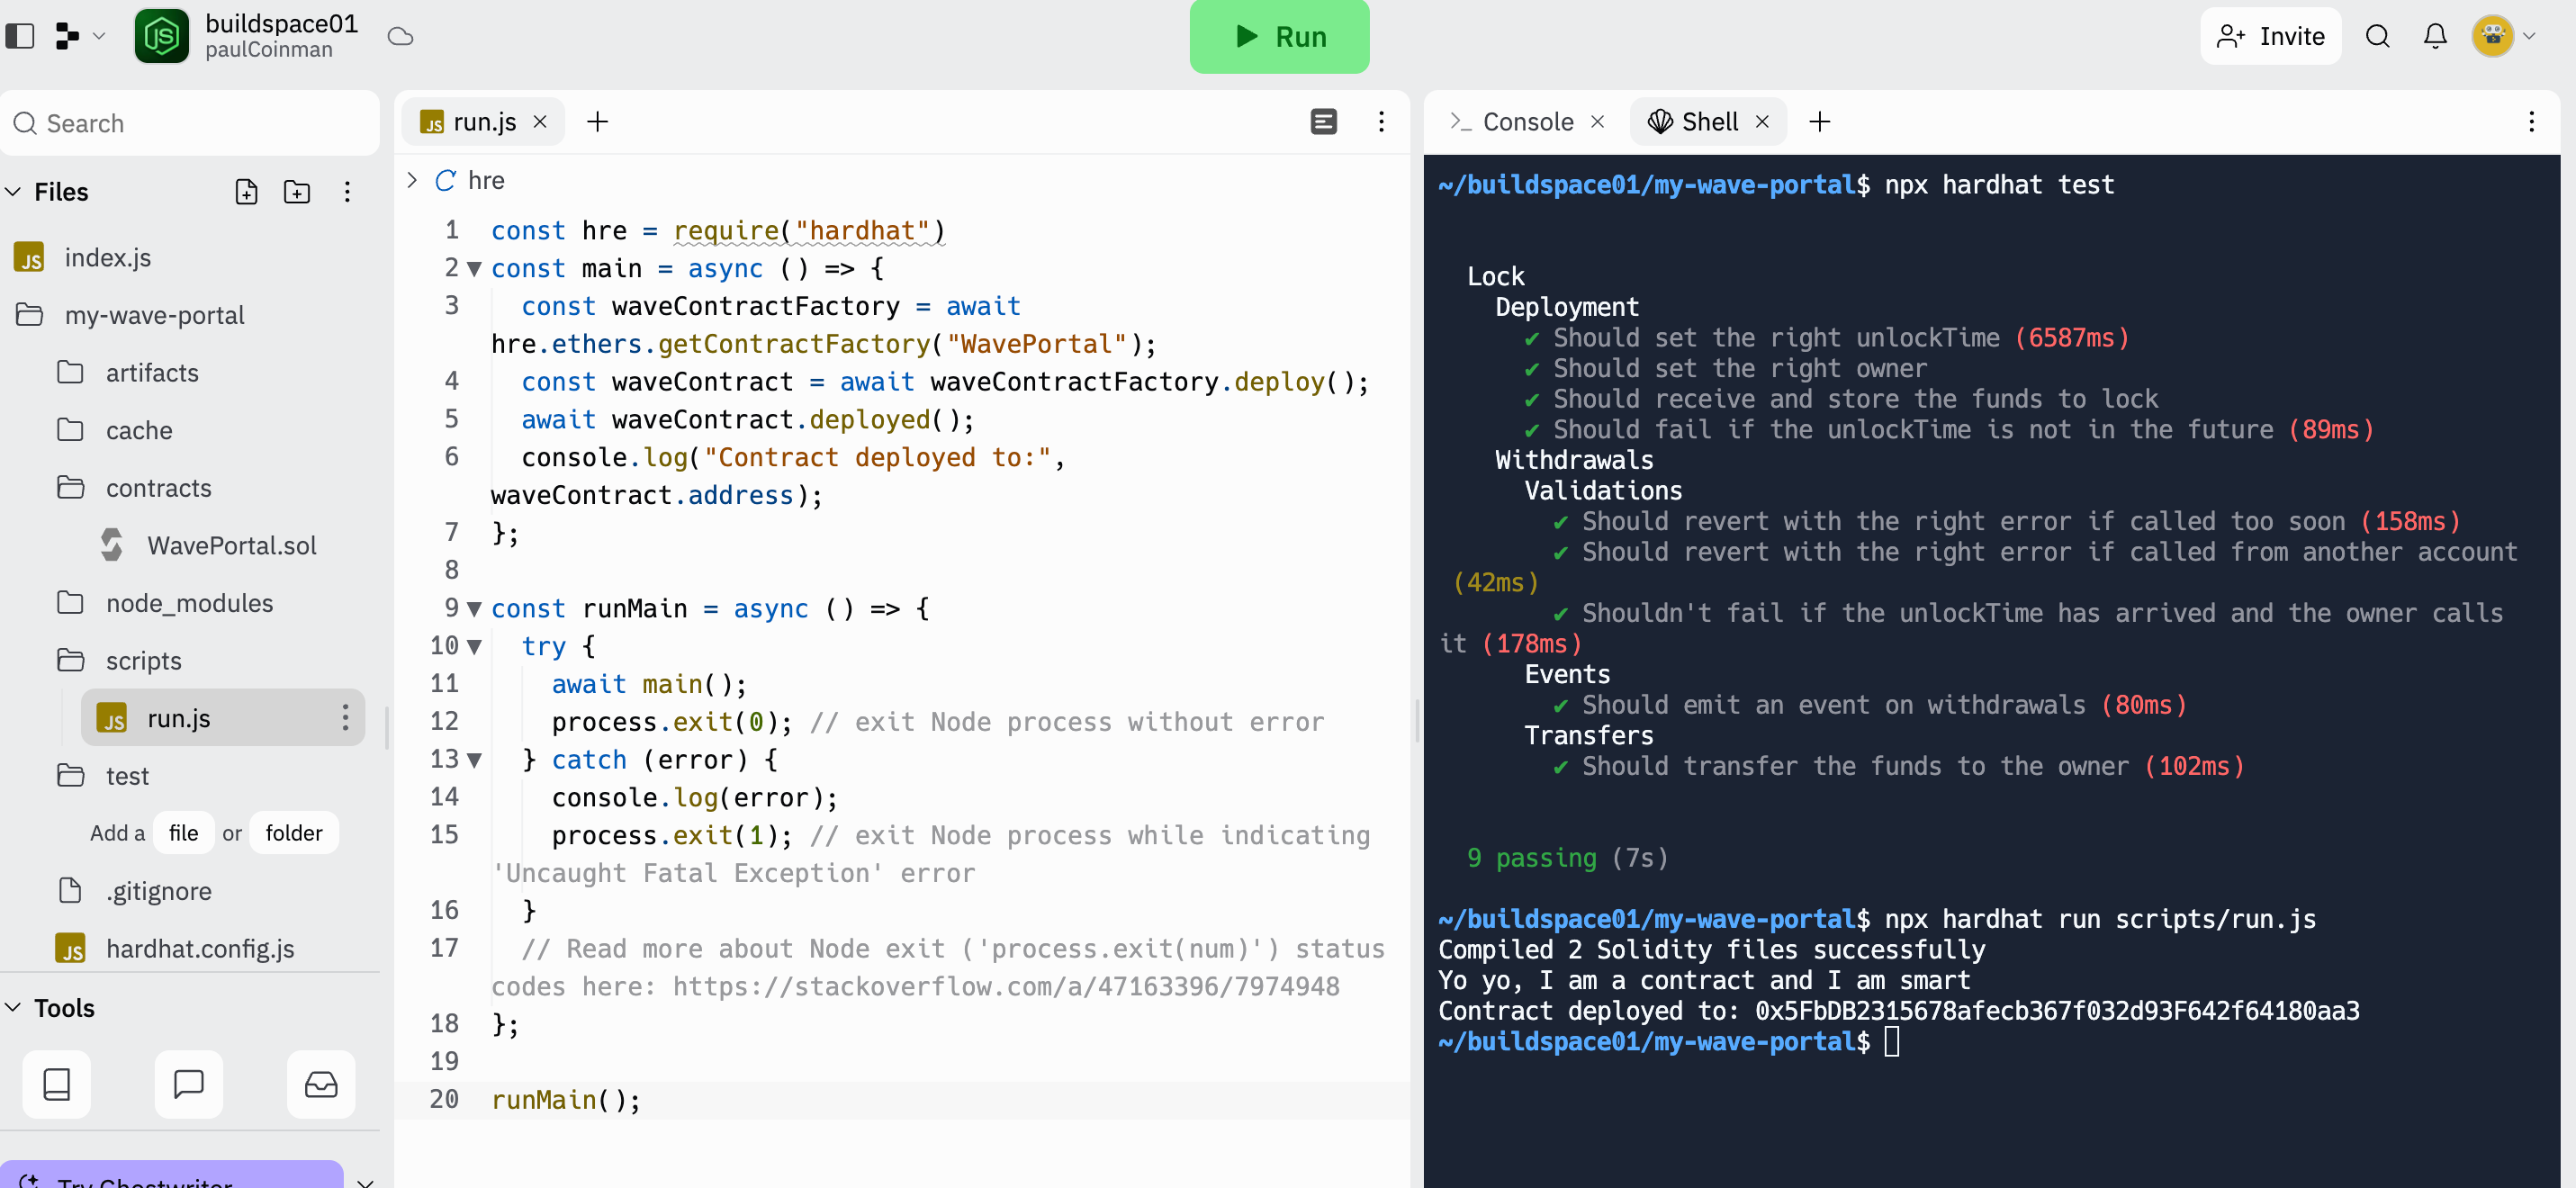
step4.新建运行脚本
在test文件夹下新建一个run.js,输入下面的内容
const hre = require("hardhat")
const main = async () => {
  const waveContractFactory = await hre.ethers.getContractFactory("WavePortal");
  const waveContract = await waveContractFactory.deploy();
  await waveContract.deployed();
  console.log("Contract deployed to:", waveContract.address);
};

const runMain = async () => {
  try {
    await main();
    process.exit(0); // exit Node process without error
  } catch (error) {
    console.log(error);
    process.exit(1); // exit Node process while indicating 'Uncaught Fatal Exception' error
  }
  // Read more about Node exit ('process.exit(num)') status codes here: https://stackoverflow.com/a/47163396/7974948
};

runMain();
当我们完成后在shell区中输入下面的命令查看结果:
npx hardhat run scripts/run.js
step5:修改合约
我们将合约替换为下面的内容
// SPDX-License-Identifier: UNLICENSED

pragma solidity ^0.8.17;

import "hardhat/console.sol";

contract WavePortal {
    uint256 totalWaves;

    constructor() {
        console.log("Yo yo, I am a contract and I am smart");
    }

    function wave() public {
        totalWaves += 1;
        console.log("%s has waved!", msg.sender);
    }

    function getTotalWaves() public view returns (uint256) {
        console.log("We have %d total waves!", totalWaves);
        return totalWaves;
    }
}
同时将run.js修改为下面的内容
const main = async () => {
  const [owner, randomPerson] = await hre.ethers.getSigners();
  const waveContractFactory = await hre.ethers.getContractFactory("WavePortal");
  const waveContract = await waveContractFactory.deploy();
  await waveContract.deployed();

  console.log("Contract deployed to:", waveContract.address);
  console.log("Contract deployed by:", owner.address);

  await waveContract.getTotalWaves();

  const waveTxn = await waveContract.wave();
  await waveTxn.wait();

  await waveContract.getTotalWaves();
};

const runMain = async () => {
  try {
    await main();
    process.exit(0);
  } catch (error) {
    console.log(error);
    process.exit(1);
  }
};

runMain();
再次运行上面的脚本执行命令
npx hardhat run scripts/run.js
但是他在这一步给了我们类似一个小的挑战,我们来看看是啥?需要我们将收件人的地址存储在一个数据里面。

所以我们修改后的合约就是这样的,
// SPDX-License-Identifier: UNLICENSED

pragma solidity ^0.8.17;

import "hardhat/console.sol";

contract WavePortal {
    uint256 totalWaves;
    address[] public waves;

    constructor() {
        console.log("Yo yo, I am a contract and I am smart");
    }

    function wave() public {
        totalWaves += 1;
        waves.push(msg.sender);
        console.log("%s has waved!", msg.sender);
    }

    function getTotalWaves() public view returns (uint256) {
        console.log("We have %d total waves!", totalWaves);
        return totalWaves;
    }
}
# 运行命令输出结果截图
npx hardhat run scripts/run.js
step6.部署合约
我们在scripts新建一个deploy.js将下面的代码复制进去
const main = async () => {
  const [deployer] = await hre.ethers.getSigners();
  const accountBalance = await deployer.getBalance();

  console.log("Deploying contracts with account: ", deployer.address);
  console.log("Account balance: ", accountBalance.toString());

  const waveContractFactory = await hre.ethers.getContractFactory("WavePortal");
  const waveContract = await waveContractFactory.deploy();
  await waveContract.deployed();

  console.log("WavePortal address: ", waveContract.address);
};

const runMain = async () => {
  try {
    await main();
    process.exit(0);
  } catch (error) {
    console.log(error);
    process.exit(1);
  }
};

runMain();
当粘贴完成后,运行下面的脚本截图,首先需要我们去新开一个shell
cd my-wave-portal/
npx hardhat node
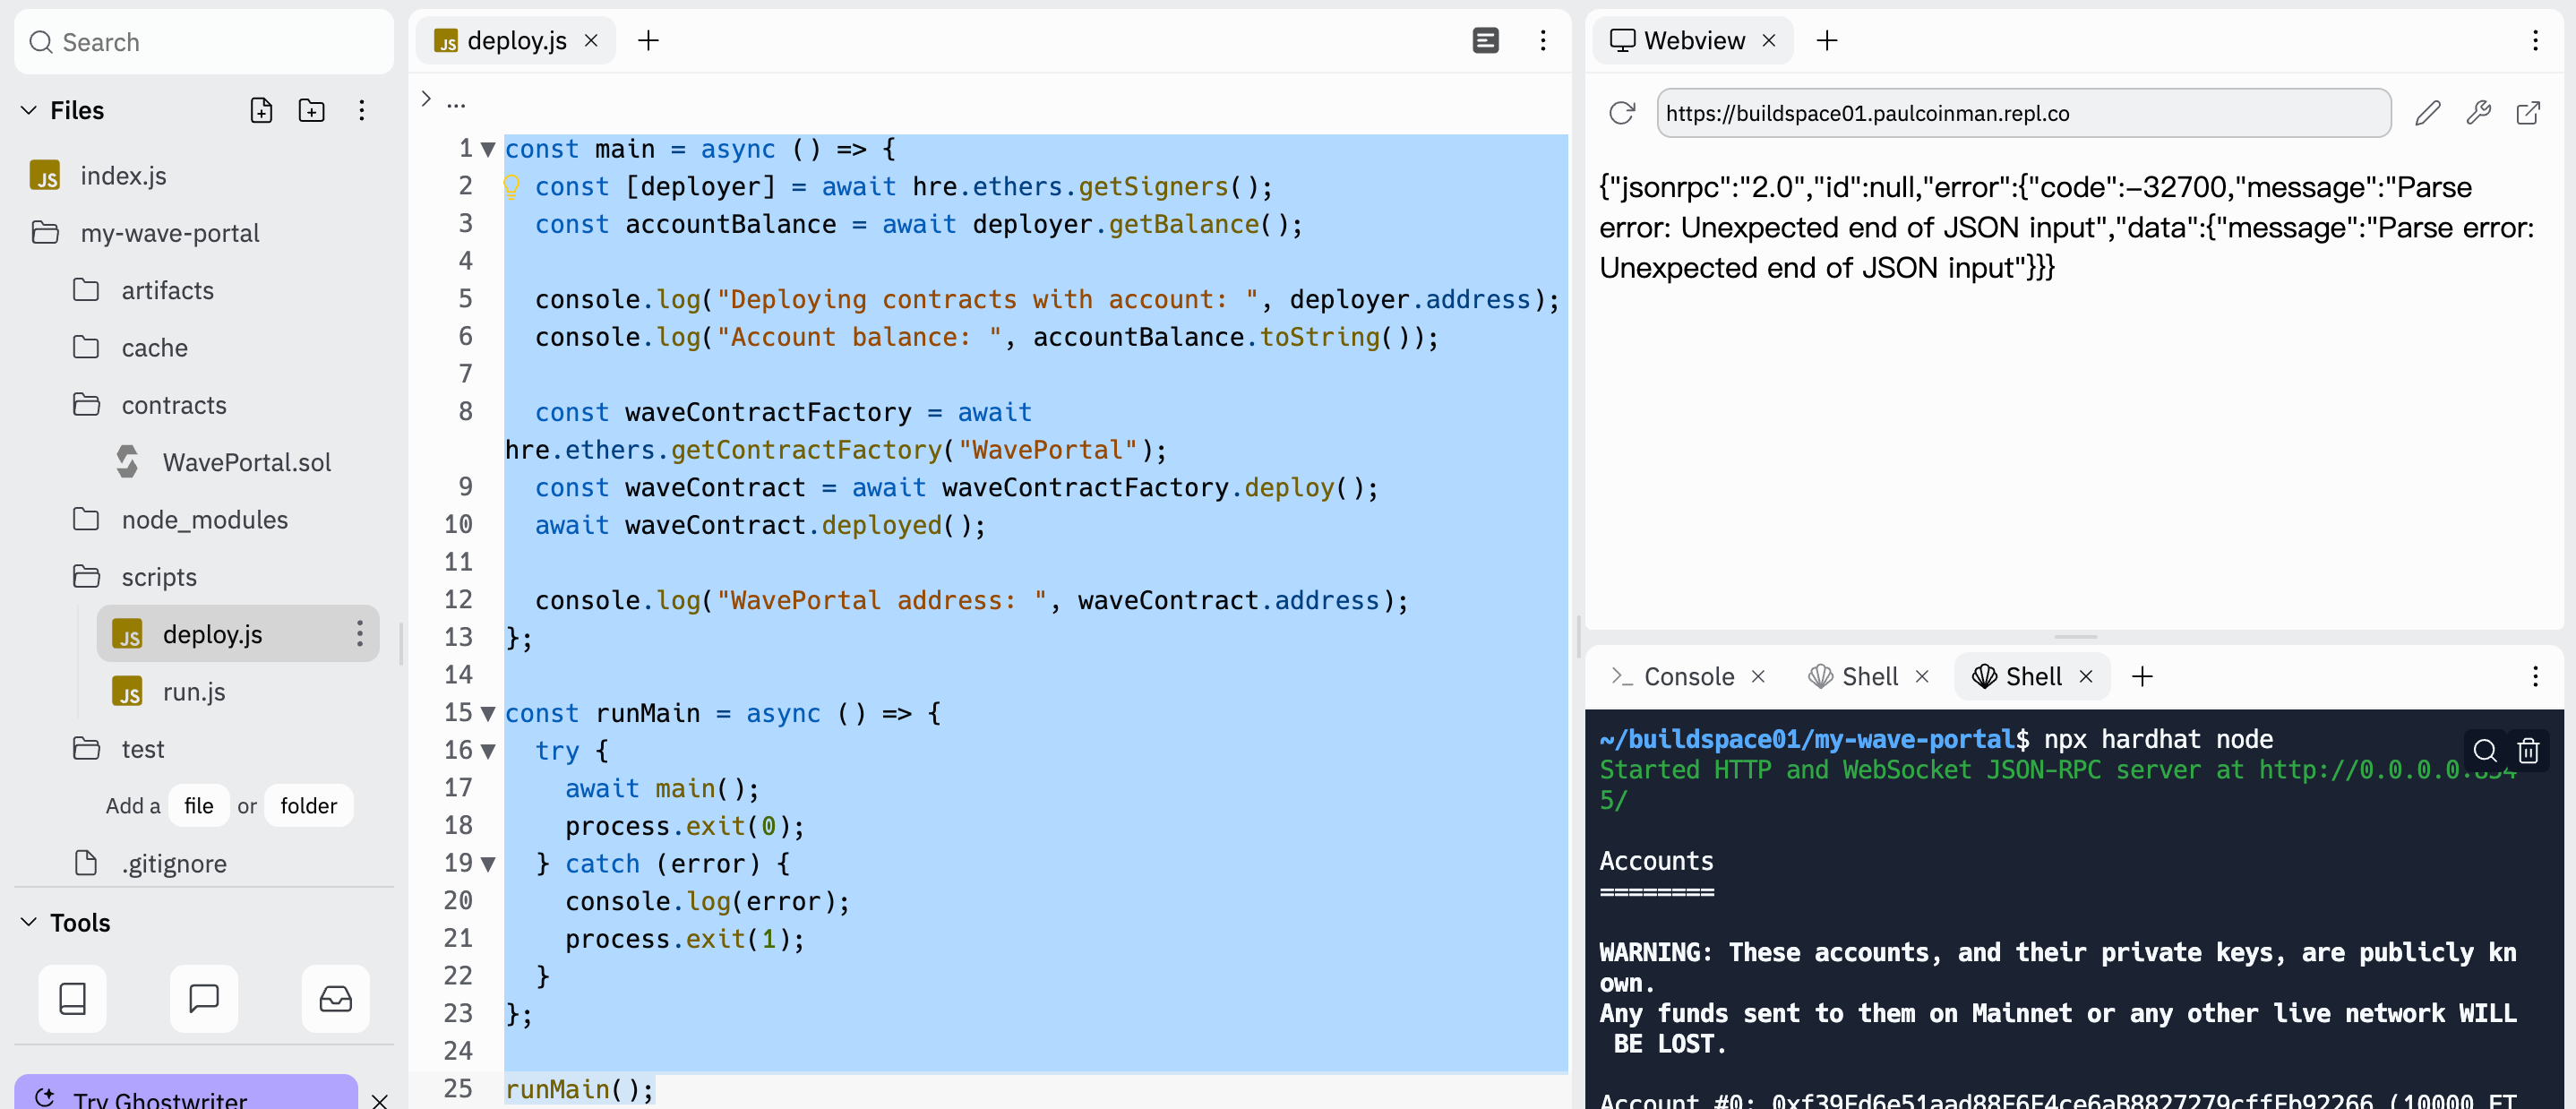
然后在原来的shell输入下面的命令
npx hardhat run scripts/deploy.js --network localhost
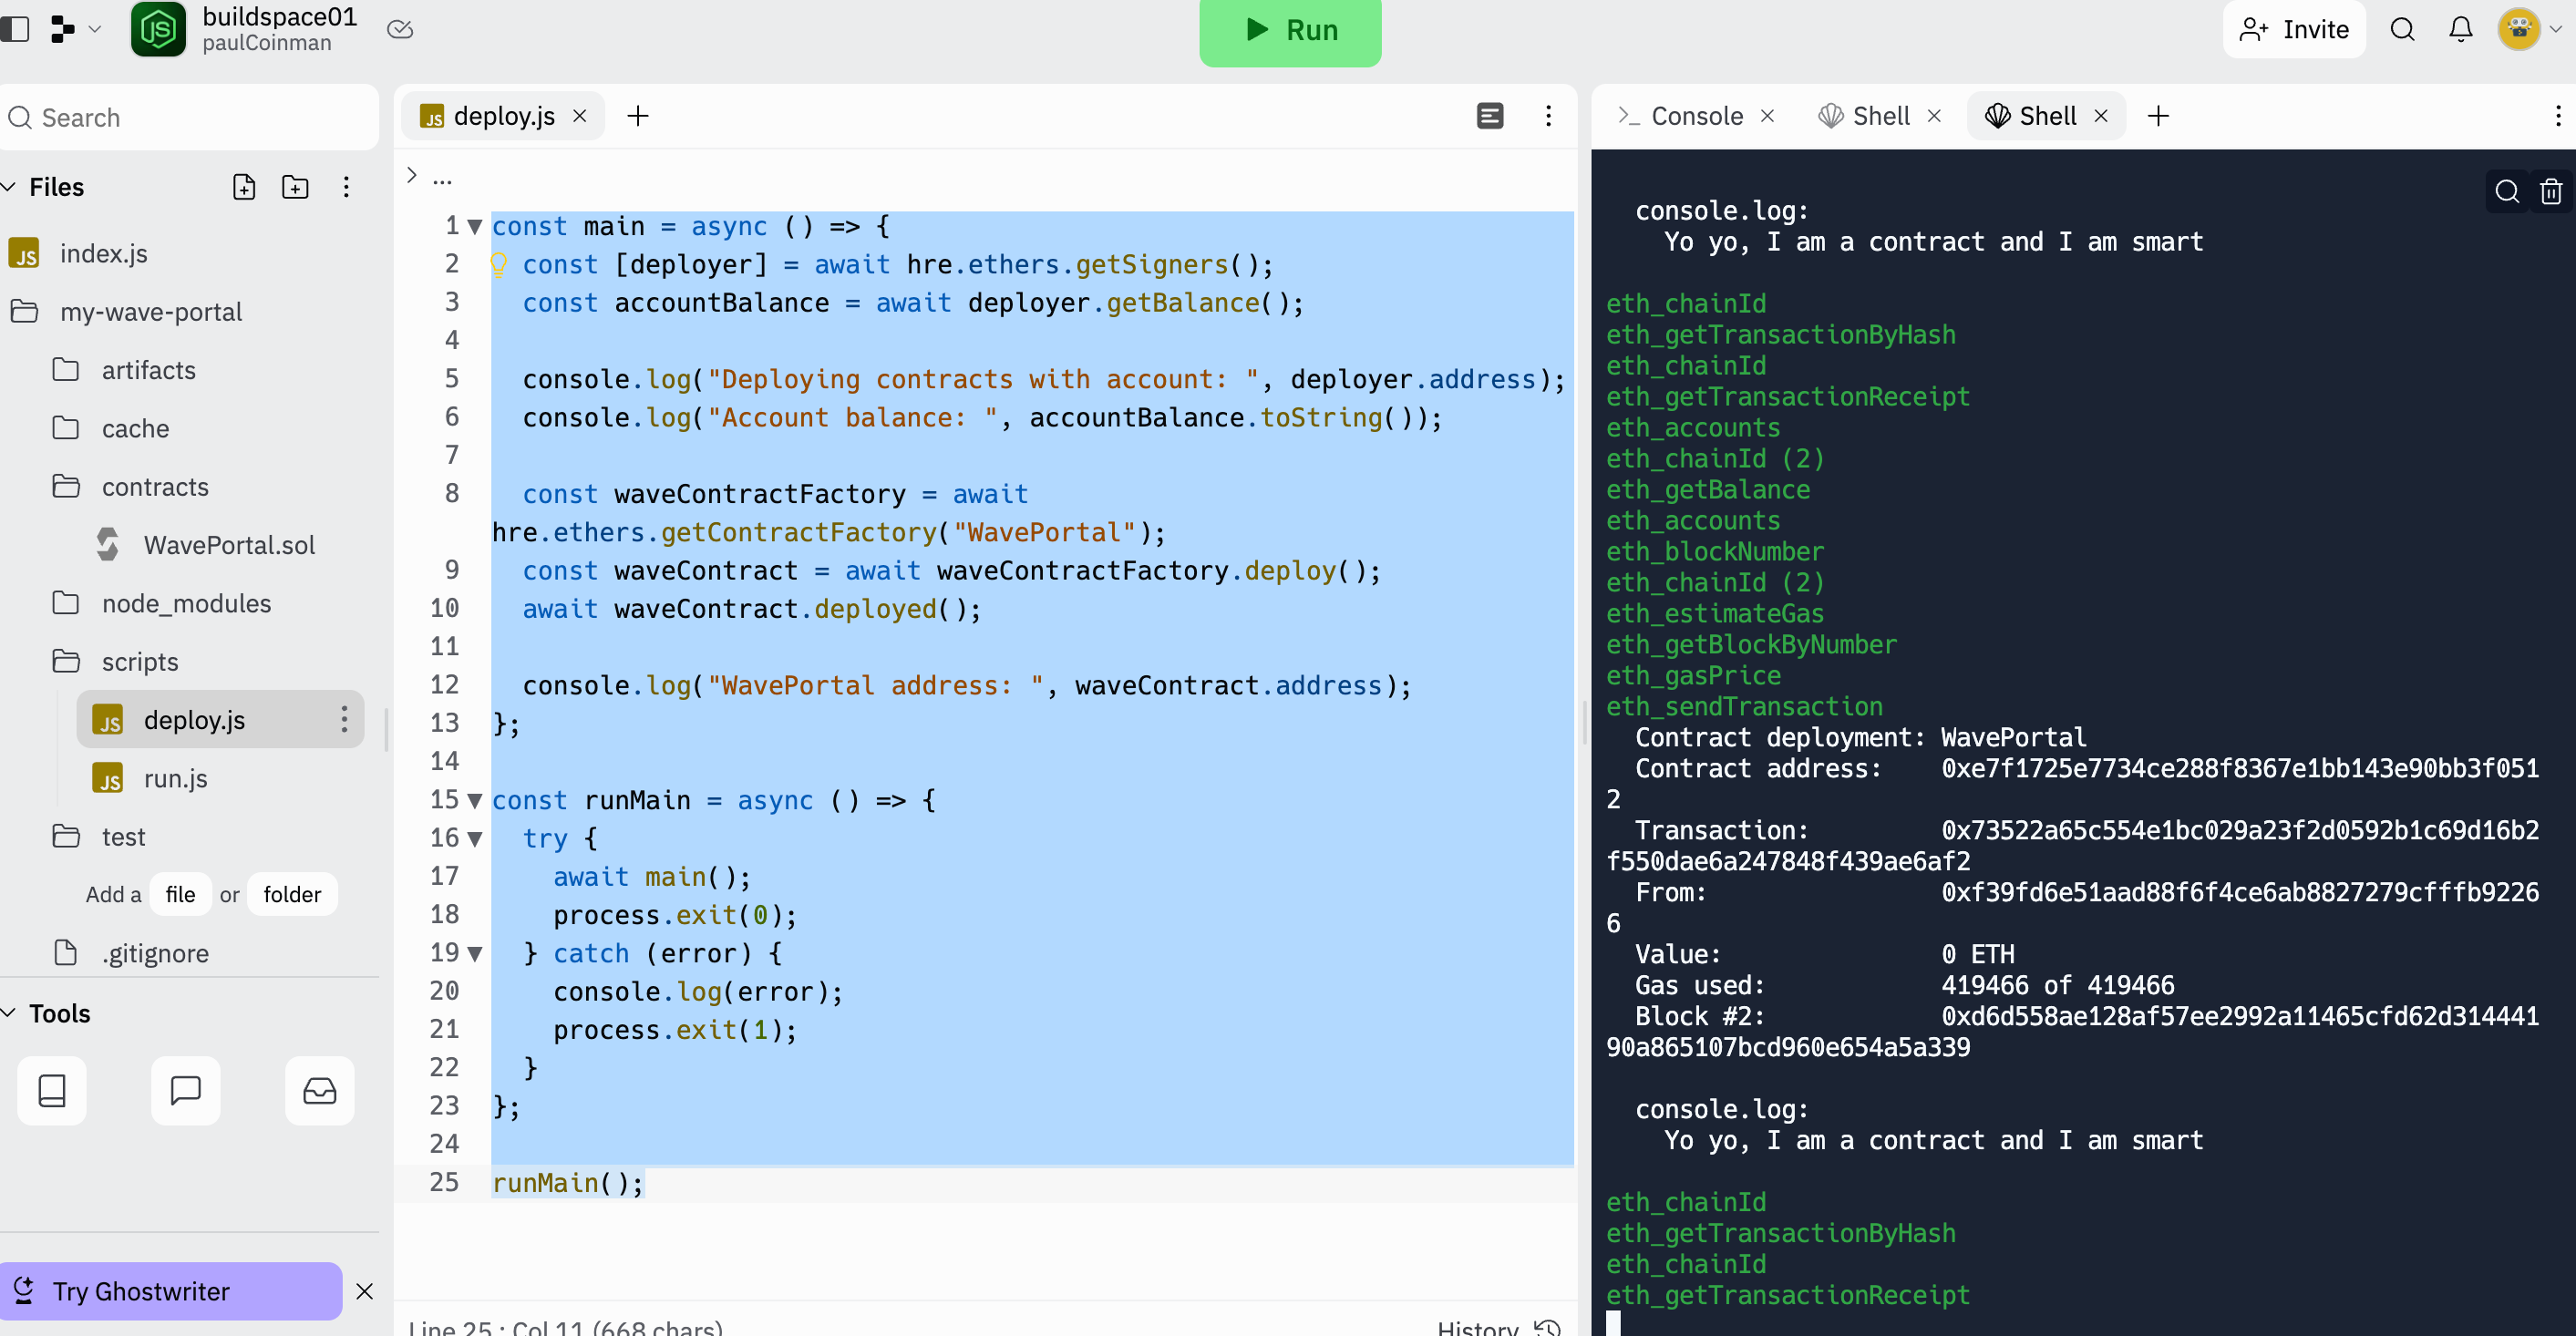
将上面的截图作为作业提交,这就是第一阶段创建一个后续了,关注帝哥为你第一时间带来最新的区块链动向。
