
There has been recent talk about Pryzm Zone and its potential airdrop for stakers of $LUNA, $ATOM, $TIA, $DYM, $INJ and other Cosmos ecosystem coins to Pryzm nodes. There has also been talk about the validator node in testnet, yet there has been misinformation on the topic, especially from the most followed profiles on Twitter.
That is why I am here, to show you how to actually launch a node on Pryzm Zone in testnet. Are you ready? Let's get started!
Don't forget to mint the entry as support and subscribe so you don't miss future updates and guides.
Pryzm Zone - Yield Trading

Pryzm is a Layer 1 based on Cosmos SDK and dedicated to tokenization and trading of future yields. Indeed, it allows the fixed component of an asset to be divided by the yield it produces.
The behavior is very similar to what happens on dApps such as Pendle Finance. Pryzm, for the veterans of DeFi, is a protocol that was created on Terra Luna chain during the last bull market with the purpose to separate staked $LUNA into $yLUNA and $pLUNA, the yield component from staking and the actual asset, respectively.

Pryzm was born from the ashes of Prism Protocol and promises to:
-
enable yield trading of LSDs;
-
provide liquid governance power;
-
build yield DEXes;
-
enable time-weighted trading, and much more.
I recommend you visit Pryzm's official channels to better understand the goals of this project, but now let's proceed with the validator node!
Don’t forget to subscribe on Mirror to stay tuned to all future articles.
Pryzm Node Installation - Step-by-Step Guide

To begin the procedure, you need a computer with any Linux distro installed, Ubuntu 20.04 or later will do, an SSD with +200 GB and a fast Internet connection.
For those without resources capable of supporting a validator node at home, you can fall back on VPS (Virtual Private Server) solutions, that is, you can rent a virtual server.
There are several solutions, which I recommend below:
-
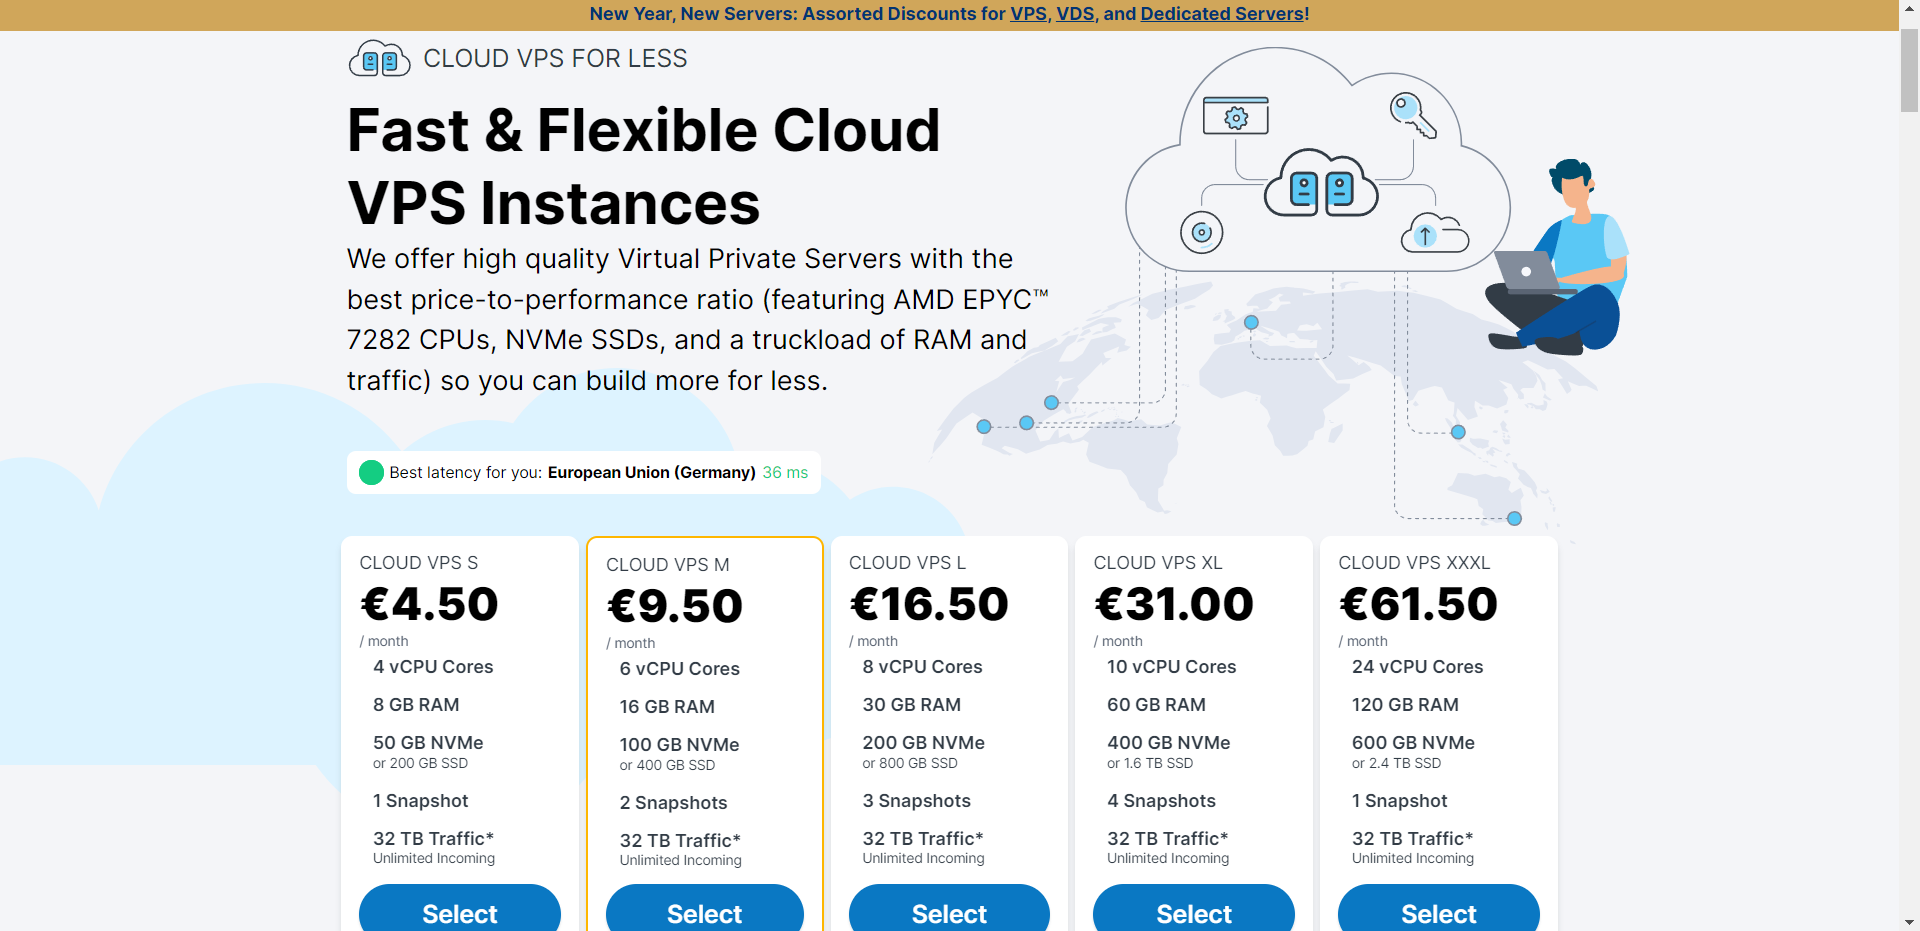
Contabo, I recommend the Cloud VPS M model, with 6 vCPU Cores, 16 GB RAM, 400 GB SSD SATA3;
-
Aeza, I recommend at least the VIEs-3 or PARs-3 model, with 4 vCPU Cores, 8 GB RAM, 120 GB NVMe. This is a Russian VPS service and payment by credit/debit card is not possible from many Western countries, but payments in crypto (BTC, BEP20, ERC20, TRC20, DASH, LTC, XMR...) are possible.
After payment is made, you will receive the IP address to access.
If operating from Windows, open Windows Powershell and launch the following command, entering your IP address instead of IP_ADDRESS:
ssh root@IP_ADDRESS
Give confirmation to save ED25519 key fingerprint to the list of known hosts, available at C:\Users\WINDOWS_USER\.ssh and enter the password of your VPS.
If you have done everything correctly, the following screen will appear:

⚠️ Disclaimer ⚠️: Launch every command one by one. Entering more commands together could break the installation process or bring to fatal errors.
Now enter the following commands and execute them:
# Preparation
sudo apt update -y
sudo apt upgrade -y
sudo apt -qy install curl git jq lz4 build-essential fail2ban ufw
Install Docker components and Golang:
# Install docker
curl -fsSL https://get.docker.com/ | sh
sudo docker run hello-world

# Hello from Docker!
# This message shows that your installation appears to be working correctly
# Install Golang
sudo rm -rf /usr/local/go
curl -Ls https://go.dev/dl/go1.21.5.linux-amd64.tar.gz | sudo tar -xzf - -C /usr/local
eval $(echo 'export PATH=$PATH:/usr/local/go/bin' | sudo tee /etc/profile.d/golang.sh)
eval $(echo 'export PATH=$PATH:$HOME/go/bin' | tee -a $HOME/.profile)

go version
# go version go1.21.5 linux/amd64
At this point download the binaries files and Cosmovisor
# Download binaries
cd $HOME
MONIKER=0xOuterGod
wget https://storage.googleapis.com/pryzm-zone/core/0.11.1/pryzmd-0.11.1-linux-amd64
sudo mv pryzmd-0.11.1-linux-amd64 pryzmd
sudo chmod +x pryzmd
 # Download Cosmovisor
mkdir -p $HOME/.pryzm/cosmovisor/genesis/bin
mv pryzmd $HOME/.pryzm/cosmovisor/genesis/bin/

sudo ln -s $HOME/.pryzm/cosmovisor/genesis $HOME/.pryzm/cosmovisor/current -f
sudo ln -s $HOME/.pryzm/cosmovisor/current/bin/pryzmd /usr/local/bin/pryzmd -f
go install cosmossdk.io/tools/cosmovisor/cmd/cosmovisor@latest
Launch the following block all together and create a service:
sudo tee /etc/systemd/system/pryzm.service > /dev/null << EOF
[Unit]
Description=pryzm node service
After=network-online.target

[Service]
User=$USER
ExecStart=$(which cosmovisor) run start
Restart=on-failure
RestartSec=10
LimitNOFILE=65535
Environment="DAEMON_HOME=$HOME/.pryzm"
Environment="DAEMON_NAME=pryzmd"
Environment="UNSAFE_SKIP_BACKUP=true"

[Install]
WantedBy=multi-user.target
EOF
# Enable service
sudo systemctl daemon-reload
sudo systemctl enable pryzm

# Setting node
pryzmd config chain-id indigo-1
pryzmd config keyring-backend test
pryzmd config node tcp://localhost:23257
pryzmd init $MONIKER --chain-id indigo-1
# Download Genesis & Addrbook
curl -Ls https://snap.nodex.one/pryzm-testnet/genesis.json > $HOME/.pryzm/config/genesis.json
curl -Ls https://snap.nodex.one/pryzm-testnet/addrbook.json > $HOME/.pryzm/config/addrbook.json
Configure seeds, gas prices, prunning settings and custom ports:
# Configure seeds
sed -i -e "s|^seeds *=.*|seeds = \"d1d43cc7c7aef715957289fd96a114ecaa7ba756@testnet-seeds.nodex.one:23210\"|" $HOME/.pryzm/config/config.toml
# Configure gas prices
sed -i -e "s|^minimum-gas-prices *=.*|minimum-gas-prices = \"0.015upryzm,0.01factory/pryzm15k9s9p0ar0cx27nayrgk6vmhyec3lj7vkry7rx/uusdsim\"|" $HOME/.pryzm/config/app.toml
# Configure prunning settings
sed -i \
  -e 's|^pruning *=.*|pruning = "custom"|' \
  -e 's|^pruning-keep-recent *=.*|pruning-keep-recent = "100"|' \
  -e 's|^pruning-keep-every *=.*|pruning-keep-every = "0"|' \
  -e 's|^pruning-interval *=.*|pruning-interval = "19"|' \
  $HOME/.pryzm/config/app.toml
# Configure custom ports
sed -i -e "s%^proxy_app = \"tcp://127.0.0.1:26658\"%proxy_app = \"tcp://127.0.0.1:23258\"%; s%^laddr = \"tcp://127.0.0.1:26657\"%laddr = \"tcp://127.0.0.1:23257\"%; s%^pprof_laddr = \"localhost:6060\"%pprof_laddr = \"localhost:23260\"%; s%^laddr = \"tcp://0.0.0.0:26656\"%laddr = \"tcp://0.0.0.0:23256\"%; s%^prometheus_listen_addr = \":26660\"%prometheus_listen_addr = \":23266\"%" $HOME/.pryzm/config/config.toml

sed -i -e "s%^address = \"tcp://0.0.0.0:1317\"%address = \"tcp://0.0.0.0:23217\"%; s%^address = \":8080\"%address = \":23280\"%; s%^address = \"0.0.0.0:9090\"%address = \"0.0.0.0:23290\"%; s%^address = \"0.0.0.0:9091\"%address = \"0.0.0.0:23291\"%; s%:8545%:23245%; s%:8546%:23246%; s%:6065%:23265%" $HOME/.pryzm/config/app.toml
Download snapshots and start the service:
# Download snapshots
curl -L https://snap.nodex.one/pryzm-testnet/pryzm-latest.tar.lz4 | tar -Ilz4 -xf - -C $HOME/.pryzm
[[ -f $HOME/.pryzm/data/upgrade-info.json ]] && cp $HOME/.pryzm/data/upgrade-info.json $HOME/.pryzm/cosmovisor/genesis/upgrade-info.json

# Start service
sudo systemctl start pryzm
sudo journalctl -u pryzm -f -o cat
Let’s check the synchronization status of the installed node with the network by running the following command:
pryzmd status | jq .SyncInfo
and it’s necessary to be false. However, we can proceed in the meantime even if the network is not perfectly synchronized.
You can either create a new wallet or import keys you already have.
# Create Pryzm wallet
pryzmd keys add feeder

# Recover Pryzm wallet
pryzmd keys add feeder --recover
Request some tokens from this faucet: Link.
# Configure Pryzm feeder
cd $HOME && mkdir -p $HOME/pryzmfeeder && cd $HOME/pryzmfeeder && wget https://storage.googleapis.com/pryzm-zone/feeder/config.yaml https://storage.googleapis.com/pryzm-zone/feeder/init.sql https://storage.googleapis.com/pryzm-zone/feeder/docker-compose.yml

# Pull Pryzm feeder image
docker pull europe-docker.pkg.dev/pryzm-zone/core/pryzm-feeder:0.3.4

# Install Postgres
sudo apt install postgresql
mv init.sql /tmp

# Create feeder folder
cd $HOME && mkdir ~/feeder
cd feeder
mv -v ~/pryzmfeeder/config.yaml ~/feeder
# Save the following validator address for later
pryzmd keys show feeder --bech val -a
Save the validator address showed and configure the config.yaml file by editing the following elements:
-
feederaddress: your feeder wallet address -
validator: the validator address the last command showed -
feederMnemonic: bip39 mnemonic used for your wallet, generated or imported -
rpcURL:"http://localhost:23657" -
gasPrice:"0.015upryzm"
Try launching again:
pryzmd status | jq .SyncInfo
and if it’s still giving back true, then proceed as followed:
# Stop the servie & Reset the data
cd $HOME && sudo systemctl stop pryzm
cp $HOME/.pryzm/data/priv_validator_state.json $HOME/.pryzm/priv_validator_state.json.backup
rm -rf $HOME/.pryzm/data

# Download latest snapshot
curl -L https://snap.skynodejs.net/pryzm/pryzm.tar.lz4| tar -Ilz4 -xf - -C $HOME/.pryzm
mv $HOME/.pryzm/priv_validator_state.json.backup $HOME/.pryzm/data/priv_validator_state.json

# Restart the service
sudo systemctl restart pryzm && sudo journalctl -u pryzm -f -o cat

# Check the logs after 3-4 hours
pryzmd status | jq .SyncInfo
After 3-4 hours the validator node should have finished synchronizing with the chain. At this point we are ready to create the validator node and connect it to our feeder wallet.
Run the following commands, modifying them appropriately in the fields for --moniker, --details, --website, --security-contact and the address in the second command:
# Create validator
pryzmd tx staking create-validator --pubkey $(pryzmd tendermint show-validator) --from feeder --amount 1000000upryzm --moniker "0xOuterGod" --chain-id indigo-1 --details "Dune Analytics | Degen DeFi" --website "https://mirror.xyz/0xb6f7E524D55672C10634D0dA7AED9cB738022274" --security-contact "https://twitter.com/0xOuterGod" --commission-rate "0.05" --commission-max-rate "0.20" --commission-max-change-rate "0.01" --min-self-delegation "1" --gas-adjustment 1.4 --gas auto --gas-prices 0.015upryzm

# Link validator to feeder, edit the address using your feeder address
pryzmd tx oracle delegate-feed-consent pryzm1rsf0vjuw5e9q7e2q7z8q7595ncgzuwv32cv8l2 --fees 2000factory/pryzm15k9s9p0ar0cx27nayrgk6vmhyec3lj7vkry7rx/uusdsim,3000upryzm --from feeder
Now you can check your validator node here: Link
Congratulations, you have successfully completed the installation of your node!

I now leave you with a set of useful commands for monitoring your validator node.
# Query validator details
pryzmd q staking validator $(pryzmd keys show feeder --bech val -a)

# Edit validator data
pryzmd tx staking edit-validator --new-moniker "0xOuterGod" --from feeder --chain-id indigo-1 --fees 2000factory/pryzm15k9s9p0ar0cx27nayrgk6vmhyec3lj7vkry7rx/uusdsim,3000upryzm -y

# Query wallet balance
pryzmd q bank balances $(pryzmd keys show feeder -a)

# Delegate to your validator
pryzmd tx staking delegate $(pryzmd keys show feeder --bech val -a) 1980000upryzm --from feeder --chain-id indigo-1 --gas-adjustment 1.4 --gas auto --fees 2500factory/pryzm15k9s9p0ar0cx27nayrgk6vmhyec3lj7vkry7rx/uusdsim,3500upryzm -y
The guide you read is for educational purposes. Pryzm has not released any information about an airdrop for its testnet node validators, so this is an educational content. If you like my work, I suggest you to subscribe and mint the entry in order to support my work.
Here you can find my node validator on the Pryzm testnet. You can also support me by delegating your testnet tokens to my node.