
Setup Celestia Light Client (Mocha Testnet) on a Ubuntu Linux 20.04 (LTS) x64 device.
Light Client: conducts data availability sampling on the Data Availability network.
A setup script, for easy install is available here:
Hardware Requirements : CPU: Single Core/ 2GB RAM/ Disk: 5 GB SSD/ 56Kbps Download/upload
This is incredibly lightweight requirements that you can even run on a Mobile phone, if you want to try this see
Install Pre-requisite Software
Update the system
sudo apt update && sudo apt upgrade -y
Install packages required for a Light node
sudo apt install curl tar wget clang pkg-config libssl-dev jq build-essential git make ncdu -y
Log in as root user
A lot of steps will require and only work under root user
sudo -i
you can exit root with exit
Install Go
Go is a programming language in which Celestia celestia-app and celestia-node are written in.
cd /tmp && wget https://go.dev/dl/go1.19.1.linux-amd64.tar.gz
tar -C /usr/local/ -xzf go1.19.1.linux-amd64.tar.gz
Add to PATH
cd /usr/local/ && echo "export PATH=$PATH:/usr/local/go/bin:$HOME/go/bin" >> ~/.bashrc && echo "export GOROOT=/usr/local/go" >> ~/.bashrc && echo "export PATH=$PATH:/usr/local/go/bin:$HOME/go/bin" >> /home//.bashrc && echo "export GOROOT=/usr/local/go" >> /home//.bashrc && source ~/.bashrc && source /home/*/.bashrc
confirm installation with
go version

Install Celestia-node
Celestia Node is the software stack for Data availability nodes, Install the binary by running the following commands:
cd $HOME
rm -rf celestia-node
git clone https://github.com/celestiaorg/celestia-node.git
cd celestia-node/
git checkout tags/v0.6.0
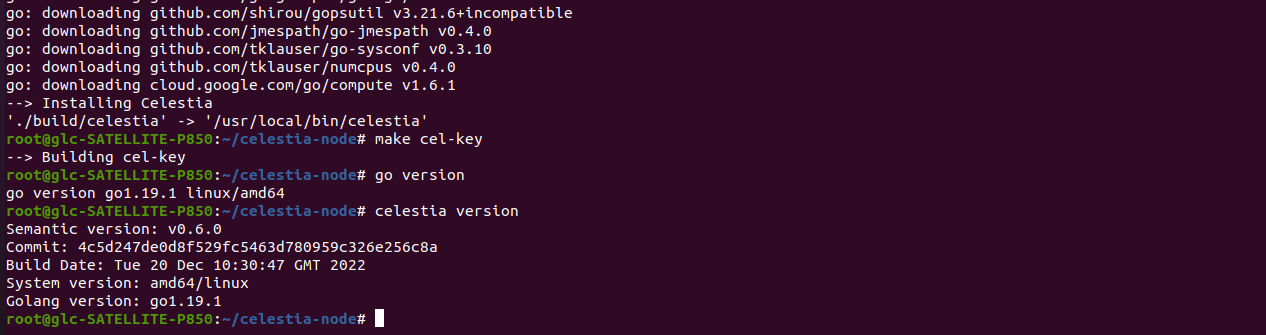
make install
make cel-key
confirm installation with
celestia version
Initialize Light Node
celestia light init

Connect to gRPC endpoint
Start the light node with a connection to a validator node's gRPC endpoint (which is usually exposed on port 9090): This can be any validator node including your own.
Example Endpoint: https://rpc-mocha.pops.one:9090
Available Endpoints: https://docs.celestia.org/nodes/light-node/mocha-testnet#rpc-endpoints
Example to place in system service file
--core.ip https://rpc-mocha.pops.one:9090
Set up SystemD service for node
setup to run as a background process with SystemD. This enables the node to run continuously in the background unless stopped.
tee <<EOF >/dev/null /etc/systemd/system/celestia-lightd.service
[Unit]
Description=celestia-lightd Light Node
After=network-online.target

[Service]
User=$USER
ExecStart=/usr/local/bin/celestia light start --core.ip <RPCENDPOINT>
Restart=on-failure
RestartSec=3
LimitNOFILE=4096

[Install]
WantedBy=multi-user.target
EOF
Enable and Start Service
systemctl enable celestia-lightd
systemctl daemon-reload
systemctl start celestia-lightd
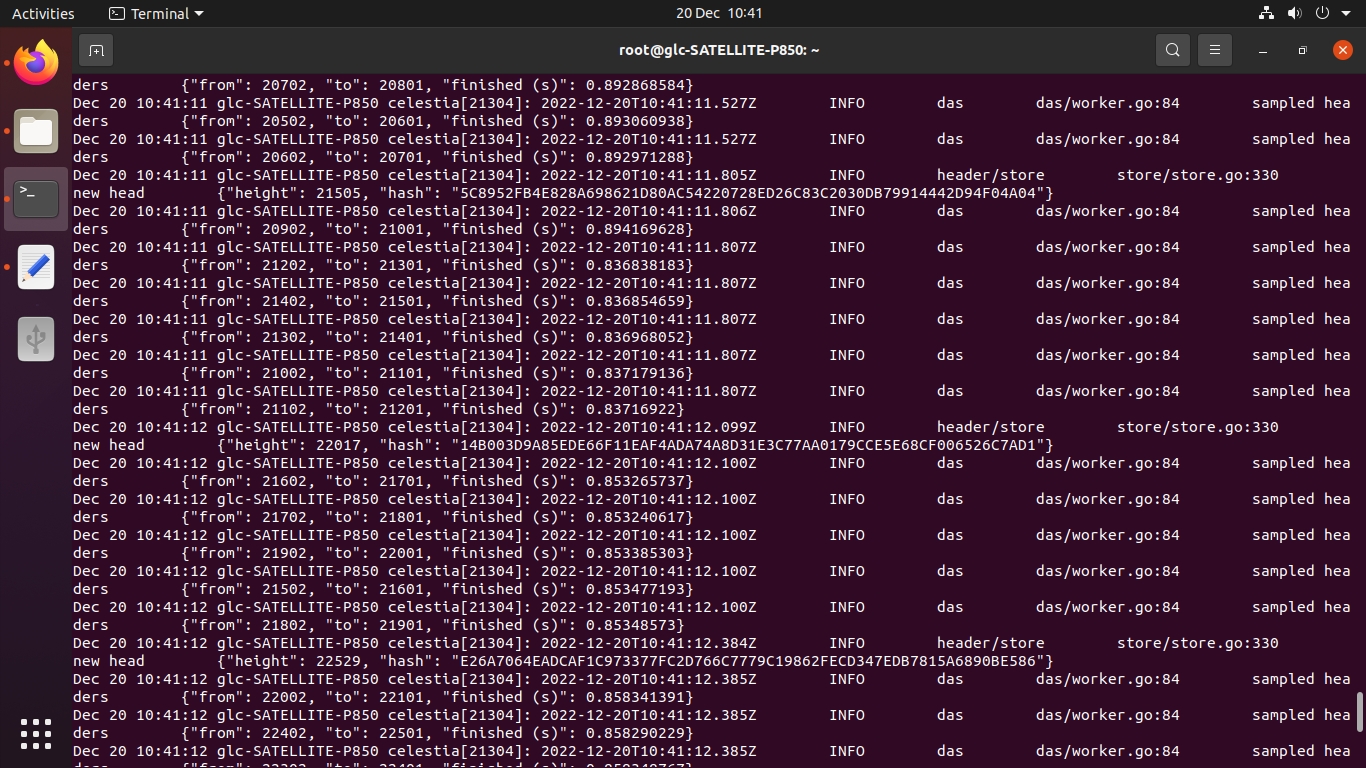
View Logs
journalctl -u celestia-lightd.service -f
Check service status
systemctl status celestia-lightd
Wallet
Once you start the Light Node, a wallet key will be generated for you. You will need to fund that address with testnet tokens to pay for PayForData transactions.
You can find the address by running the following command in the celestia-node directory:
cd celestia-node
./cel-key list --node.type light --keyring-backend test

The Address that’s displayed is what you fund in order to start pay for data transactions.