Hi, my name is Heorhii, and in this guide, I’ll walk you through the process of deploying your first smart contract to the Somnia network using the Remix IDE. If you're already comfortable with basic Solidity and have MetaMask installed, you're ready to go.
What is Somnia? Somnia is a new blockchain ecosystem designed to support mass-consumer, real-time applications at scale. It’s built for developers who want fast, low-latency environments to create powerful, decentralized apps. With a focus on performance, Somnia enables complex dApps like games, metaverses, social platforms, and beyond — all while keeping user experience seamless.
For developers, it offers a testnet (DevNet) where you can easily deploy and experiment with smart contracts before going live. Whether you're building a simple on-chain app or a full-scale virtual world, Somnia aims to give you the tools to build it efficiently.
What you’ll need. Before we start, make sure you’ve got the following:
-
Basic understanding of Solidity (this isn’t a beginner’s coding tutorial)
-
MetaMask installed and set up in your browser
-
Somnia DevNet added to your MetaMask networks
-
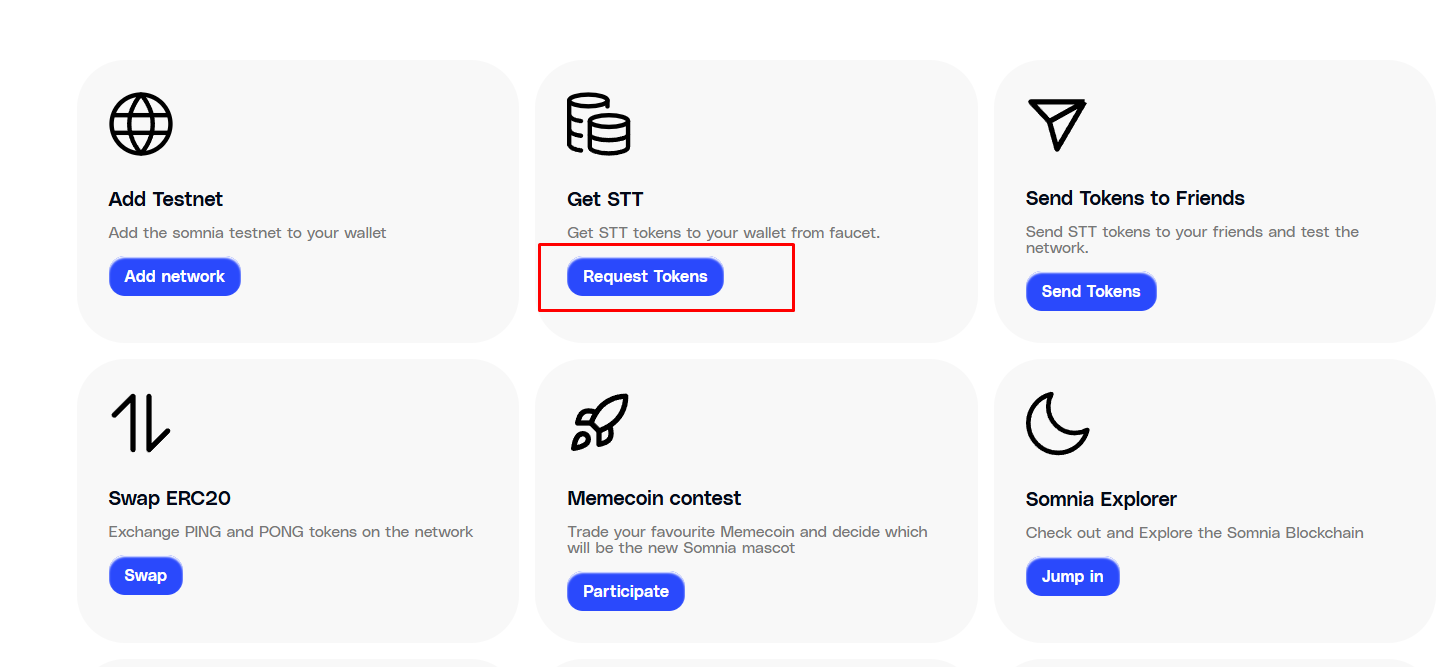
STT test tokens in your wallet (grab them from the faucet)
-
Remix IDE open at remix.ethereum.org
Step 1: Connect to Somnia DevNet.
Open MetaMask and switch to the Somnia DevNet. Make sure you're logged in and have STT tokens to cover transaction fees.
Step 2: Create the contract.
In Remix, create a new file in the contracts folder (you can name it YourName.sol).
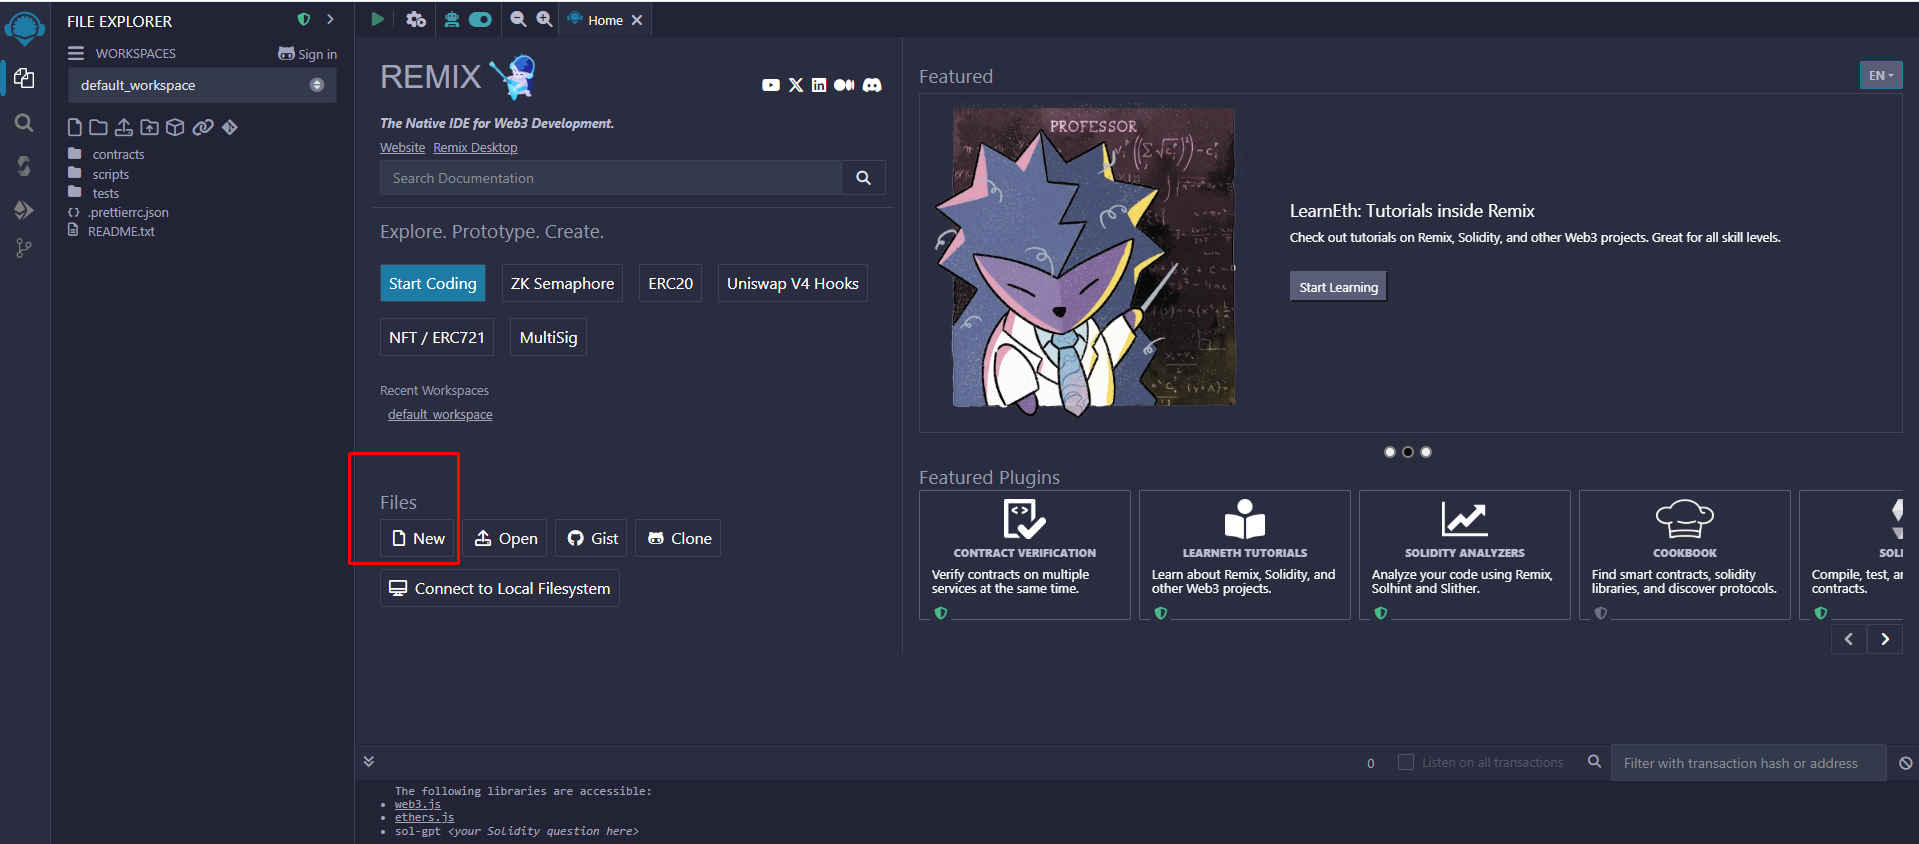
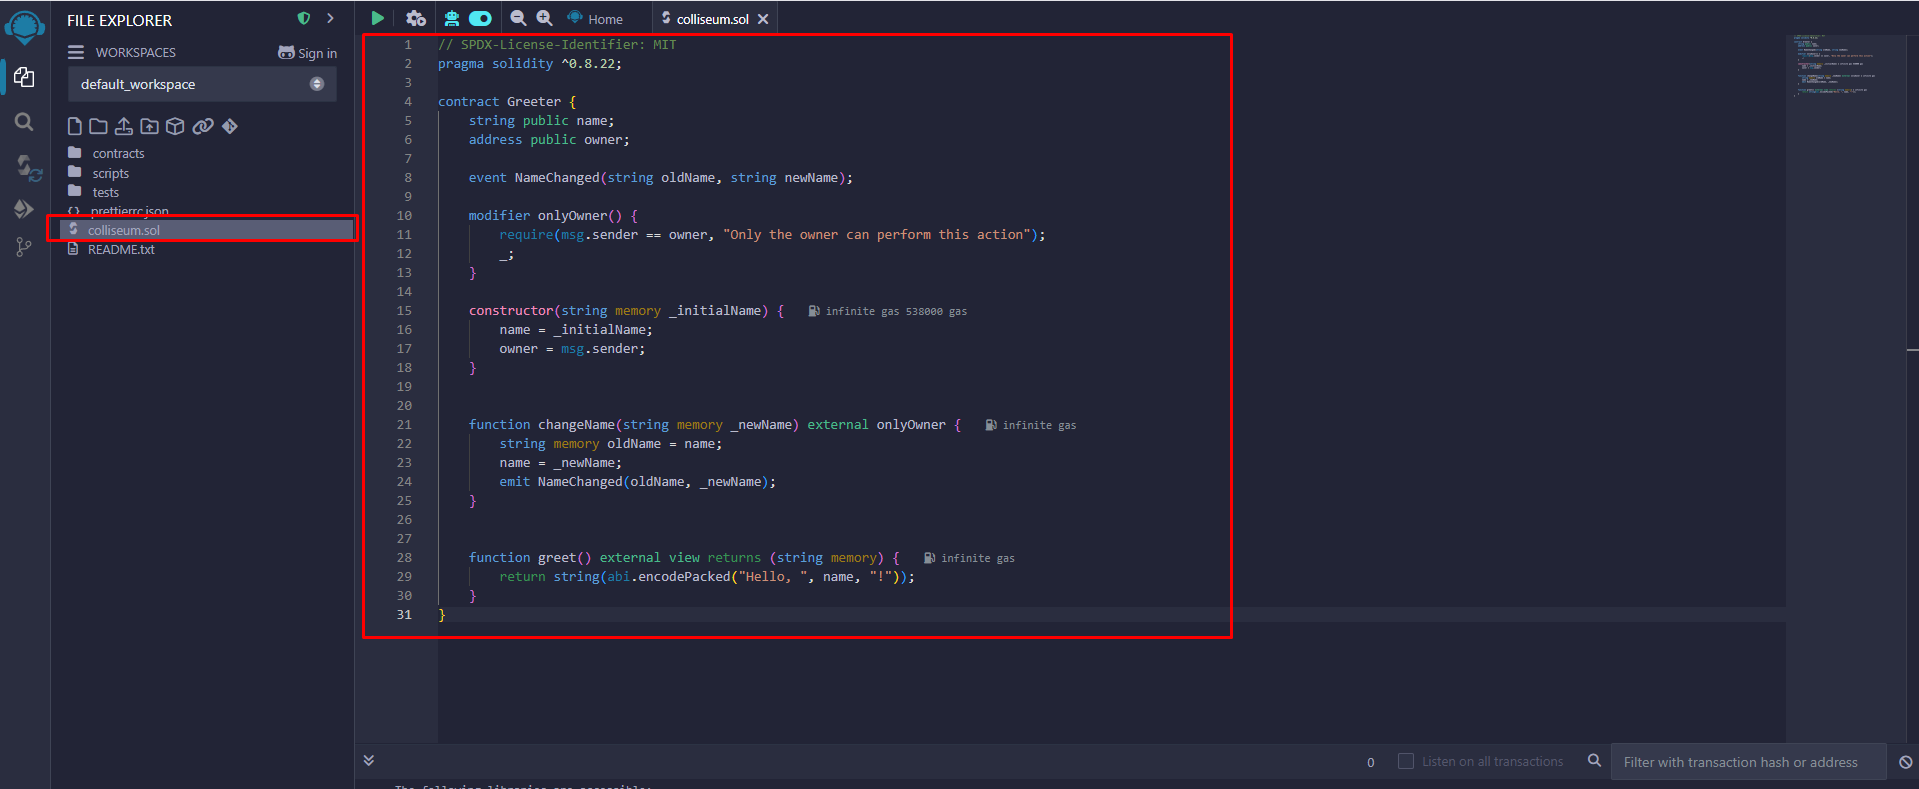
Then copy and paste the code below:
// SPDX-License-Identifier: MIT
pragma solidity ^0.8.22;

contract Greeter {
    string public name;
    address public owner;

    event NameChanged(string oldName, string newName);

    modifier onlyOwner() {
        require(msg.sender == owner, "Only the owner can perform this action");
        _;
    }

    constructor(string memory _initialName) {
        name = _initialName;
        owner = msg.sender;
    }


    function changeName(string memory _newName) external onlyOwner {
        string memory oldName = name;
        name = _newName;
        emit NameChanged(oldName, _newName);
    }


    function greet() external view returns (string memory) {
        return string(abi.encodePacked("Hello, ", name, "!"));
    }
}
Step 3: Compile the contract.
Click on the Solidity compiler tab (left panel). Make sure the compiler version is ^0.8.22 or compatible, then hit YourName.sol.
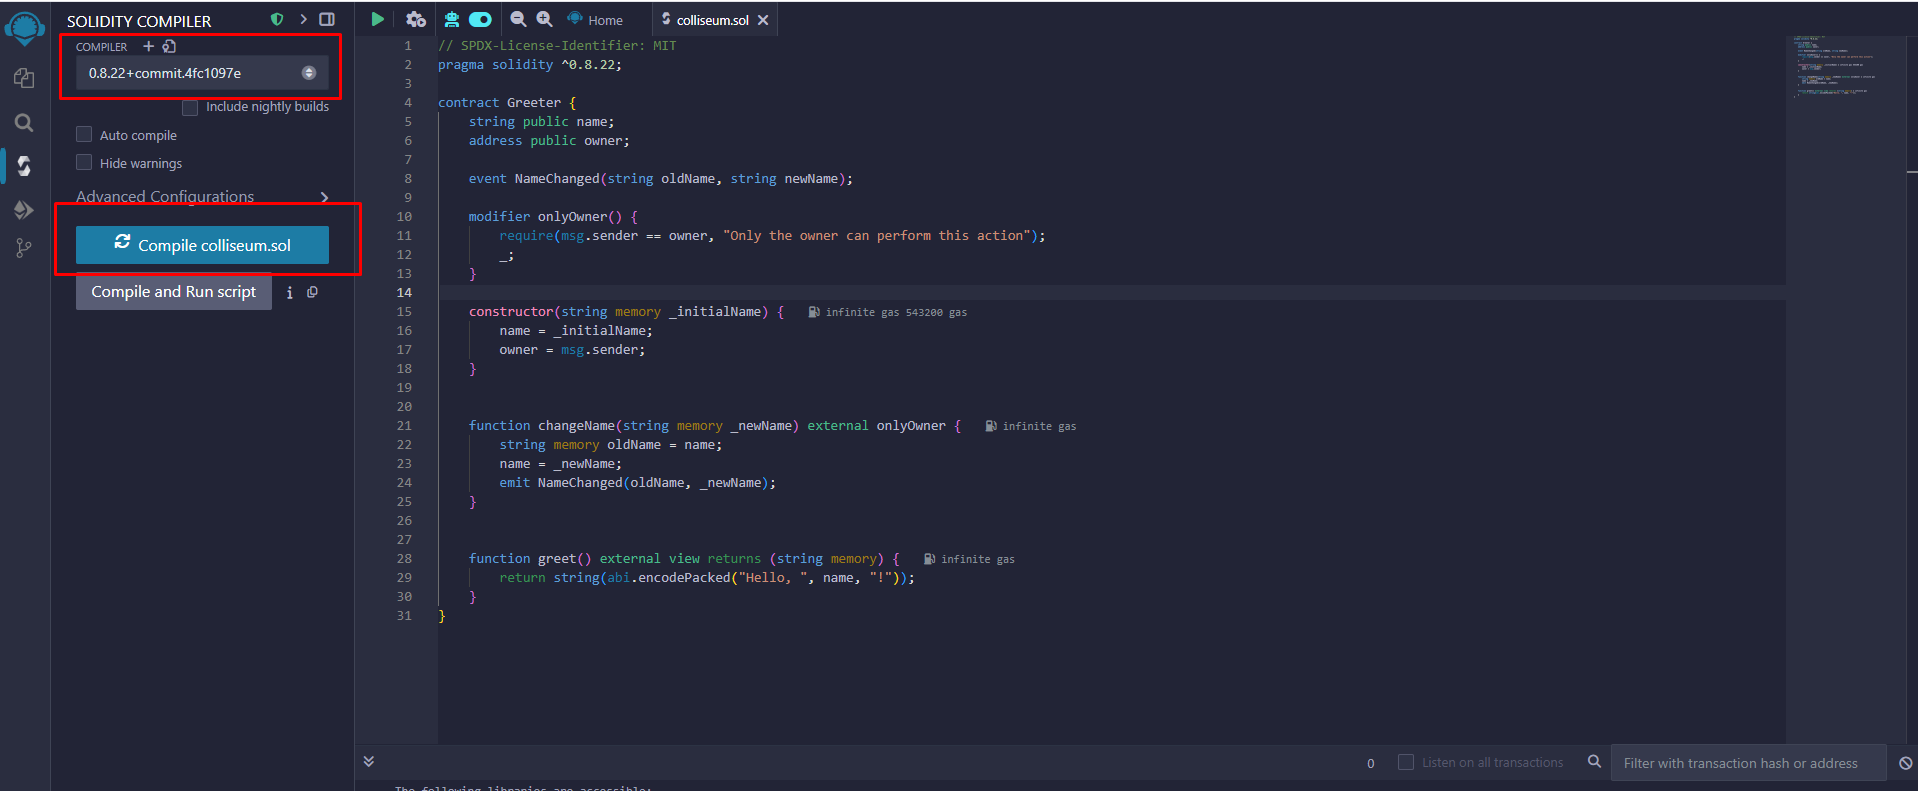
Once compiled, Remix will generate the bytecode and ABI behind the scenes, which are necessary for deploying and interacting with the contract.
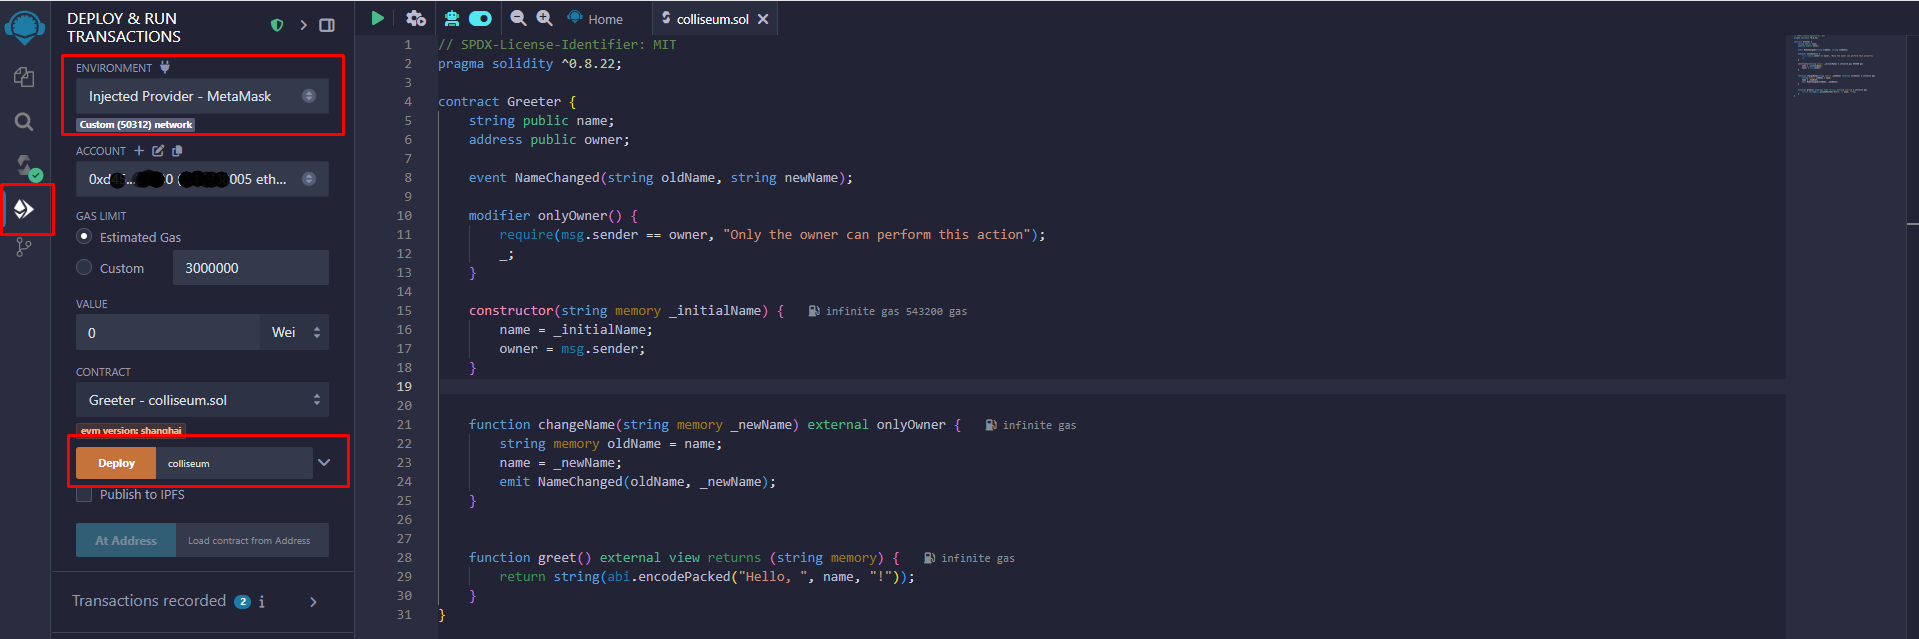
Step 4: Deploy the contract.
Now we’ll send the contract to the blockchain.
-
Go to the Deploy & Run Transactions tab.
-
In the Environment dropdown, choose Injected Provider - MetaMask.
-
Connect your MetaMask wallet that holds STT tokens.
-
Under Deploy, enter an initial name like
"Somnia"for the_initialNameconstructor field. -
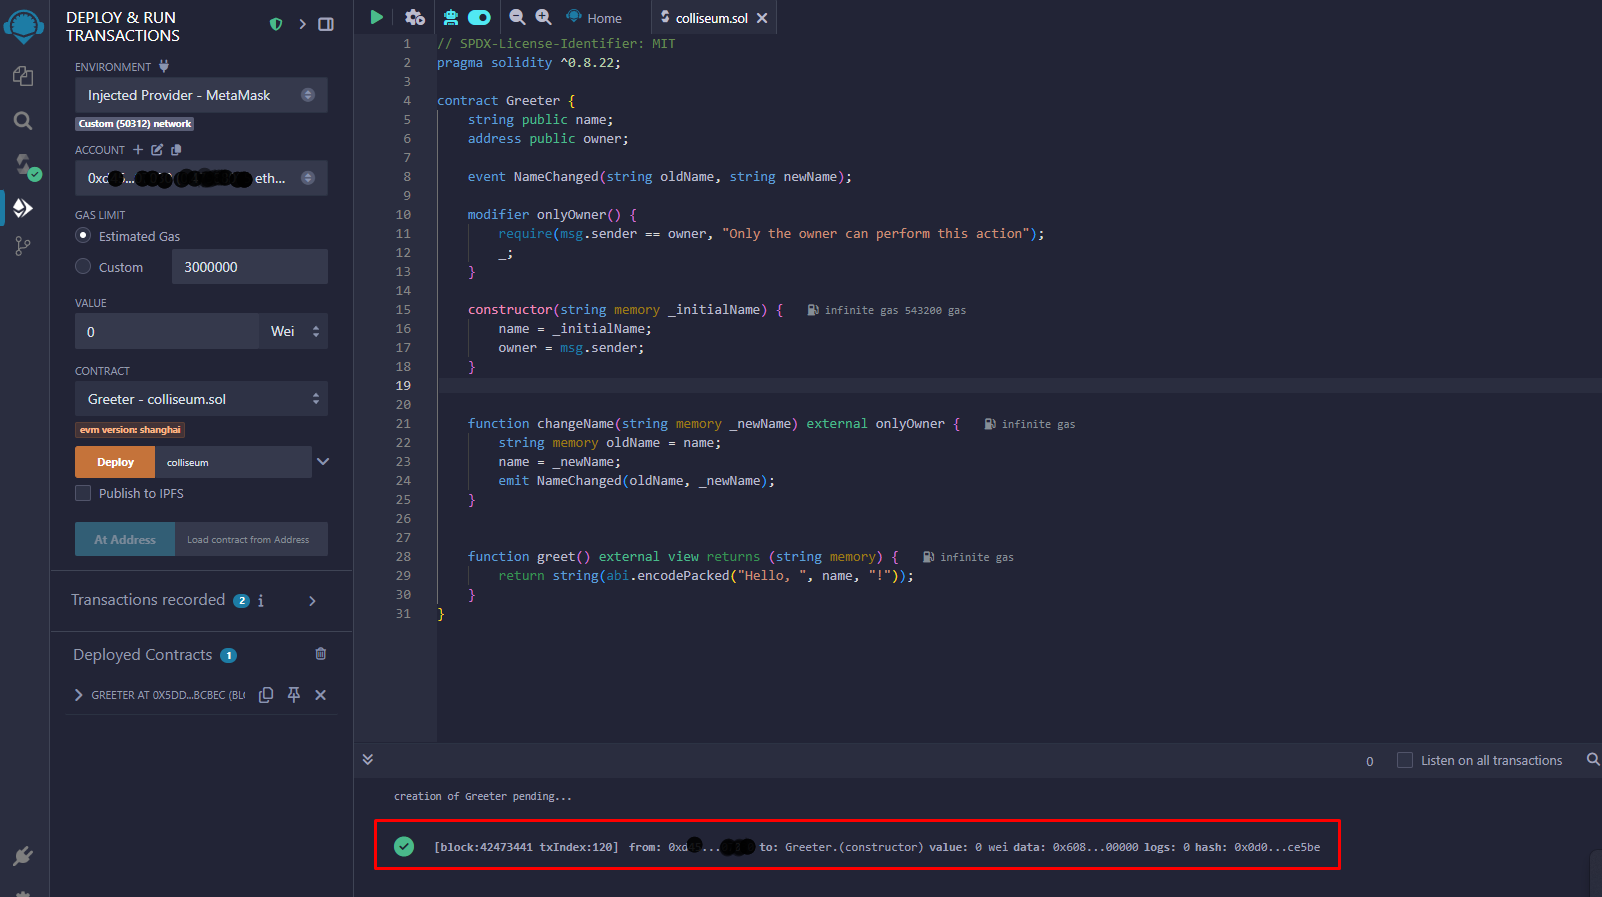
Click Deploy and approve the transaction in MetaMask.
Once confirmed, you’ll see the contract appear under Deployed Contracts, along with its address and function controls.
Step 5: Interact with your contract.
Now that your smart contract is live, try interacting with it.
-
Click greet to see the greeting message ("Hello, Somnia!")
-
Use changeName to update the name (only works from the owner's wallet)
-
Call greet again to see the updated message
More info you can find here:
You did it 🎉
Congrats — you've just deployed and interacted with your first smart contract on the Somnia network. From here, you can expand your contract, test other logic, or even build a full dApp on top of it.
Whether you're experimenting or preparing something production-ready, Somnia is built to scale with your ideas.
— Heorhii (colliseum)
Somnia Social: