
In this tutorial, we’ll be doing a walkthrough of updating Consensys’ eventsea repo to use Foundry, highlighting some key gotchas in running it locally and on Linea on your machine. This repo is one of many sample use case oriented dapps to showcase how to build end-to-end, leveraging Linea for fast and cheap transactions and MetaMask SDK for smooth connections to MetaMask mobile and desktop. If you want to see the completed code for the Foundry version we’ll be going over here, head over to my Github here.
I do want to start off by “pretending” like we’re starting from scratch, just to get the feeling of what it would be like if you were to build on your own, but when it comes to the frontend part, we’ll just copy/paste, because that is wayyyyy too many files to meaningfully, individually step through.
This walkthrough will primarily focus on how everything works together and to get the project started rather than explaining all the Solidity code written.
Create your project
In this example, we’ll be using turbo to conveniently create a monorepo, which is especially great for hacking collaboratively and quickly at hackathons. There’s a variety of template projects for various frameworks, but we’ll be starting with the basic Next.js version using typescript.
First, make sure you have the proper Node version (greater than v18.17.0) and an updated npm if you are planning on using npm. My version is v10.4.0. You should always install Node using nvm. Then, install turbo by following the instructions here.
Finally, navigate to your terminal and run:
npx create-turbo@latest
And then follow the prompts for your desired settings. I created a repo called eventsea and used npm workspaces. You can find more details on the structure of the monorepo here.
Call cd eventsea so that we can start working out of our project directory. I recommend using VSCode to edit your code, but feel free to use whatever IDE you desire.
Write and compile the smart contracts
We will be writing three smart contracts: EventsFactory.sol, Event.sol, and Ticket.sol using Foundry.
turbo will automatically create a Github project, but creating a Foundry project requires a clean working and staging areas. So, we’ll first need to call:
git add .
git commit -m "first commit"
Now, make sure you have installed Foundry by following these instructions. Then, we will create a blockchain package to work with in the frontend like so:
cd packages
forge init blockchain
In the src folder, create the files Event.sol , Ticket.sol, and EventsFactory.sol, and delete the example contract automatically created by Foundry. Then, you can copy paste the code into the respective contracts from the Github repo:
For this project, we are using a factory contract structure. We will actually only deploy the EventsFactory contract ourselves. Aside from that, Event and Ticket contracts will be deployed on the fly via the createEvent method in EventsFactory and in the constructor in Event.
If at any point you run into this issue,
The target directory is a part of or on its own an already initialized git repository,
and it requires clean working and staging areas, including no untracked files.

Check the current git repository's status with `git status`.
Then, you can track files with `git add ...` and then commit them with `git commit`,
ignore them in the `.gitignore` file, or run this command again with the `--no-commit` flag.

If none of the previous steps worked, please open an issue at:
https://github.com/foundry-rs/foundry/issues/new/choose
make sure you commit any code changes since Foundry needs to work out of clean working and staging areas.
Note that Ticket imports OpenZeppelin contracts. To install them, call:
forge install OpenZeppelin/openzeppelin-contracts
And, so that the import is a bit cleaner, create remappings.txt and add:
@openzeppelin/contracts/=lib/openzeppelin-contracts/contracts/
Finally, delete the example contracts under script and test, and then compile our contracts:
forge build
Set up environment variables
Create a file called .env underneath the blockchain folder with these properties:
INFURA_API_KEY=
ACCOUNT_PRIVATE_KEY=
To deploy locally, we’ll need to run a local test blockchain. To do so, run anvil in a separate terminal window. Upon start, it’ll give 10 test wallets. Take one of the private keys and add it to .env.
To deploy to Linea, we’ll need an INFURA_API_KEY, which you can get by navigating to and creating an account and project at infura.io. In this case, you’ll want to use a private key from an actual account on your MetaMask wallet funded with Linea test ETH. You can fund your account with Linea test ETH using any of the steps described in our docs - faucets, bridging, or our chatbot with XMTP.
Next, let’s add aliases to foundry.toml to make life easier when calling Foundry commands. Add this section as follows:
[rpc_endpoints]
linea-testnet = "https://linea-goerli.infura.io/v3/${INFURA_API_KEY}"
linea-mainnet = "https://linea-mainnet.infura.io/v3/${INFURA_API_KEY}"
local = "http://localhost:8545"
Deploy the smart contracts
To deploy your smart contracts, we’ll need to write a deployment script. To do so, create a file under the script folder called EventsFactory.s.sol. Copy paste this code into the file:
// SPDX-License-Identifier: UNLICENSED
pragma solidity ^0.8.13;

import "forge-std/Script.sol";
import "../src/EventsFactory.sol";

contract Deploy is Script {
    function run() external {
        uint256 deployerPrivateKey = vm.envUint("ACCOUNT_PRIVATE_KEY");
        vm.startBroadcast(deployerPrivateKey);

        new EventsFactory();

        vm.stopBroadcast();
    }
}
To briefly explain what’s going on here, we’re importing forge-std/Script.sol, which offers some nifty functionality and utility to be used in your smart contracts. In this particular case, we want to indicate that this contract is a script via is Script. Starting and ending broadcast will tell Foundry when to send function calls to the blockchain. In this case, we are only deploying the one EventsContract by calling new EventsFactory().
Next, you’ll notice that we need to pull in the private key of your deployer wallet so that we can pay the gas necessary to make the transaction.
If running locally with anvil, set your ACCOUNT_PRIVATE_KEY to one of the provided private keys. Otherwise, set it to the private key of a MetaMask wallet account funded with Linea test ETH.
Then, to deploy locally, call:
forge script script/EventsFactory.s.sol:Deploy --fork-url local --broadcast
To deploy to Linea testnet, call
forge script script/EventsFactory.s.sol:Deploy --fork-url linea-testnet --broadcast
Save the deployed contract address.
Test your smart contract
You can test your smart contracts by writing actual tests, running scripts, or calling functions off the fly. To write a test, create EventsFactory.t.sol under the test folder, and paste in this code:
// SPDX-License-Identifier: UNLICENSED
pragma solidity ^0.8.13;

import "forge-std/Test.sol";
import "../src/EventsFactory.sol";
import "../src/Event.sol";

contract EventsFactoryTest is Test {
    EventsFactory eventsFactory;
    Event eventExpected;

    function setUp() public {
        eventsFactory = new EventsFactory();
        eventExpected = eventsFactory.createEvent(
            "test_title",
            "test_description",
            "test_location",
            "test_eventType",
            "test_image",
            1708488239,
            100,
            100
        );
    }

    function test_getEvents() public {
        Event eventActual = eventsFactory.getEvents()[0];
        assertEq(address(eventExpected), address(eventActual));
    }

    function test_getEventById() public {
        Event eventActual = eventsFactory.getEventById(0);
        assertEq(address(eventExpected), address(eventActual));
    }
}
As you can see in this test, we import "forge-std/Test.sol" to get some testing functionality such as assertEq. We instantiate the EventsFactory contract we will be interacting with in the setUp function, and write various functions to test certain aspects of what you can find in EventsFactory.sol. This is by no means a comprehensive test, but you can read more about testing and test configurations in Foundry here.
To run the test, simply call:
forge test
You can call or send transactions on the fly using cast call or cast send.
Creating a new event:
cast send EVENTSFACTORY_CONTRACT_ADDRESS “createEvent(string, string, string, string, string, uint, uint, uint)” “test_title” “test_description” “test_location” “test_eventType” “image” 1708906852 100 .01 --private-key YOUR_PRIVATE_KEY
Getting an event:
cast call EVENTSFACTORY_CONTRACT_ADDRESS “getEventById(uint) (address)” 0
Note that in the call function, you don’t need to pass in a private key, since you’re not making a transaction.
You can read more about these functions and other functionality here.
Create types
Our frontend will be built using Typescript, so we will need to convert all of our smart contract artifacts into types. To do this, we will be using typechain. We’ll need to add a package.json and install the appropriate packages as follows:
npm init
npm install --save-dev @typechain/ethers-v6
npm install --save-dev typechain
Then, call:
npx typechain --target ethers-v6 "out/**/!(.t|test).sol/!(.abi).json" --out-dir typechain-types
This will target the abis generated in /out from when we called forge compile. Note that we use this regex pattern, because we don’t need to create types from any compiled files from test files, since they will not be used in our frontend.
Add typechain-types to your .gitignore since we don’t need to be uploading it to Github.
And that’s it for our smart contracts!
Build the frontend
To be honest, there’s a slot of stuff going on in the frontend given so many moving parts (event cards, displaying your event UI, creating an event UI, etc), that it’s a bit unwieldy to copy and paste file by file.
At this point, you should just clone the repo and work off of that one. The cloned repo has made changes to various package.json files and changed up the connections for tsconfig.json to make turborepo work, but they’re not relevant for understanding how to set up the web3 component of this tutorial. For the most part, the changes made add in additional scripts to help make starting from the repo itself easier, such as npm run compile, which will compile your smart contracts and run typechain on them.
Set up environment variables
For the webapp, we will need to set up a few API keys, gateways, and other environment variables to work with. There’s an existing .env.example file under apps/web that you can copy into another .env file.
NEXT_PUBLIC_EVENTS_FACTORY_CONTRACT_ADDRESS=
# Drop the https://
NEXT_PUBLIC_PINATA_GATEWAY=
NEXT_PUBLIC_GOOGLE_MAPS_API_KEY=

LINEA_TEST_RPC_ENDPOINT=
PINATA_IPFS_ENDPOINT=https://api.pinata.cloud

PINATA_JWT=
INFURA_API_KEY=
INFURA_API_SECRET=

NETWORK=linea-testnet
The contract address should be the EventsFactory address you deployed either on anvil or on Linea testnet.
We will be using Pinata to store event images on IPFS, aka decentralized file storage, so you’ll also need to create a Pinata account. From that Pinata account, you can get the Pinata gateway as well as the JWT when you create an API key on your account. Note that the JWT will only be shown once upon API key creation, so make sure you save it somewhere safe!
If you are using Infura, LINEA_TEST_RPC_ENDPOINT will be https://linea-goerli.infura.io/v3. You can find INFURA_API_KEY and INFURA_API_SECRET all on your Infura dashboard.
We are using Google maps to select the event location. Getting the maps API key requires credit card information, so feel free to ignore this if you would like. It’ll break in the UI, but is not required for functionality.
Diving into the relevant “web3 files”
getEventContract.ts, getEventFactoryContract.ts, getTicketContract.ts
These files use ethers.js to create a contract object we can interact with through our dapp.
import { ethers } from "ethers";
import contract from "@blockchain/out/EventsFactory.sol/EventsFactory.json";
import { EventsFactory } from "@blockchain/typechain-types/EventsFactory";
import { ContractPermission } from "@/types";
import { getNetworkRPC } from "./utils";

type Args = {
  permission: ContractPermission;
};

export const getEventFactoryContract = async ({ permission }: Args) => {
  const network = process.env.NETWORK || "localhost";
  const rpcUrl = getNetworkRPC(network);

  const provider =
    typeof window !== "undefined" && typeof window.ethereum !== "undefined"
      ? new ethers.BrowserProvider(window.ethereum!)
      : new ethers.JsonRpcProvider(rpcUrl);

  const signerOrProvider =
    permission === ContractPermission.READ
      ? provider
      : await provider.getSigner();

  return new ethers.Contract(
    process.env.NEXT_PUBLIC_EVENTS_FACTORY_CONTRACT_ADDRESS!,
    contract.abi,
    signerOrProvider
  ) as unknown as EventsFactory;
};
As you can see from this example of getEventFactory.ts, we need the contract address, abi, and signer/provider in order to create the necessary contract object. We need the WRITE permission when we are sending a transaction that we need to sign, such as creating an event. However, if we are simply reading, such as getting the list of events, we can just use the READ permission.
Do note the imports at the top, where we’re able to use the information in @blockchain/…, which is where we compiled and deployed all of our Foundry smart contracts!
Finally, you can see how to actually interact with the ethers contract object in actions.ts,
try {
    const eventsFactory = await getEventFactoryContract({
      permission: ContractPermission.READ,
    });

    const eventAddresses = (await eventsFactory.getEvents()).slice(0, 8);

    const eventsPromises = eventAddresses.map(async (address) => {
      const eventContract = await getEventContract({
        address,
        permission: ContractPermission.READ,
      });
// continued...
Navbar.tsx
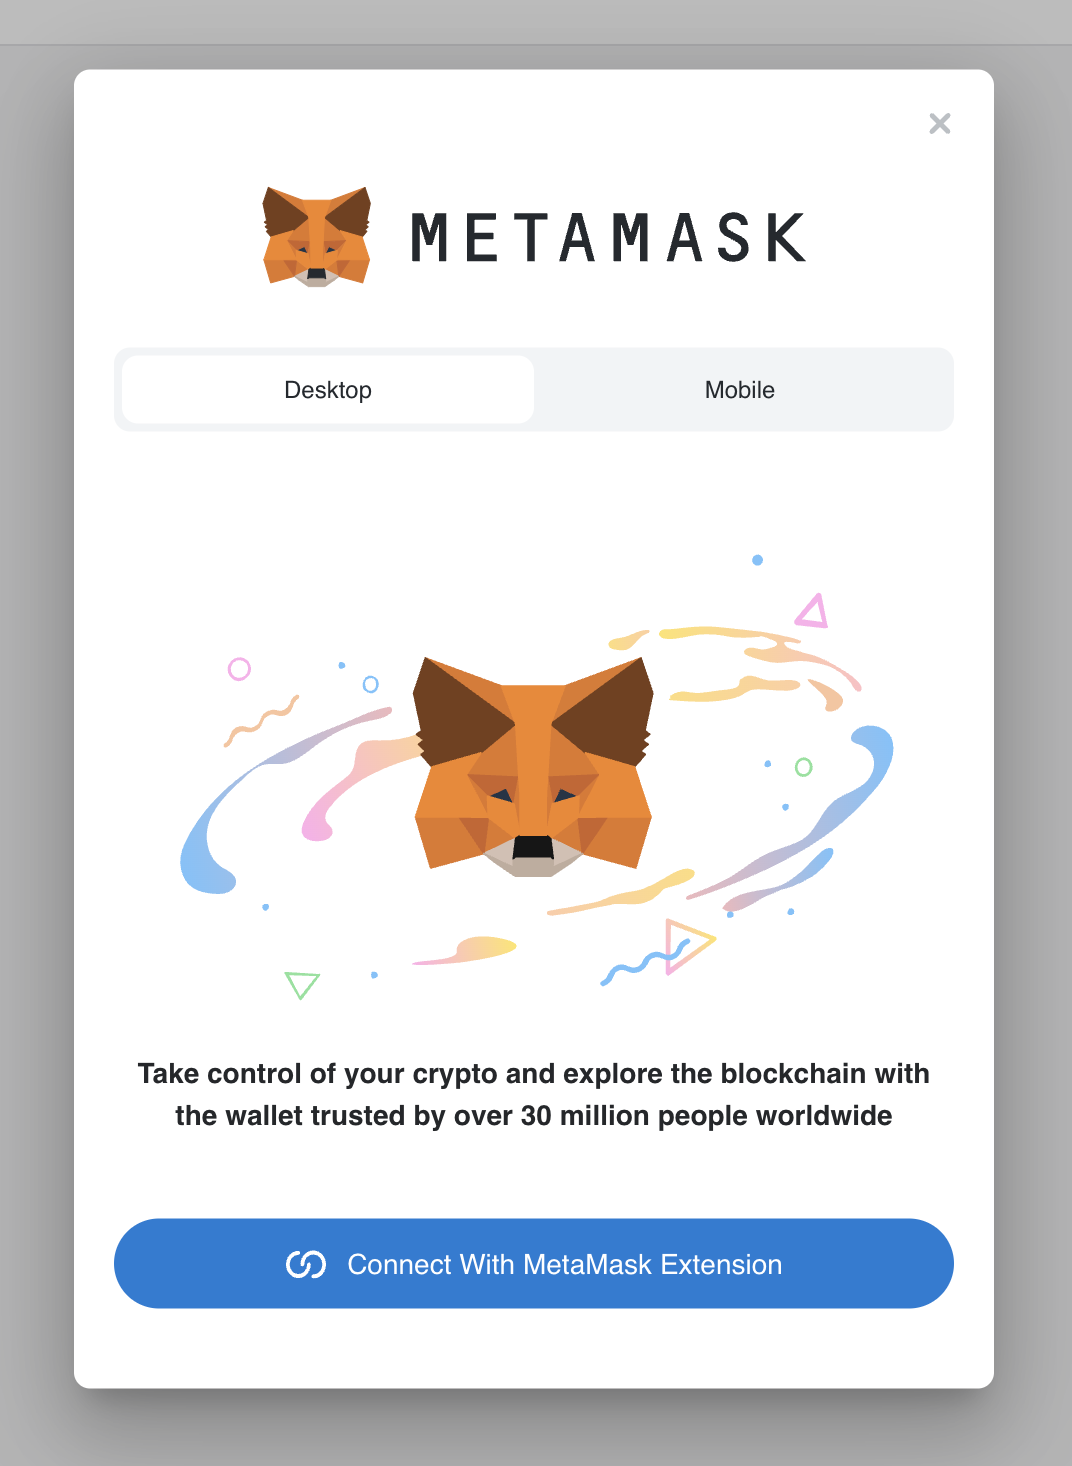
This file contains the Connect MetaMask button, which leverages the MetaMask SDK to perform a smoother wallet connection. That is, it allows the user to decide between connecting via mobile or browser extension and also does not break when the user has no extension installed at all! This is what it will look like:
Using this is fairly straightforward. You can find the docs here. Highlighting the key parts of the code and leaving out irrelevant stuff, we can look at Navbar.tsx as follows:
"use client";

import Link from "next/link";
import { useSDK } from "@metamask/sdk-react";
// other code...
import MetaMaskProvider from "@/providers/MetamaskProvider";
import { useEffect, useState } from "react";

// other code...
export const ConnectWalletButton = () => {
  const [chainId, setChainId] = useState<string | null>(null);
  const { sdk, connected, connecting, account } = useSDK();

  useEffect(() => {
    if (window?.ethereum?.chainId) {
      setChainId(window?.ethereum?.chainId);
    }
  }, []);

  const isOnLineaTestnet = chainId === LINEA_TESTNET_CHAIN;
  const isOnLocal = chainId === ANVIL_CHAIN;

  const connect = async () => {
    try {
      (await sdk?.connect()) as string[];
    } catch (err) {
      console.warn(`No accounts found`, err);
    }
  };

// other code...

  return (
    // other code...
  )

};

export const NavBar = () => {
  return (
    <nav className="flex items-center justify-between gap-4 mx-auto bg-white border md:px-6 py-7 rounded-xl">
      <MetaMaskProvider>
        <Link href="/" className="flex px-2 md:gap-1 md:px-6">
          <EventSeaLogo />
          <span className="hidden text-2xl font-bold sm:block">
            <span className="text-[#0C200A]">Event</span>
            <span className="text-[#4C6D07]">Sea</span>
          </span>
        </Link>
        <div className="flex items-center gap-4 px-1 md:px-6">
          <SearchBar />
          <CreateEvent />
          <ConnectWalletButton />
        </div>
      </MetaMaskProvider>
    </nav>
  );
};

export default NavBar;
Essentially, the most important parts to call out are actually installing the MetaMask SDK package @metamask/sdk-react, and wrapping the relevant connect button with <MetaMaskProvider>.
After connecting, you can call useSDK to get values like chainId, connected, and other important information about your wallet connection throughout your code.
Interacting with the frontend locally
If you want to play around with your dapp frontend, it’s fairly straightforward if you are using Linea Goerli testnet. Simply toggle on test networks, and the Linea testnet should be default in your MetaMask wallet!
However, if you want to play around on the anvil test chain, you’ll have to manually add the network to your MetaMask wallet, and import a wallet using the private key provided by the test chain.
You can follow the instructions to add a network manually on the MetaMask website using the following information:
-
Network name: anvil
-
New RPC URL: http://localhost:8545
-
Chain ID: 31337
-
Currency symbol: ETH
Then, you can just connect your MetaMask wallet to the imported account and switch to the test network you just added!
That’s a wrap
This is a monster of a dapp, but expect a video walkthrough to be coming out shortly. Do note that the current version of this dapp does not have a component to display your tickets, but feel free to clone the repo and try to build it yourself!
Feel free to follow @_emjlin and @lineabuild on Twitter, or @emilylin and @linea on Farcaster to stay up to date with the latest news.
Happy building!