门槛越高,卷的人越少,回报也就越高
关于Aptos的AIT3
如果不了解什么是Aptos和Ait3的,可以阅读前篇:
如果只是为了拿空投奖励,可以在群里咨询核桃壳,直接报价给服务器的验证Key;
后面的部分,默认大家完成了前三步,https://aptoslabs.com/it3
- Step1, 关联discord
- Step2, 关联测试钱包
- Step3, 完成参与调研问卷;
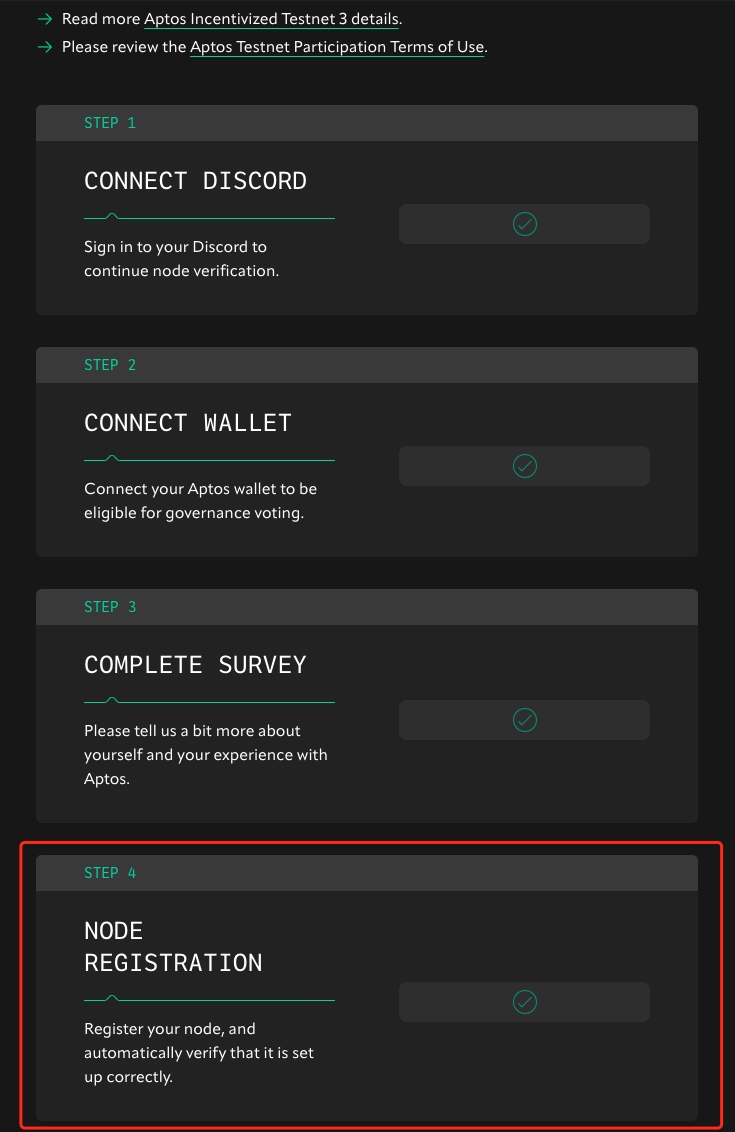
下面是从整个大的测试流程中的Step4,完成结点注册开始的。
本文是对官方文档,使用 Docker 进行验证节点的搭建进行翻译整理,对原文中不合理和表述不清的地方进行修正补齐。
原文地址:https://aptos.dev/nodes/validator-node/run-validator-node-using-docker
因为踩坑比较多,所以在配置之前,选服务器和服务器的配置环节放在明天;
Using Docker
- 关于服务器的选择和设置,下一篇再说,本篇是对官方文档的一次补齐;
- 以下操作全是在服务器系统是ubuntu-20.04版本,过高版本可能没有openssl,导致很多命令无法执行;
- 防火墙记得打开80 6180 9101这几个端口;
- 本教程中,删除了关于全节点的部分,只做验证节点也是足够了;
Step 1
Install Docker and Docker-Compose, Aptos CLI 0.3.1.官方文档没有细说,直接复制运行我下面的安装命令,即可完成 docker和aptos的程序。
sudo sh -c "apt update && apt install unzip && curl -fsSL get.docker.com -o get-docker.sh && sh get-docker.sh && service docker start && wget https://github.com/aptos-labs/aptos-core/releases/download/aptos-cli-v0.3.1/aptos-cli-0.3.1-Ubuntu-x86_64.zip && unzip aptos-cli-0.3.1-Ubuntu-x86_64.zip && mv aptos /usr/bin/"
Step 2
Create a directory for your Aptos node composition, and pick a username for your node. e.g.
配置工作文件夹,替换【配置你的节点名字】,之后还会使用;
export WORKSPACE=testnet
export USERNAME=【配置你的节点名字】
mkdir ~/$WORKSPACE
cd ~/$WORKSPACE
Step 3
将validator.yaml和docker-compose.yaml两个配置文件下载到你的工作目录中。
下面两条命令复制运行
wget https://raw.githubusercontent.com/aptos-labs/aptos-core/main/docker/compose/aptos-node/docker-compose.yaml
wget https://raw.githubusercontent.com/aptos-labs/aptos-core/main/docker/compose/aptos-node/validator.yaml
Step 4
Generate the key pairs (node owner, voter, operator key, consensus key and networking key) in your working directory.
在你的工作目录下生成密钥。运行
aptos genesis generate-keys --output-dir ~/$WORKSPACE/keys
会在你的~/$WORKSPACE/keys目录下,生成以下四个文件
- public-keys.yaml
- private-keys.yaml
- validator-identity.yaml
- validator-full-node-identity.yaml.
如果没有,则是第一步aptos的安装失败
Step 5
Configure validator information. You need to setup a static IP / DNS address (DNS is much preferred) which can be used by the node, and make sure the network / firewalls are properly configured to accept external connections. See Network Identity For FullNode for how to do this.
配置你的验证结点信息。
下面这段代码,先进行编辑,<Validator Node IP / DNS address>:。替换成你的服务器IP,Port换成本次测试用的端口,6180
cd ~/$WORKSPACE
aptos genesis set-validator-configuration \
    --local-repository-dir ~/$WORKSPACE \
    --username $USERNAME \
    --owner-public-identity-file ~/$WORKSPACE/keys/public-keys.yaml \
    --validator-host <Validator Node IP / DNS address>:<Port> \
    --stake-amount 100000000000000
命令运行后,会在~/$WORKSPACE/$USERNAME文件夹下生成两个yaml配置文件, owner.yaml和operator.yaml。
Step6
生成本次验证结点的配置文件,运行下面的命令:
aptos genesis generate-layout-template --output-file ~/$WORKSPACE/layout.yaml
编辑上面的layout.yaml文件,使用下面的配置模板。
需要对root_key进行补充,如下所示;
需求对users做修改,即前面step2中预备的用户名,因为是个数组,可以有复数个用户,保持["和]"的存在。
需要将chain_id进行修改;
最终如下图所示:
root_key: "D04470F43AB6AEAA4EB616B72128881EEF77346F2075FFE68E14BA7DEBD8095E"
users: ["<username you specified from previous step>"]
chain_id: 43
allow_new_validators: false
epoch_duration_secs: 7200
is_test: true
min_stake: 100000000000000
min_voting_threshold: 100000000000000
max_stake: 100000000000000000
recurring_lockup_duration_secs: 86400
required_proposer_stake: 100000000000000
rewards_apy_percentage: 10
voting_duration_secs: 43200
voting_power_increase_limit: 20
Step7
下载aptos的库,直接运行下面的命令
wget https://github.com/aptos-labs/aptos-core/releases/download/aptos-framework-v0.3.0/framework.mrb -P ~/$WORKSPACE
Step8
复制下面的命令,进行编译
aptos genesis generate-genesis --local-repository-dir ~/$WORKSPACE --output-dir ~/$WORKSPACE
运行完成后,会生成两个文件在你的工作目录, genesis.blob 和waypoint.txt.
Step9
当前的文件确认,在你的$workspace目录下会有以下文件,如果有对应的文件缺失,查看对应的缺失步骤。
docker-compose.yamldocker compose file to run validator and fullnodelayout.yaml: The layout file containing the key values for root key, validator user, and chain ID (from step 6).framework.mrb: The AptosFramework Move package (from step 7).waypoint.txt: The waypoint for the genesis transaction (from step 8).genesis.blobThe genesis binary that contains all the information about the framework, validatorSet and more (from step 8).keys文件夹下应该包括以下四个文件:public-keys.yaml: Public keys for the owner account, consensus, networking (from step 4).private-keys.yaml: Private keys for the owner account, consensus, networking (from step 4).validator-identity.yaml: Private keys for setting the Validator identity (from step 4).validator-full-node-identity.yaml: Private keys for setting validator full node identity (from step 4).
username文件夹下包括以下两个文件:owner.yaml: define owner, operator, and voter mapping. They are all the same account in test mode (from step 5).operator.yaml: Node information that will be used for both the Validator and the FullNode (from step 5).
Step10
运行docker
docker compose up -d
加上-d参数后,docker就会在启动后,后台运行,否则你可能不知道是否运行成功(其实已经成功)。否则如下图所示:

Step11
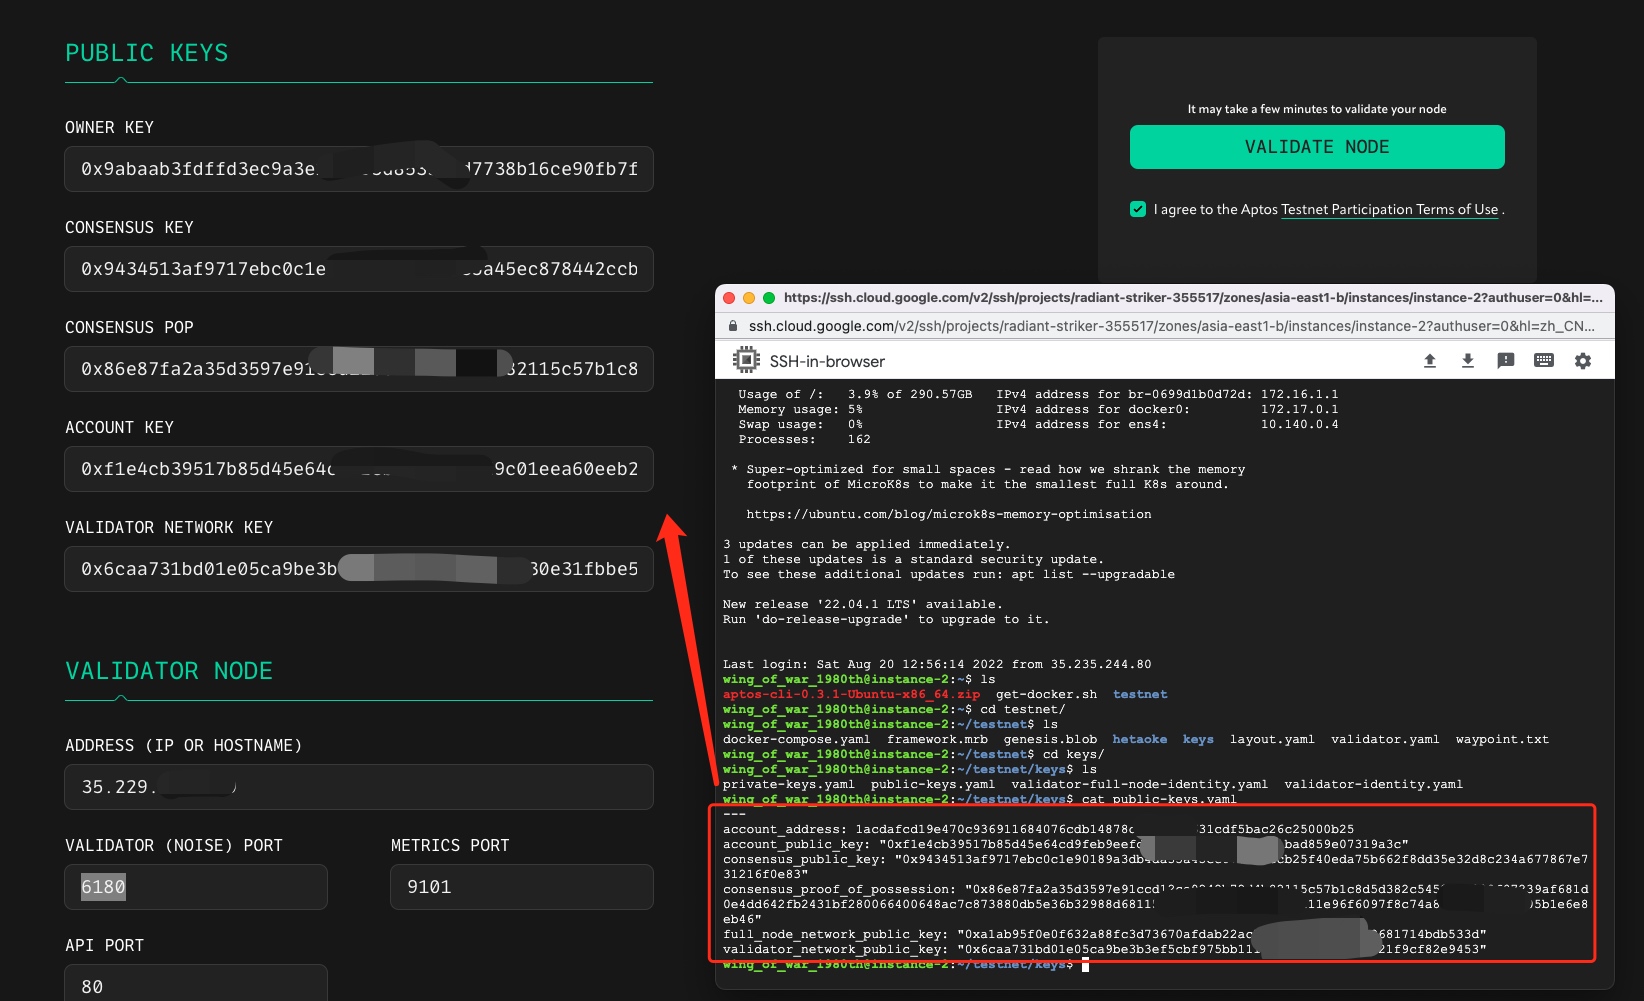
查看在keys文件夹中的public-keys.yaml
填入对应的表单中进行验证
最后
从空投的角度上来说,其实只要有人帮你运行服务器,最后拿到这几个PUBLIC KEYS即可。当然可以付费解决。
另外aptos的空投也不止公链本身,未来它的生态还有上面个项目在准备。感兴趣的可以在我的公众号中回复aptos入群沟通;
我的公众号:核桃壳战记
我的推特: