
Brought to you by @0xfan
0. Introduction
Rollups are intended to provide scaling benefits to Layer 1s. They consist of various components, such as a user client, VM, sequencer, proving system (especially for zk rollups), one or more mempools, and a bridge contract on the Layer 1. There are two primary types of rollups in use today: settlement rollups and sovereign rollups. These types differ significantly from one another.
Settlement Rollups refer to the type that relies on the smart contract on the settlement layer to verify proofs and bridge assets. This smart contract acts as the source of truth for the rollup chain. To protect this bridge smart contract, many rollup teams, like Arbitrum and Optimism, hold tight to the upgrade key to fix any apparent bugs on the rollup at any time. However, this authority, on the other hand, also poses risks for changing the code arbitrarily without being noticed.
Sovereign Rollups were introduced by Celestia, where the rollups themselves operate like a layer 1 blockchain. The Sovereign rollup itself is the source of truth, not the L1. The rollup nodes transfer fraud (validity) proofs through their own P2P network and verify them locally, while only using the base chain to store ordered transactions.
This post provides a guide to building a basic sovereign rollup that uses Celestia as the data availability (DA) and consensus layer for submitting blocks. To implement a basic transfer token function on the rollup, we will use modules like Rollkit and Ignite, and run it on a local devnet. We tested and deployed this on a laptop with the following specifications:
-
CPU: 12th Gen Intel(R) Core(TM) i5-12500H
-
OS: Ubuntu 22.10 x64
-
Memory: 7811 MB
-
Disk: 256 GB SSD Storage
1. Install Docker
- To begin, update apt-get by running the following command:
sudo apt-get update

-
To install the latest version of Docker, execute the following command:
sudo apt-get install docker-ce docker-ce-cli containerd.io docker-buildx-plugin docker-compose-plugin

2. Running Celestia’s local devnet
-
You can initiate Celestia's local devnet by running the following command:
docker run --platform linux/amd64 -p 26650:26657 -p 26659:26659 ghcr.io/celestiaorg/local-celestia-devnet:main

If you are using WSL, every time you start the WSL, you have to start the docker service by
sudo service docker startIf
sudo service docker startsays "Starting Docker: docker" butsudo service docker statusshows "Docker is not running":
sudo update-alternatives --config iptablesand select the path of
/usr/sbin/iptables-legacy
- To stop Docker, first check the container ID by running
docker ps. Then, choose the ID of the container you want to stop. For exampledocker stop a50a233aed94

-
After running a devnet, you can check the balance of the smart contract that will be used to post rollup blocks into Celestia's local network. To display this information in a more readable format, you can install
jq.curl -X GET http://0.0.0.0:26659/balance sudo apt install jq

curl -X GET http://0.0.0.0:26659/balance | jq

3. Install the Golang and set the environment variables
- To build this basic rollup based on Cosmos-SDK, you need to install Golang. First, delete the old version of the Golang package.
sudo rm -rf /usr/local/go
sudo apt-get remove golang
sudo apt-get remove golang-go
sudo apt-get autoremove
- Next, install the Golang package with version 1.19.1.
ver="1.19.1"
cd $HOME
wget "https://golang.org/dl/go$ver.linux-amd64.tar.gz"
sudo tar -C /usr/local -xzf "go$ver.linux-amd64.tar.gz"

Note that if you cannot connect to the network, it is recommended to use
https://golang.google.cn/dlinstead.
- Then, we should set the $PATH before running the rollup.
sudo nano /etc/profile
export GOROOT=/usr/local/go
export GOPATH=$HOME/gowork
export GOBIN=$GOPATH/bin
export PATH=$GOPATH:$GOBIN:$GOROOT/bin:$PATH

One can add environment variables to the user root directory in the .bashrc file to avoid repeated work. Add
source /etc/profileat the end of the file.

- Finally, you can check if the environment is working by using
go env

4. Installing Ignite CLI and Rollkit
The Ignite CLI wrapped and included everything that is needed to build a rollup. By using this, it can make the development of the rollup quicker and safer.
-
First, use the following command to install Ignite CLI:
curl https://get.ignite.com/cli! | bash

-
Then, check the version of Ignite and then build a new rollup.
ignite version ignite scaffold chain gm


- Next, you can install Rollkit by running the following code inside the
gmfolder.
go mod edit -replace github.com/cosmos/cosmos-sdk=github.com/rollkit/cosmos-sdk@v0.46.7-rollkit-v0.7.3-no-fraud-proofs
go mod edit -replace github.com/tendermint/tendermint=github.com/celestiaorg/tendermint@v0.34.22-0.20221202214355-3605c597500d
go mod tidy
go mod download

5. Running your basic sovereign rollup
- To start the rollup, navigate to the
gmfolder and download theinit-local.shscript.
wget https://raw.githubusercontent.com/rollkit/docs/main/docs/scripts/gm/init-local.sh
bash init-local.sh

- After starting the rollup, it will be connected to the local Celestia devnet that you are running. The rollup's block is then posted into the devnet, where it functions as the data availability layer.

- To test this simple rollup, you can explore it by sending its native token from one address to another.
gmd keys list --keyring-backend test
export KEY1=gm1q6kqngl06ytpgv3z5ft6cmjyke7rg3s5qfduwd
export KEY2=gm1a9eh7stvvdpf53w9rass3ka7tnwf9lng74h3cd
gmd tx bank send $KEY1 $KEY2 42069stake --keyring-backend test


-
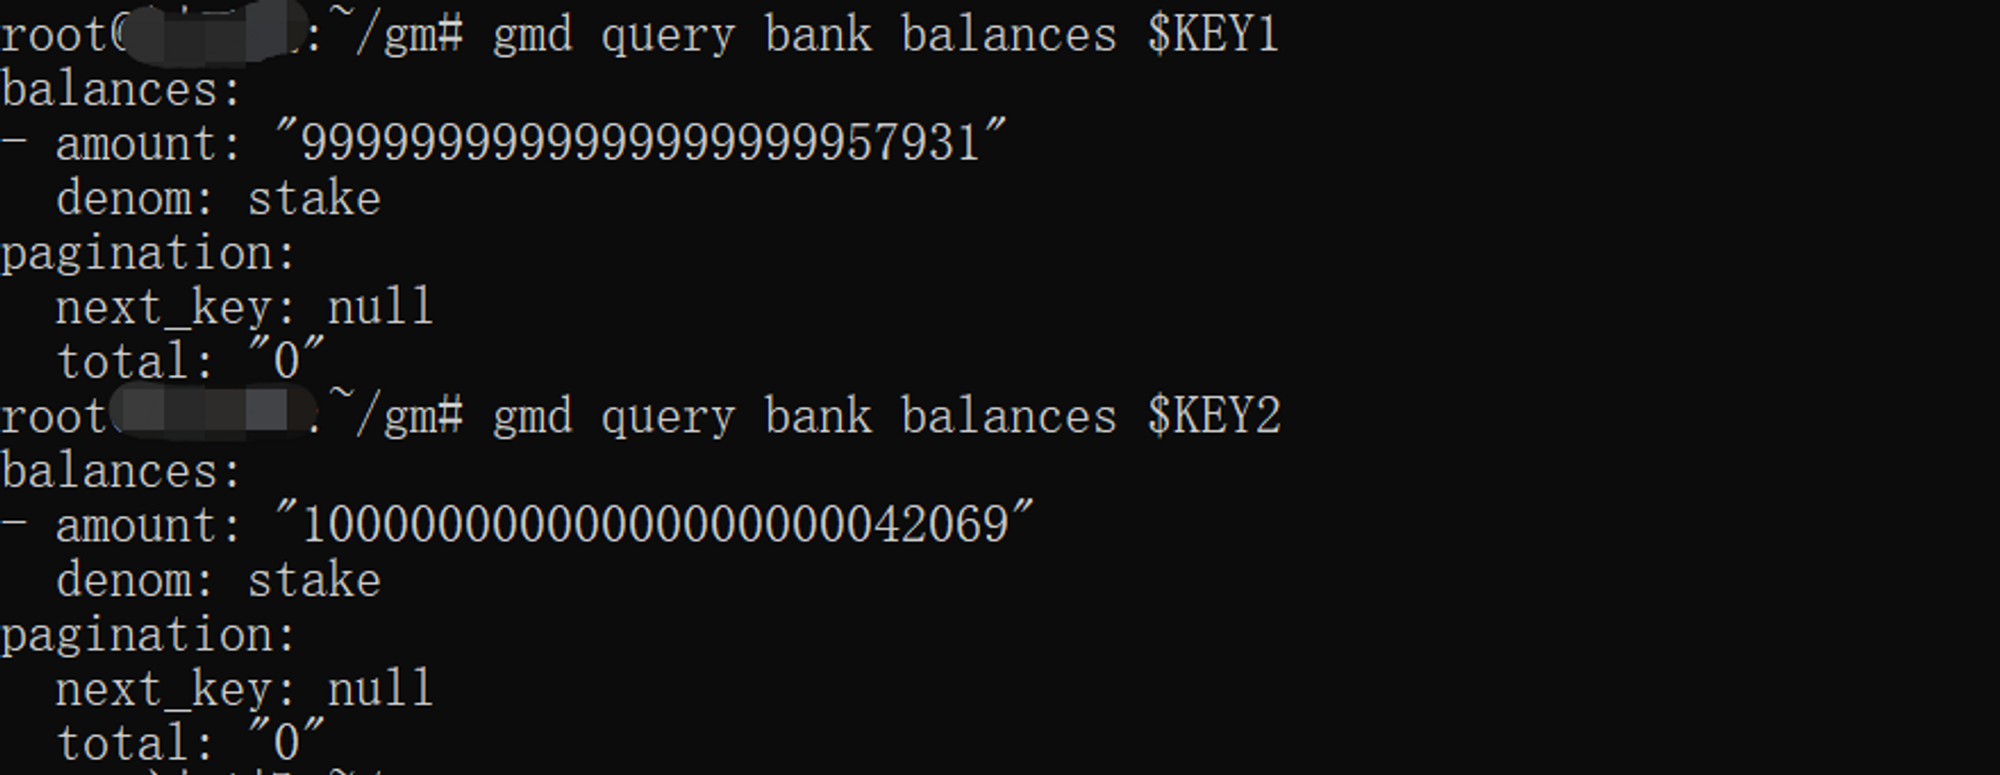
You can query the balance of an account using the following commands:
gmd query bank balances $KEY1 gmd query bank balances $KEY2
6. Conclusion
Starting a sovereign rollup on Celestia's local devnet using well-developed modules like Rollkit and Ignite is very convenient. This post does not cover how to add more functionality to the rollup, which is slightly irrelevant to the post's topic and will be explored in the future.