Preparation:
Firstly, you need to prepare some “Matic” in your on-chain wallet, as a gas fee for the Polygon network. The gas fee on the polygon is cheap, probably less than 1 MATIC.
Here are some links to the exchanges you can go through to buy Matic:
Binance: https://www.binance.com/en/trade/MATIC_USDT
Kucoin:https://trade.kucoin.com/trade/MATIC-USDT?spm=kcWeb.B1homepage.Header3.1
Bybit:https://www.bybit.com/en-US/trade/spot/MATIC/USDT
You can use these links to purchase USDC:
Binance:https://www.binance.com/en/trade/USDC_USDT
Kucoin:https://trade.kucoin.com/trade/USDC-USDT?spm=kcWeb.B1homepage.Header3.1
Bybit:https://www.bybit.com/en-US/trade/spot/USDC/USDT
Withdraw your USDT, USDC, and Matic to your on-chain wallet from the exchange. Let's take Binance as an example.
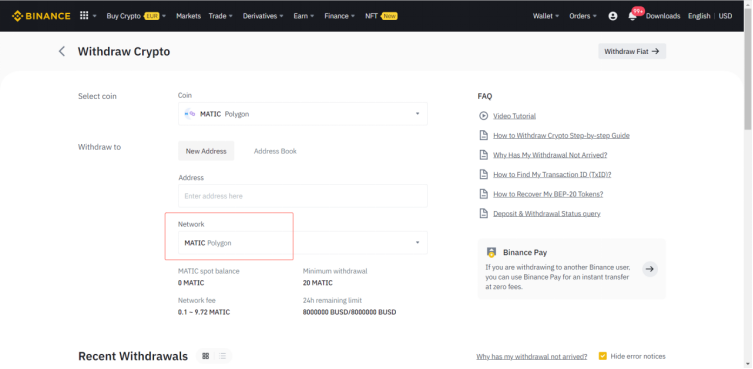

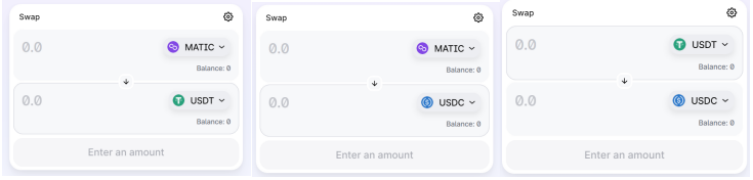
If your exchange doesn’t support USDT/USDC withdrawals on Polygon network, you can withdraw Matic to your on-chain wallet and use Uniswap on Polygon to swap.
You can access Uniswap through this link, and choose Matic/USDC pair, Matic/USDT pair, USDT/USDC pair, and swap the amount that you want.
https://app.uniswap.org/#/swap?chain=polygon
Finally, you get Matic(at least 1), USDC(at least 10), USDT(at least 10)on the polygon network in your on-chain wallet.
How to interact with izumi Finance:
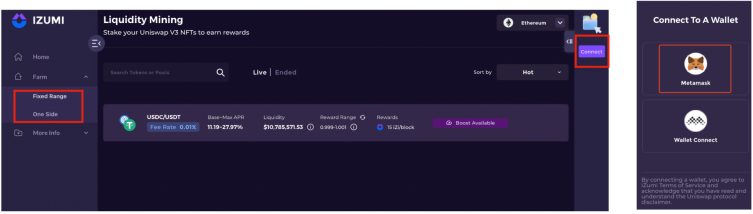
1. Visit the official website: izumi.finance and go to the farm function from the left sidebar.
Go to the “Fixed Ranges”, here we take USDC/USDT as an example.
Click the "Connect Wallet" button to connect your wallet. izumi's LiquidBox is supporting liquidity mining on Ethereum and Polygon right now,
Select the Polygon network at your wallet, and the available farming pools will be displayed.
2.Click the “Details” button “🔽” on the right of the “ USDC/USDT”.
Click “Get Uniswap V3 NFT”, Then approve both USDC and USDT on the right side.

3. Set the volume of USDC and USDT, input the number of USDT ( 5 USDT), it will automatically give the number of USDC. Price range is seated as the default, you can change it as you wish, but following the default price range will get the maximum APR.
After you click "Add Liquidity", we will help you to get a Positions NFT from Uniswap V3. When you get your Positions NFT, you can click the “Approve” button and then click “Stake” to start farming on izumi.
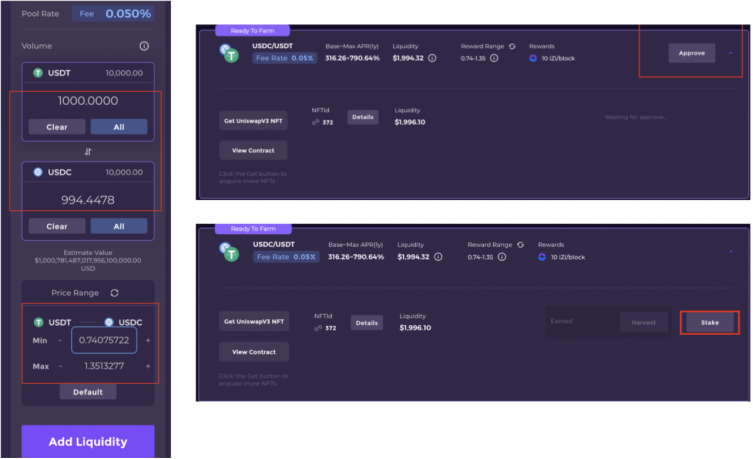
6. You also can add other Positions NFTs may be in different price ranges by clicking “Get UniswapV3 NFT” and repeat this process.
5. Wait several seconds, you can see that you have successfully added liquidity to the izumi platform. Please stake your liquidity for at least two days, because the snapshot only is taken once a day.
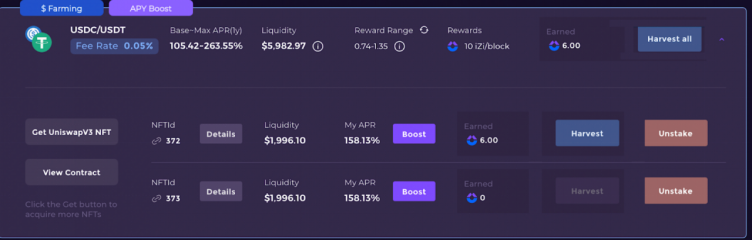
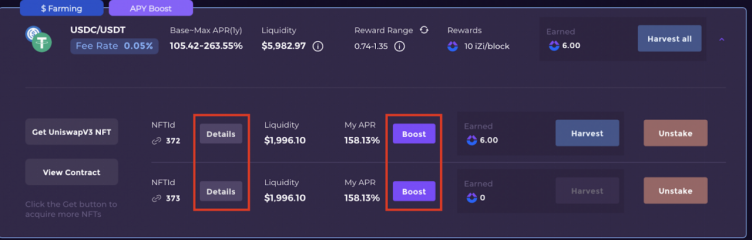
6. You can boost your APR by clicking the “Boost” button. You can learn more details(Your Liquidity,Your APR etc.) by clicking the “Details” button.
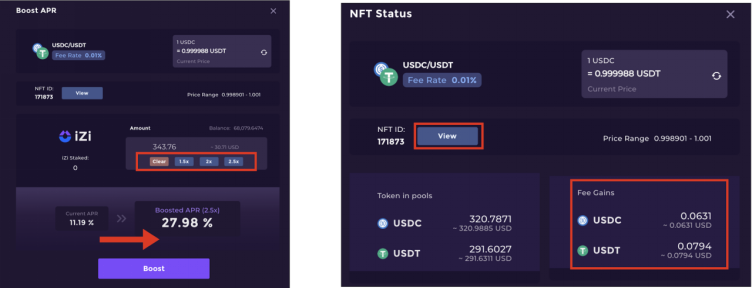
After clicking “Boost”, a pop-up window will show up and it can be used to boost your APR. You can select a boost rate, the program will calculate how many iZi token should be staked.
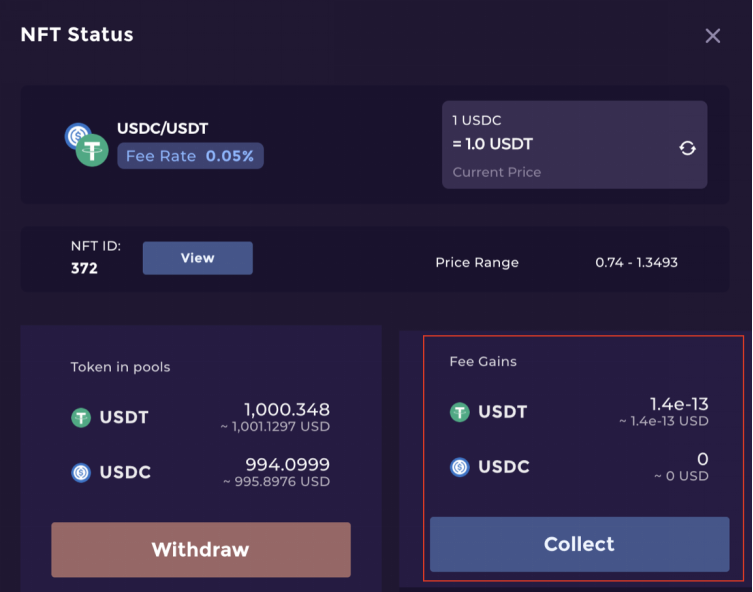
After clicking “Details”, a pop-up window will show up and it will show your Positions NFT’s details. Click “View” will show your Positions NFT on etherscan.io. You can also find the trading fees you have got on Uniswap V3.
7. Click the “Harvest all” or each “Harvest” button, the reward will be sent to your wallet.

8. About withdraw, you should firstly “Unstake” your NFT, and then click the “Details”.
There will have two buttons in the pop-up window of details, "Withdraw" & "Collect".
The “Collect” means to gain the trading fees from UniV3. Click “Withdraw”.