
Building a powerful decentralized application (or a “dapp”) is easier than you think! Dive into this walkthrough to learn how to build using The Graph, a subgraph, Python, and Flask!
TLDR? Watch the video version of this tutorial!
And here is the completed repository of this project
Imagine being able to see every single transaction that has gone through Bank of America.
All of the pseudonymized users, all of the transaction amounts, the date, the time… all of it!
Here are some analysis and datapoints that I’d be curious to see:
-
What are the biggest transactions in the history of Bank of America?
-
What transactions typically occur the week before and after a person books a hotel room?
-
How does spending change after payday for people making between $50k and $75k?
-
When interest rates go up or down, how does that affect real-estate purchases?
Now imagine you could use that data to create your own app.
Powerful stuff!
Now while we cannot access Bank of America transactional data as it is a centralized bank, we CAN do that with the decentralized Ethereum blockchain, as all of the data is public!
So let’s get to work and build a simple app based on decentralized blockchain data, also known as a “dapp.”.
Learning Objectives
By the end of the article, you should know how to:
-
Set up a Python web server with Flask
-
Access blockchain data through an API known as a Subgraph - powered by The Graph Protocol
-
Present this blockchain data clearly in a table.
-
Take what you’ve learned and build your own custom dapp!
What We Are Building
Our dapp is going to find the biggest swaps ever performed on the token exchange, Uniswap.
Let’s name it Top Swaps!
Here is what our dapp will look like when completed:

What is Uniswap?
Uniswap is an exchange built on the Ethereum blockchain, which means that it allows users to easily interact with blockchain transactions of tokens. This is similar to how the New York Stock Exchange allows individuals to quickly and easily exchange stocks, Uniswap allows individuals to quickly and easily exchange tokens.
Personally, I'm a HUGE fan of Uniswap as it doesn’t ask its users to trust the custody of their tokens to a centralized exchange, such as with FTX (and we all saw what happens when a centralized exchange takes these private keys to do illicit things!).
All users retain full security within their accounts, and the code is fully open-sourced for auditing.
To read more about Uniswap, check out this article:
Lets Build!
Set Up Your Virtual Environment
In your code editor, open up your terminal and create a virtual environment.
In python (and many other languages), it’s best practice to use virtual environments as they keep your installed packages separate from your other projects. To read more on why virtual environments are amazing, check out this article: https://www.geeksforgeeks.org/python-virtual-environment/
Let's create a new virtual environment.
python3 -m venv .venv
Nice! .venv is your new virtual environment!
Now we have to activate the virtual environment.
If you are working in Linux or Mac, you’ll use this:
source .venv/bin/activate
If you’re on windows, you can activate your virtual environment using this:
.venv/bin/activate.bat
Install Dependencies
Our dapp requires the following items to be installed in our virtual environment.
-
Flask - the python webserver we will be using
-
Documentation: https://flask.palletsprojects.com/en/2.2.x/
-
Short video introduction: https://www.youtube.com/watch?v=2BbuB8QP1D4
-
-
Dotenv - allows our dapp to pass secure information around our files safely
-
Documentation: https://pypi.org/project/python-dotenv/
-
Short video introduction: https://www.youtube.com/watch?v=ryVzkQAtpKQ
-
-
GraphQL Client - allows for our python app to make GraphQL queries
- Documentation: https://github.com/graphql-python/gql
-
JsonToHTML - takes a Json file and converts it to a HTML table
- Documentation: https://pypi.org/project/json2html/
To install all of these at once, use this command:
pip install Flask python-dotenv json2html
As well as:
pip install ‘gql[all]’
Start our Flask Server
In your home directory of subgraph-to-dapp, create a file called app.py
Copy/paste this code into the file.
This code imports what is required to run our dapp as well as starts the Flask server when Flask is run.
from flask import Flask, render_template, request
from dotenv import load_dotenv
from json2html import *
from gql import Client, gql
from gql.transport.aiohttp import AIOHTTPTransport
import os

app = Flask(__name__)
if __name__ == '__main__':
   app.run()
Now let’s tell Flask that this file is the main file that should run when Flask is activated by entering this code in the terminal:
export FLASK_APP=app.py
Let's also tell Flask that it should be in Debug Mode, which means it will quickly restart the server any time we change the code so we don’t have to manually restart it.
export FLASK_DEBUG=1
We now have a server ready to run! But before we run it, let’s set up a simple landing page so we can actually see if our server is running properly.
Connecting our Server to Our Front End
Add this code below the code you have previously written:
@app.route("/", methods=["GET", "POST"])
def index():
   return render_template('index.html')
Now create a folder in your subgraph-to-dapp directory named templates and create a file called index.html
Your project structure should look something like this:

Copy paste this code into index.html:
<!DOCTYPE html>
<html lang="en">
   <head>
       <meta charset="UTF-8" />
       <meta http-equiv="X-UA-Compatible" content="IE=edge" />
       <meta name="viewport" content="width=device-width, initial-scale=1.0" />
       <title>Top Swaps</title>
   </head>
   <body>
       <h1>Testing our server!</h1>
   </body>
</html>
We now have a basic landing page ready to connect to our Flask server.
Now let's run our Flask server!
flask run
You should see this code! Your server is running!

Check the website it suggests http://127.0.0.1:5000/ to see if your index.html is also working properly.

It works!
Create a Form For User Input
The users of Top Swaps will input how many Top Swaps they would like to see and Top Swaps will dynamically update to provide that data.
To do this, we need to update our index.html to have a form that will get the input that we need from the user:
<!DOCTYPE html>
<html lang="en">
   <head>
       <meta charset="UTF-8" />
       <meta http-equiv="X-UA-Compatible" content="IE=edge" />
       <meta name="viewport" content="width=device-width, initial-scale=1.0" />
       <title>Top Swaps</title>
   </head>
   <body>
       <form method="post">
           <h1>
               Want to see the Top Swaps in the history of Uniswap? Enter the number of Top Swaps you want to see!
           </h1>
           <p><input type="number" name="top_swap_count" /></p>
           <p><input type="submit" value="submit" /></p>
       </form>
   </body>
</html>
We added some context as well as created an input and submit component that is tagged with
name="top_swap_count"
Which will allow our app.py to both recognize and import the inputted value so it can be processed.
If you check your webpage, it should update to look like this:
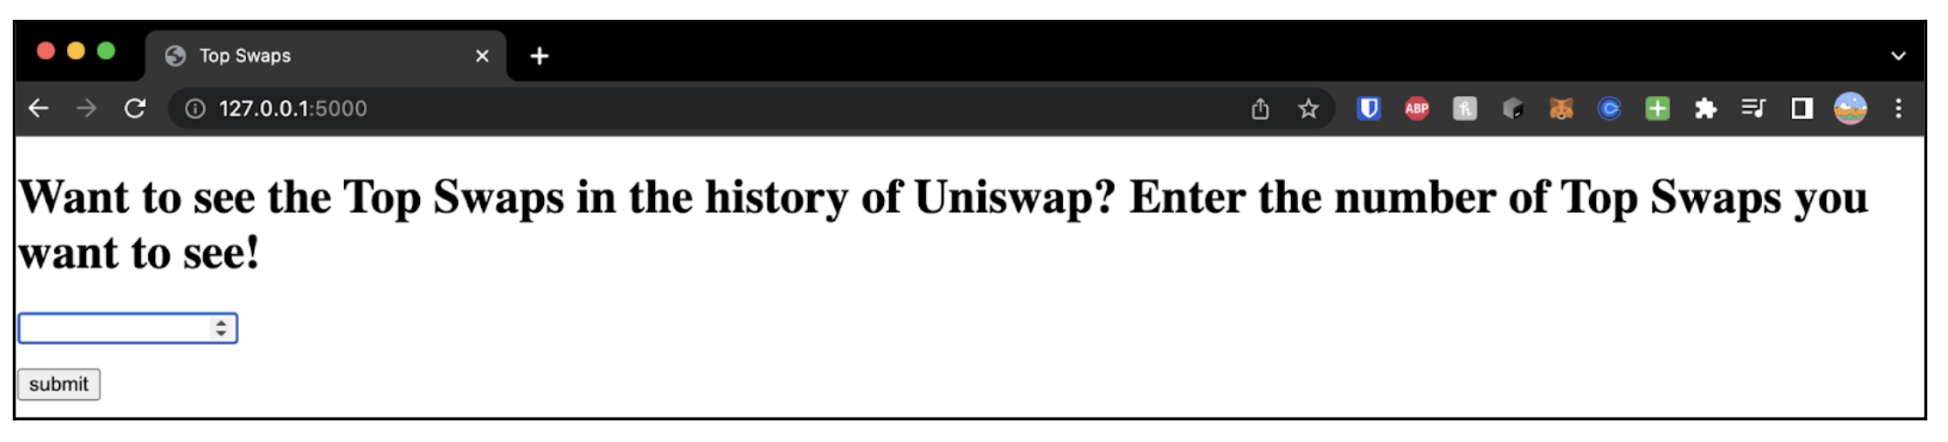
Congratulations! You have set up your Flask server as well as your input fields for your users!
Connecting our Server to the Uniswap Subgraph
The blockchain is a HUGE public database that is not easily accessed. In the past, searching blockchain data was terribly costly and time-consuming.
Luckily, The Graph (www.thegraph.com) has done the hard work of creating a system that allows developers easy and affordable access to this data.
You access this blockchain data through an API they developed called a Subgraph.
Subgraphs can access different parts of the Ethereum blockchain depending on how the Subgraph is designed.
The Graph has two types of Subgraphs:
Hosted, and Decentralized.
-
Hosted: a centralized Subgraph that is hosted by The Graph
-
Decentralized: a Subgraph that is published on the The Graph Network, the decentralized network of indexers around the world!
Read more about The Graph, Subgraphs, and The Graph Network at https://thegraph.com/docs/en/
Lets go to The Graph Explorer page and find the Uniswap V3 Decentralized Subgraph which allows access to Uniswap blockchain data, then design our GraphQL query for our dapp.

Designing our GraphQL Query Using Subgraph Playground
Go to the Playground button.
This will show you a wonderful GraphQL interface that will allow you to easily query the Subgraph in small test queries that you might want to use in your dapp!
Read more about GraphQL here: https://graphql.org/
Press the big “Play” button in the middle of the page to run a test query that’s prepopulated with a “tokens” and “rewardTokens” query.

This Subgraph is reading from the Ethereum blockchain and the data is ready to be used by you! This would be impossible with current banking institutions such as Bank of America!
Let’s click on this button on the right of the Playground where we can design our query to find the Top Swaps of this Subgraph:
Let’s design our Top Swaps query! We want to know:
-
The value of the token transaction
-
Who its from and who it's going to
-
When it occurred
-
The names of the tokens swapped
Click around the Explorer tab and create a GraphQL query that contains this information. Once completed, your GraphQL query should look like this:

You can test your GraphQL query once you’re done by clicking the big “Play” button in the middle of the Playground.

Perfect. This is the data that we need!
Let’s copy the GraphQL query we designed and bring it into our app as a variable so we can use it!
Our app.py file should now look this:
app = Flask(__name__)
if __name__ == '__main__':
  app.run()

subgraph_gql_query = """
   {
   swaps(orderBy: amountInUSD, orderDirection: desc, first: 10) {
       amountInUSD
       from
       to
       timestamp
       tokenIn {
       name
       }
       tokenOut {
       name
       }
   }
   }
"""


@app.route("/", methods=["GET", "POST"])
def index():
   return render_template('index.html')
Great! Now we have the query variable we want for our dapp.
Accessing A Subgraph’s Endpoint
Now let’s find the Uniswap Subgraph endpoint address where we can send our beautifully designed query:
-
Go to the Uniswap V3 Ethereum Subgraph found on Subgraph Explorer (at the time of writing this article, this is the most current link though it might be updated to a newer subgraph by now. Go search Subgraph Explorer to confirm!)
-
Click the “Query” button in the top right corner and bring that link into your app.py workspace.

3. Copy the Query URL and bring it into your app.py file.

Your app.py should look like this:
from flask import Flask, render_template, request
from dotenv import load_dotenv
from json2html import *
import requests
import json
import os


app = Flask(__name__)
if __name__ == '__main__':
  app.run()


subgraph_endpoint = 'https://gateway.thegraph.com/api/[api-key]/subgraphs/id/ELUcwgpm14LKPLrBRuVvPvNKHQ9HvwmtKgKSH6123cr7'


query = """
   {
   swaps(orderBy: amountInUSD, orderDirection: desc, first: 10) {
       amountInUSD
       from
       to
       timestamp
       tokenIn {
       name
       }
       tokenOut {
       name
       }
   }
   }
"""


@app.route("/", methods=["GET", "POST"])
def index():
   return render_template('index.html')
We now have the endpoint address of the Uniswap Subgraph to which we will be sending our Playground-designed query!
Retrieving and Implementing our API Key Securely
The Uniswap Subgraph has a “lock” on it to keep it secure.
To open this lock and use the Subgraph, we need an API Key. Let's go get that key!
- Click “Manage API Keys”

Create and connect your Metamask wallet if you haven’t already. Think of this as your own personal wallet - keep it SECURE!
-
What is Metamask? https://www.youtube.com/watch?v=YVgfHZMFFFQ

Create your first API key
The Graph gives you 1000 free queries with your first API key! Let’s use those queries to test out our new dapp.


Create a .env file in your home directory, then put your API Key in there. Your file structure should look something like this:

We’ll be implementing environment variable security with this .env file. If you don’t know about this concept, you need to watch the video links below!
To implement this security, include these final steps to your project:
-
Use
dotenv()to secure this API Key in your.envfile by following these video or written instructions:-
Video tutorial:Using Python Dotenv to Manage Environment Variables
-
Written tutorial: https://paulapivat.com/technical_notes/example_tech/python_dotenv/
-
-
After you’ve set up your
dotenv(), lets import that key into our query url by using f-strings -
Your
app.pyEnvironment Variable code should look something like this when finished with this section.
I’ve added a print() function to confirm that your API key is being imported correctly.
# Environment Variable Management
load_dotenv()
api_key = os.getenv('SUBGRAPH_API')
subgraph_endpoint = f'https://gateway.thegraph.com/api/{api_key}/subgraphs/id/ELUcwgpm14LKPLrBRuVvPvNKHQ9HvwmtKgKSH6123cr7'


print('This is my API key: ' + api_key)
AMAZING!
We’ve got our API key into the dapp!
Let’s make our query accept the number that we have in our front end
Running our Query Through the Uniswap Subgraph
Let’s go back to app.py and start building out the logic that creates Top Swaps!
To begin passing our GraphQL query, we should use the GraphQL Client we imported earlier!
As per the GraphQL Client documentation, the client needs a “transport” and “client” variable written right below our Environment Variable Management.:
# Environment Variable Management
load_dotenv()
api_key = os.getenv('SUBGRAPH_API')
subgraph_endpoint = f'https://gateway.thegraph.com/api/{api_key}/subgraphs/id/ELUcwgpm14LKPLrBRuVvPvNKHQ9HvwmtKgKSH6123cr7'

transport = AIOHTTPTransport(
   url=subgraph_endpoint
)

client = Client(
   transport=transport,
   fetch_schema_from_transport=True,
)
Lets update our GraphQL query that we found previously to be dynamically updated by wrapping it in a function as such, written below your previous code:
load_dotenv()
api_key = os.getenv('SUBGRAPH_API')
subgraph_endpoint = f'https://gateway.thegraph.com/api/{api_key}/subgraphs/id/ELUcwgpm14LKPLrBRuVvPvNKHQ9HvwmtKgKSH6123cr7'

transport = AIOHTTPTransport(
   url=subgraph_endpoint
)

client = Client(
   transport=transport,
   fetch_schema_from_transport=True,
)

def update_subgraph_query(input_number):
   subgraph_gql_query = gql(
               """
               {
               swaps(orderBy: amountInUSD, orderDirection: desc, first: replaceMe) {
                   amountInUSD
                   from
                   to
                   timestamp
                   tokenIn {
                   name
                   }
                   tokenOut {
                   name
                   }
               }
               }
           """.replace('replaceMe', input_number))
   return subgraph_gql_query
You’ll see now that this function takes an input_number and dynamically puts that number into the GraphQL query before returning the updated query. Amazing!
Let’s take our newly updated query and query the subgraph, then save it as a new variable, ‘response’, then print its contents:
@app.route("/", methods=["GET", "POST"])
def index():
   if request.method == "POST":
       swapInputNumberData = request.form["top_swap_count"]
       subgraph_gql_query_result = update_subgraph_query(swap_input_number_data)
       response = client.execute(subgraph_gql_query_result)
       print(response)


       return render_template('index.html')
Enter and submit a number in your webpage:

Boom! You should see your data in your terminal!

Let's take our data and bring it into Top Swaps front-end!
Update your index.html with this code:
<!DOCTYPE html>
<html lang="en">
   <head>
       <meta charset="UTF-8" />
       <meta http-equiv="X-UA-Compatible" content="IE=edge" />
       <meta name="viewport" content="width=device-width, initial-scale=1.0" />
       <title>Top Swaps</title>
   </head>
   <body>
       <form method="post">
           <h1>
               Want to see the Top Swaps in the history of Uniswap? Enter the
               number of Top Swaps you want to see!
           </h1>
           <p><input type="number" name="top_swap_count" /></p>
           <p><input type="submit" value="submit" /></p>
       </form>
       <div>{{ response }}</div>
   </body>
</html>
Enter and submit a number in your dapp. Boom! All of your data should be present on your dapp’s front-end.

Now let's take that data and make it pretty!
-
Add this single line of code below our
responsevariable that will first properly format, then convert our data into a nice table. -
Also update the return to
json_tableto reflect we’ve converted the data into a table!
@app.route("/", methods=["GET", "POST"])
def index():
   if request.method == "POST":
       swap_input_number_data = request.form["top_swap_count"]
       subgraph_gql_query_result = update_subgraph_query(swap_input_number_data)
       response = client.execute(subgraph_gql_query_result)
       json_table = json2html.convert(json = response)

       return render_template('index.html', json_table = json_table)
   else:
       return render_template('index.html')
3. In index.html, replace {{ response }} with {{ json_table | safe }} to allow the HTML to run properly in our dapp.
<!DOCTYPE html>
<html lang="en">
   <head>
       <meta charset="UTF-8" />
       <meta http-equiv="X-UA-Compatible" content="IE=edge" />
       <meta name="viewport" content="width=device-width, initial-scale=1.0" />
       <title>Top Swaps</title>
   </head>
   <body>
       <form method="post">
           <h1>
               Want to see the Top Swaps in the history of Uniswap? Enter the number of Top Swaps you want to see!
           </h1>
           <p><input type="number" name="top_swap_count" /></p>
           <p><input type="submit" value="submit" /></p>
       </form>
       <div>{{ json_table | safe }}</div>
   </body>
</html>
This data is now formatted in a super nice table!

We’re done!
You created your first dapp!
Hopefully this was helpful in getting you started in dapp development.
Here is the completed repository for you to look over: https://github.com/marcusrein/subgraph-to-dapp
Feel free to reach out and happy developing!
–
Marcus Rein