Salam & hi readers! Welcome to my first blogpost. Several weeks ago, I alongside members from my university joined a mobile application competition organized by Universiti Tun Hussein Onn Malaysia (UTHM) and compete with other public universities in Malaysia. We were representing Universiti Malaya and won second place! So I thought of sharing the technical problems I faced when building the mobile app here.
Here is the table of contents of which the topics I will be talking about:
-
The Motivation
-
A Bit About Blockchain, Web3, Smart Contracts and NFT
-
Why an NFT Marketplace App?
-
Problems I Encountered (& How I Tackled It!)
-
Finding a wallet connector tool supported on React Native
-
Figuring out the NFT smart contract
-
Figuring out the marketplace trading contract
-
Finding a tool for uploading an image & its metadata to IPFS
-
Figuring the mechanism for updating database for confirmed transactions in Ethereum
-
6. Ironing out build errors
-
-
Conclusion
The Motivation
Hackathons have always been an opportunity for me to build stuff and test out technical ideas.
Having myself working as a Front-End developer intern in Digi-X last year for 6 months as part of compulsory Industrial Training, it has provided me with some experience dealing with React Native framework in developing a mobile app. So I wanted to test further my front-end development skills.
In late 2021, I got myself to the whole crypto/blockchain rabbit hole as I began reading books about Bitcoin, Ethereum, and bunch of academic papers on blockchains out of curiosity and was fascinated with that this technology has to offer. Since then, I’ve been wanting to get myself familiar with the whole Ethereum development ecosystem, as in my personal opinion, it is the best blockchain platform to start with when one is still fresh and new into web3 space.
I would also be doing my academic Final Year Project 1 and 2 on building a student campus voting system using Ethereum (more about this soon!). So by picking up Solidity and familiarize myself with the whole Ethereum ecosystem, I thought I would kill two birds with one stone, as it would also be a preparation (at least on the technical side) for my FYP.
A Bit About Blockchain, Web3, Smart Contracts and NFT
Blockchain is a distributed ledger that is immutable, auditable and timestamped. Bitcoin is considered the first ever kind of successful blockchain, and Ethereum extended the capabilities of blockchains by emphasizing the notion of smart contracts.
Web3 is a term coined (pun intended) by Gavin Wood, the co-founder and one of early core developers of Ethereum, proposing the idea of using decentralized public blockchains for websites on internet.
Smart contracts are custom programs that stored on the blockchain. One can think of blockchains like state machines, where for any given time, they maintain a certain state of the ledger (balances, etc). Every state change on the blockchain is done through transactions under the rules of the consensus protocol. That means any function invoked in the smart contract program that produces change of blockchain state, requires user to sign transactions.
In the case of Non-Fungible Tokens (NFTs), they are custom digital assets that exist on the blockchain, the same way BTC is an asset (and the only asset) in Bitcoin network. Ethereum allows for custom assets to be minted through ERC-20, ERC721, ERC1155 smart contract standards. The cool thing about NFTs is that they allow for a closer artist-consumer relationship, where for every art that the artist created, they don’t need to rely on trusted third party to issue and sell their art to buyers.
As every transactions on blockchains are public, artists and its consumers can have a crytographically-verified guarantee for full custody on their digital assets, as well as know the history of transactions.
In the case of Ethereum, each NFT is a smart contract that follows ERC721 or ERC1155 standard. That means, if you use the same account to connect to any NFT dApps, they will recognize your minted NFTs regardless which dApp you use to mint it from, as long as the smart contract implements those standard.
Why an NFT Marketplace App?
The theme of the competition was “Kuasakan Bisnes dengan Digitalisasi” (empower your business with digitalization). That rhymed well with building a dApp platform as much of web3 is about further digitizating businesses with the use of blockchains.
I thought about doing a platform, as a platform is essentially a place where producers and consumers trade goods/services with each other through the means of using digital technologies.
I was fascinated with how much experimentation there is in the web3 space. There are lots of cool projects going on, among are Decentralized Exchanges (DEX), stablecoins, GameFi, and of course, NFT.
I decided to try out doing an NFT project given it’s already quite established now with the existence of with OpenSea, Rarible and other NFT platforms. Another reason is there are lots of learning resources out there in YouTube and GitHub that I can refer to.
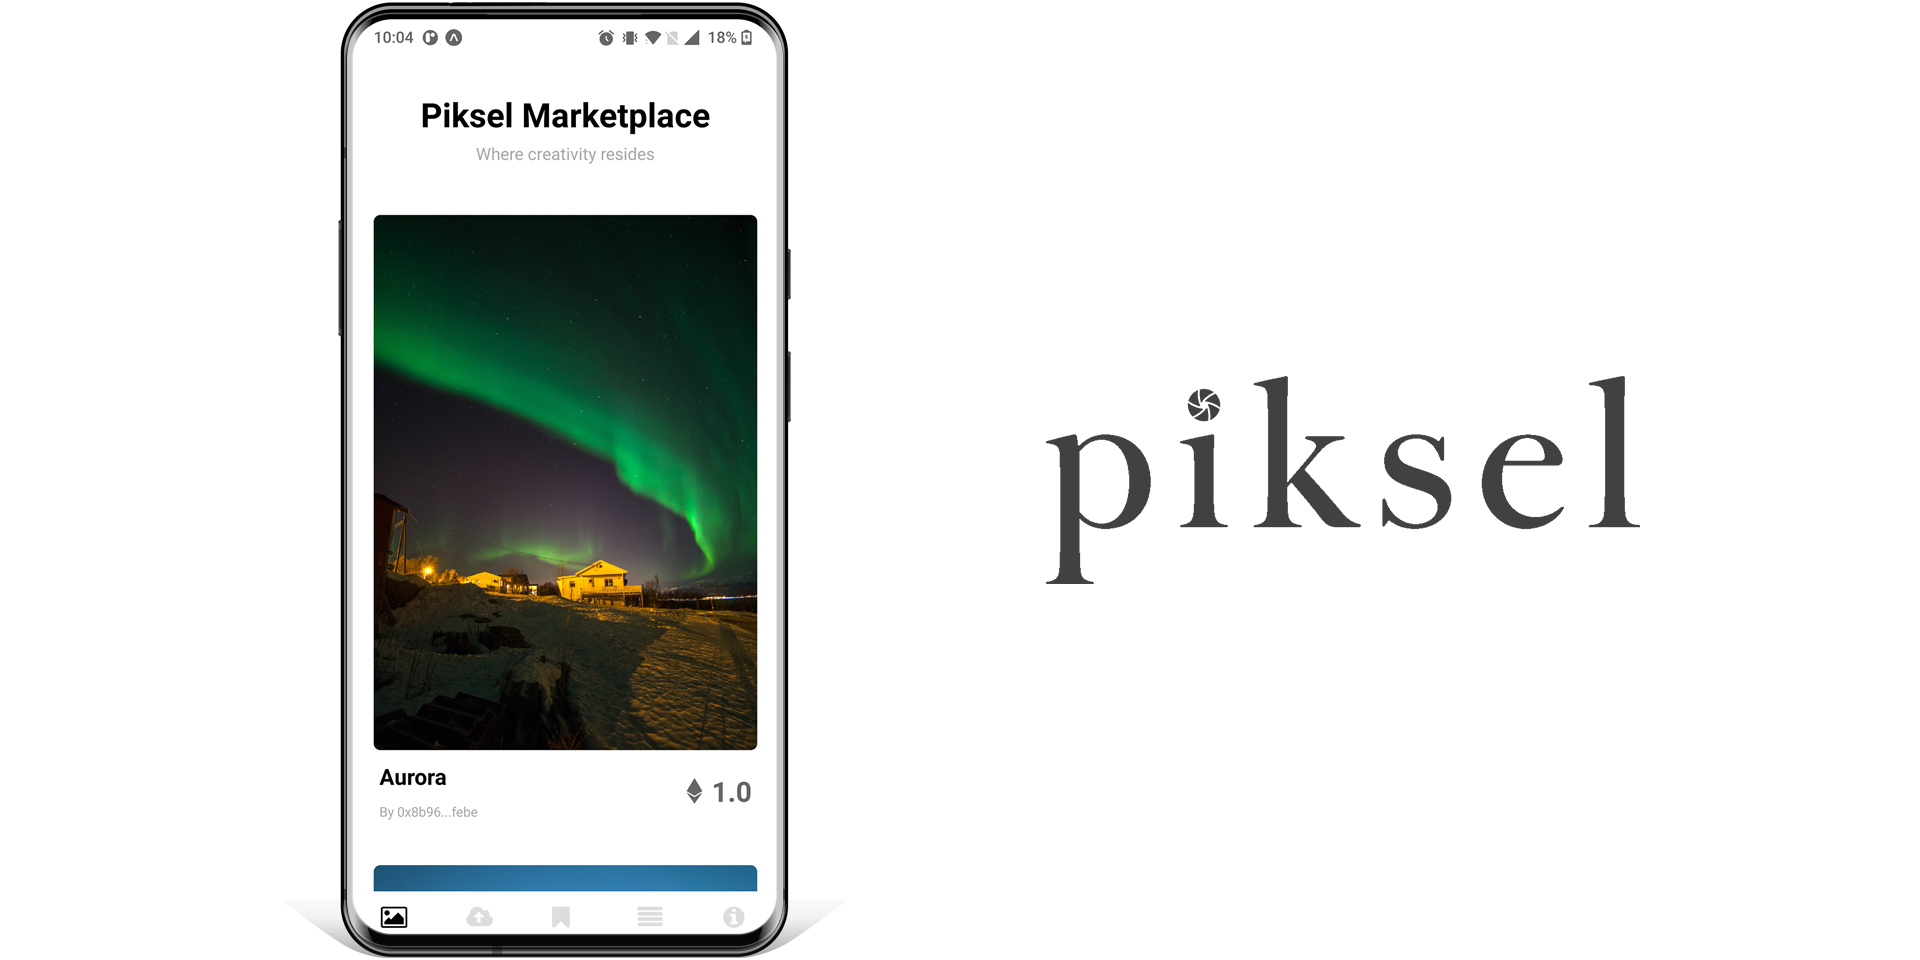
We pitched this project as a platform where photographers can monetize their creative photography art in the form of NFTs, thereby bringing closer together the artist-consumer relationship I mentioned above. We called this application “Piksel”, a Malay word borrowed from the English word “Pixel”, meaning one unit of a screen.
Problems I Encountered (& How I Tackled It!)
1. Finding a wallet connector tool supported on React Native
I noticed dApps people use in web3 are usually run on desktop web browsers with their wallets installed as browser extensions. So what about dApps on mobile? From this initial observation, I became sceptical on the feasibility of developing anything web3 on mobile because there just aren’t many examples around.
How would you connect a React Native app to an existing MetaMask Android/iOS app so you can sign transactions, like one would normally do on web? Luckily, I found a handy GitHub repo of a sample React Native app with WalletConnect. WalletConnect is an open-source protocol for establishing connections with crypto wallets. I set up Infura as the web3 provider.
At first, I started running the sample app by signing a “Hello World” message with MetaMask installed in my phone and connected to my test account. Then I continued experimenting to call a simple integer increment() function in a smart contract I deployed in Goerli testnet. Was cool to know I could interact with smart contracts from a React Native app! (here is the transaction)
So I thought: “Hey, if this React Native sample app can interact with one smart contract deployed in Ethereum, by right, it could also interact with any smart contracts, which means, I could indeed build a simple NFT marketplace on a mobile app!”
2. Figuring out the NFT smart contract
As previously mentioned, NFTs in Ethereum are basically made of ERC721/ERC1155 smart contracts. And inside those contracts, there’s a built-in code that keeps track of user’s balances of the specific NFT.
Open Zeppelin Contracts Wizard offers useful code templates to build ERC721 contracts. I ticked only the necessary checkboxes on features I’d like to have, deploy them on Goerli ETH testnet, and voila! In this case, I named my NFT “PhotoToken”!, cause I intend the NFT marketplace a place for photographers to sell their images.
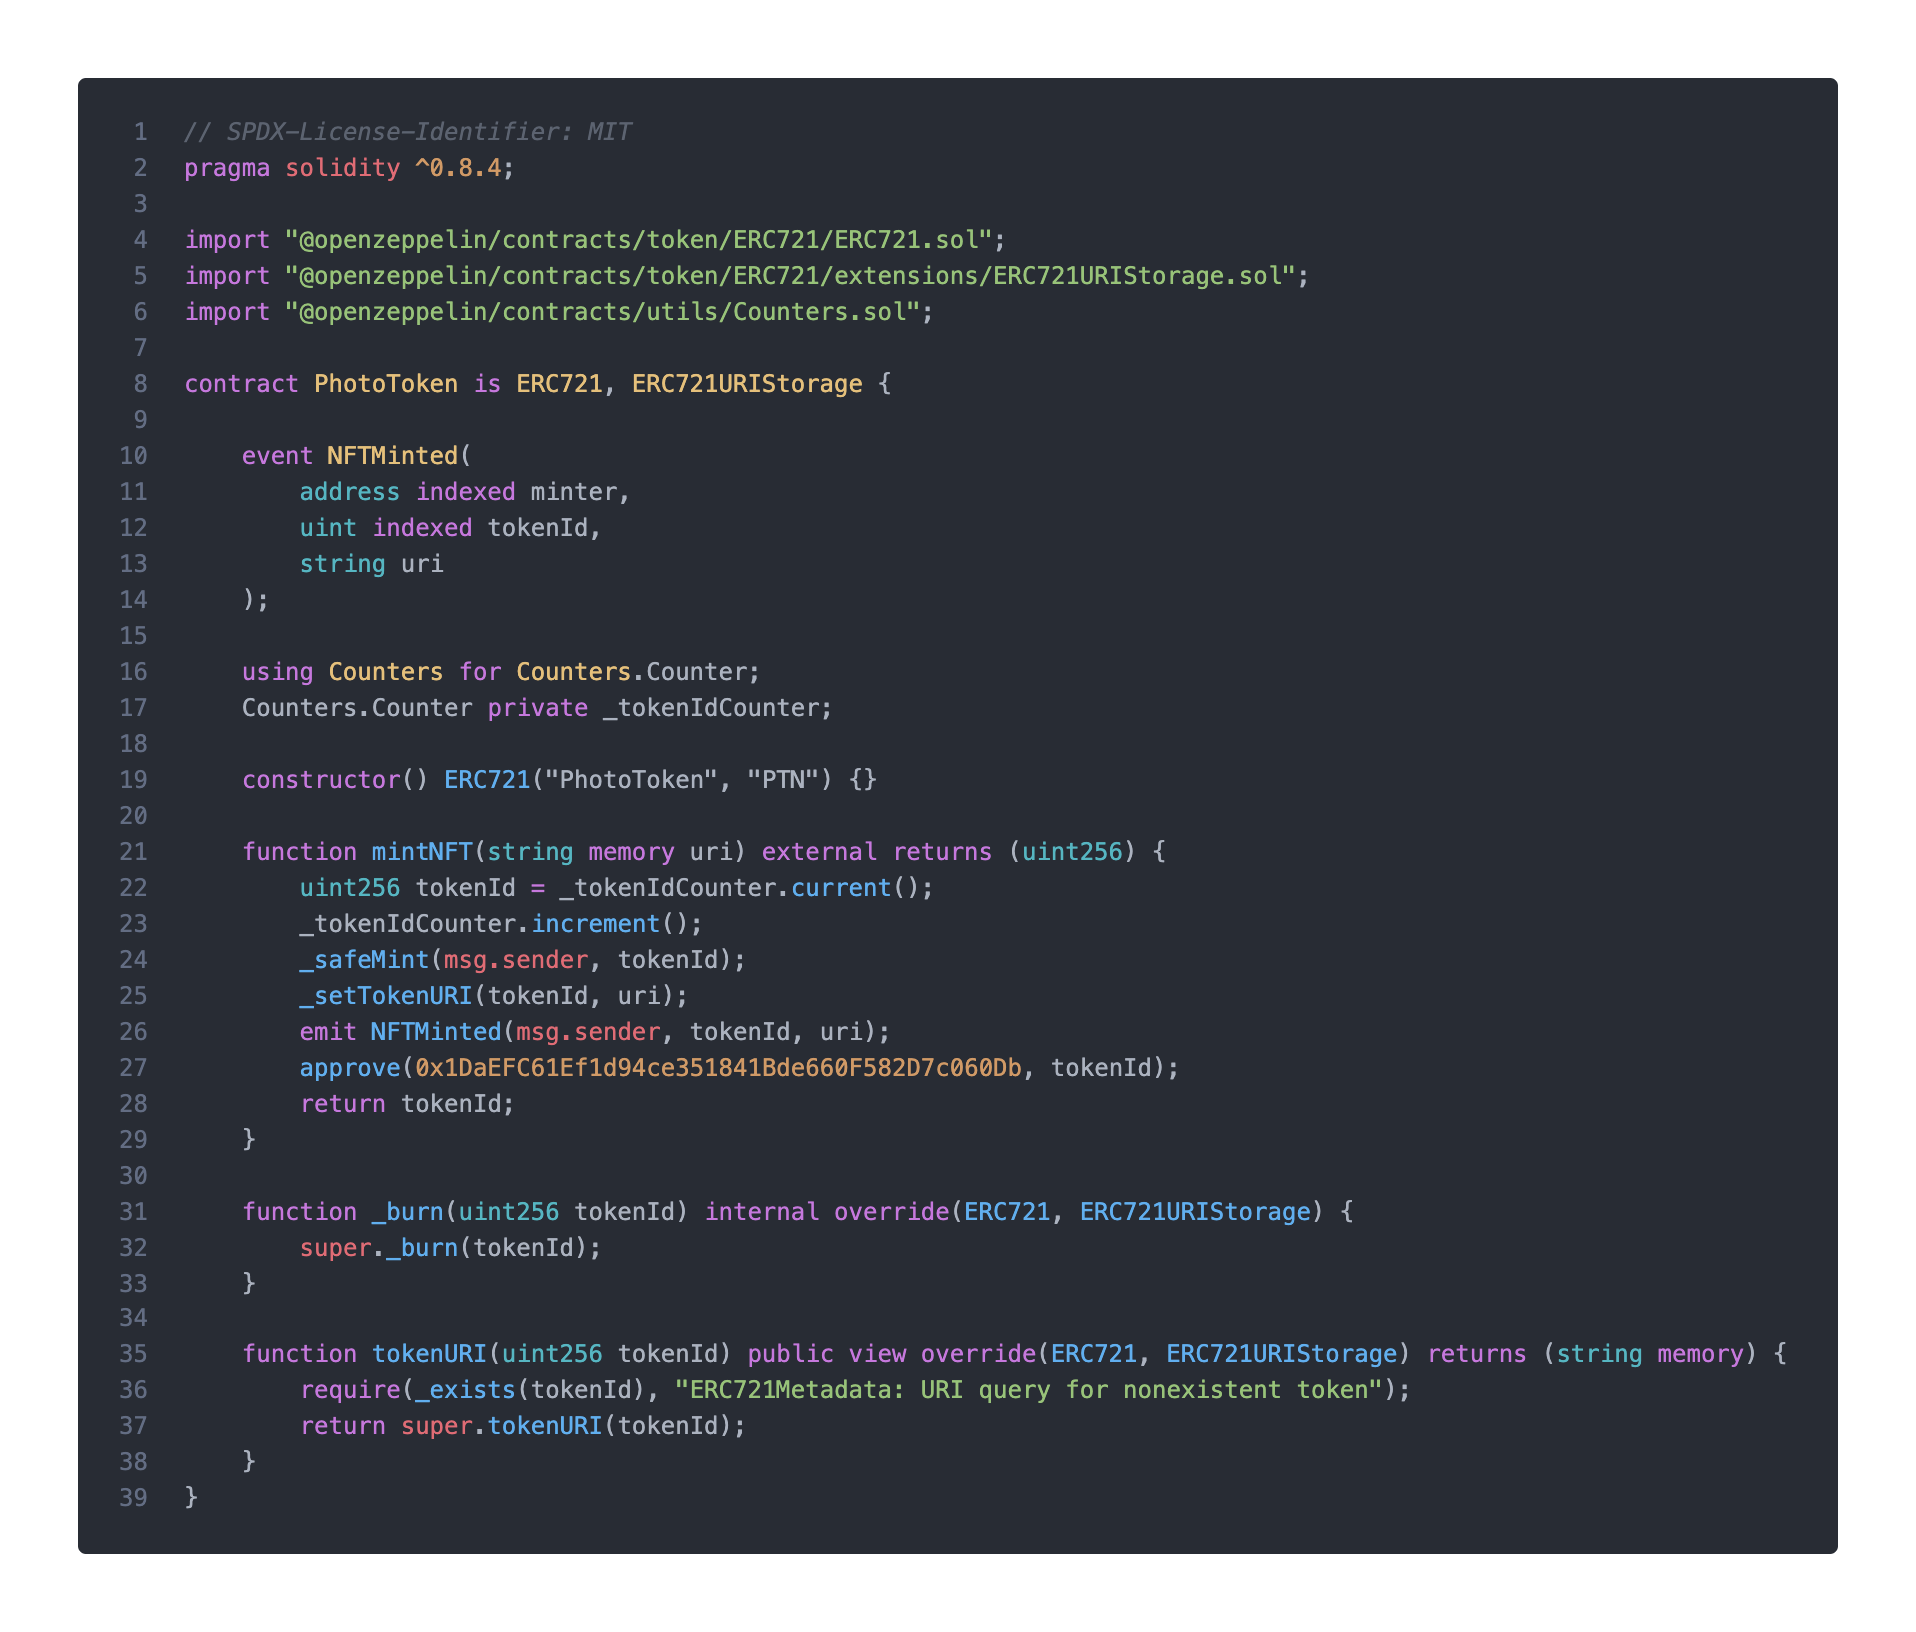
Notice in line 27 under mintNFT() function, there is this line:
approve(0x1DaEFC61Ef1d94ce351841Bde660F582D7c060Db, tokenId);
What this basically does is it acts as a “shortcut” for PhotoToken minters to directly interact with the 0x1Da…60Db the trading smart contract (which we’ll get into in the next part). This way, minters in this platform do not have to perform a separate transaction just to call the approve() function.
For more info, read how approve() method in ERC721 works
3. Figuring out the marketplace trading contract
Like previously mentioned, a smart contract is essentially a custom program on the blockchain. To make the NFT being able to be bought and sold, I used an existing Solidity contract here and deployed in Goerli testnet. I decided to use this contract as it’s quite simple.
The essential functions in the trading contract is as below:
-
listedItem(): List item in the marketplace -
buyItem(): Buy item in the marketplace -
cancelListing(): Remove item from the marketplace -
updateListing(): Update listing price to a new one -
withdrawProceeds():Allow for sellers to withdraw their total Ether amount from successfully sold items
For each of these function calls, the user has to sign a transaction with their wallets.
4. Finding a tool for uploading an image & its metadata to IPFS
InterPlanetary File System (IPFS) is a peer-to-peer file storage protocol. It is commonly used in the NFT platforms to store images in a decentralized manner.
I settled on using NFTPort API for users to upload pictures to IPFS . Here is a sample code of which how it’s done.
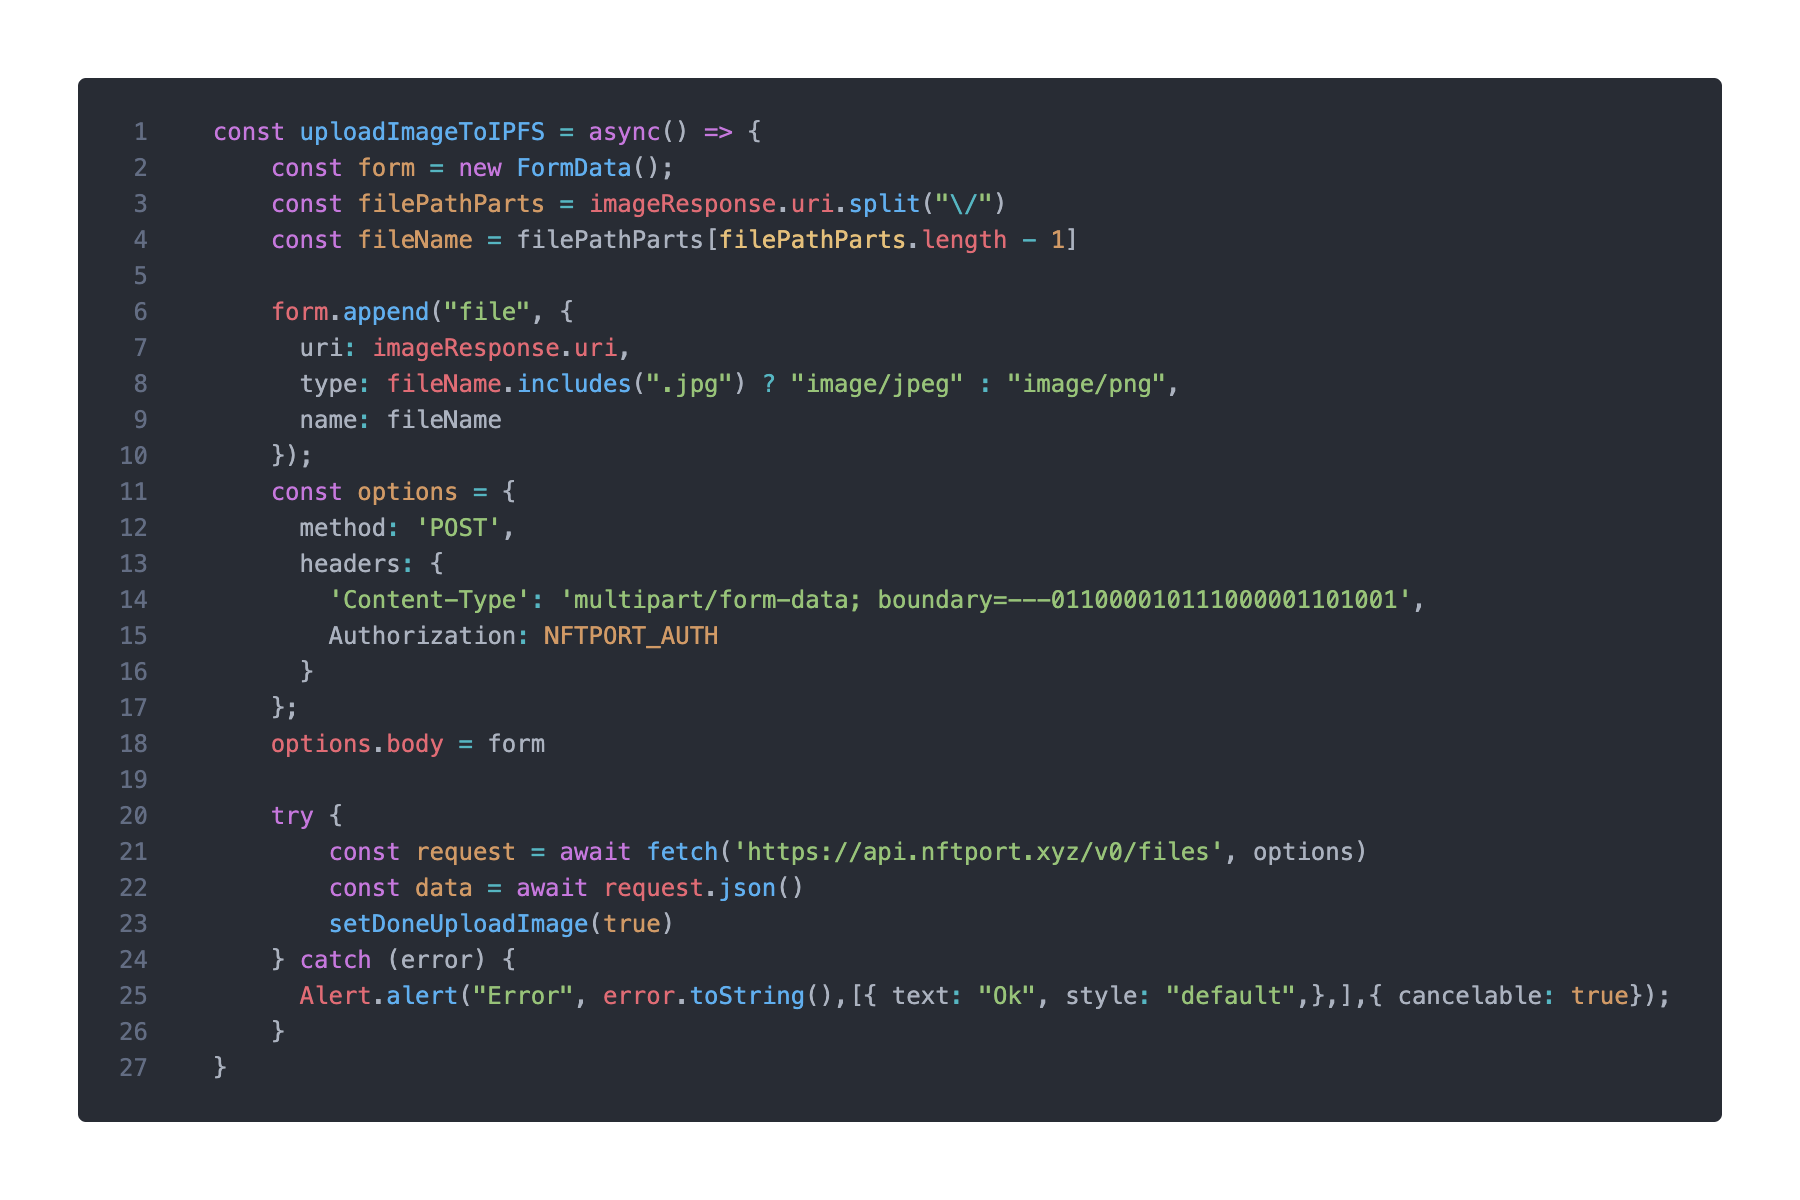
imageResponse is the resulting URI image retrieved from expo-image-picker when user picks an image in their gallery. (ImagePicker documentation here)
For image metadata, NFTPort also provides an API endpoint to upload metadata to IPFS. IPFS image link inside the IPFS “image” section.
There is a decent metadata guideline in OpenSea of which I followed. So a standard NFT metadata would look like this:
{
  "name":"Jeju Island",
  "description":"Korea",
"image":"https://ipfs.io/ipfs/bafybeiglhg5wxkuiqx23xsr4xjr3btopvtmx5wkg3rbt3ol47vjacmsyf4"
}
Note that I use https://ipfs.io/ipfs/ and not the ipfs:// URL in the image attribute so that it’s more easily accessible by the front-end because there is no working IPFS client in React Native yet (or at least I know of).
After successfully uploading the metadata to IPFS, the resulting IPFS metadata link will be passed as the uri argument in the mintNFT() function on the NFT smart contract when user mints a new NFT. That means, what is stored on Ethereum blockchain for each NFT minting transaction is the link to the metadata, not the image link.
So the step in summary goes like this: Upload image to IPFS (receives IPFS image link) → Upload image metadata to IPFS (receives IPFS metadata link) → User signs minting transaction (with IPFS metadata link). (Refer to NFTPort documentation)
5. Figuring the mechanism for updating database for confirmed transactions in Ethereum
One of the problems in building a web3 dApp is to synchronize relevant data in your centralized database with the decentralized blockchain.
Now, you don’t want the user app side to be the server who is updating the database in backend. As transactions in Ethereum can take on average 20-30 seconds to get first block confirmation (and sometimes more than a minute!). Users would not want to wait that long for their transactions to confirm and update them to database. So you want to offload the task of updating the database to a dedicated server.
On this particular app, I use Google Firebase as a simple CRUD database to store user’s NFT metadata. For every successful transaction that involves interacting with NFT contract & marketplace trading contract, the information in Firebase gets updated accordingly.
So what I did was to have a NodeJS server running in my computer that listens to any new transactions from 0x1DaE…60Db (Marketplace trading contract) and 0xC9a25…90dE (NFT contract) and updates relevant infos to Firebase properly. Here is the sample code:
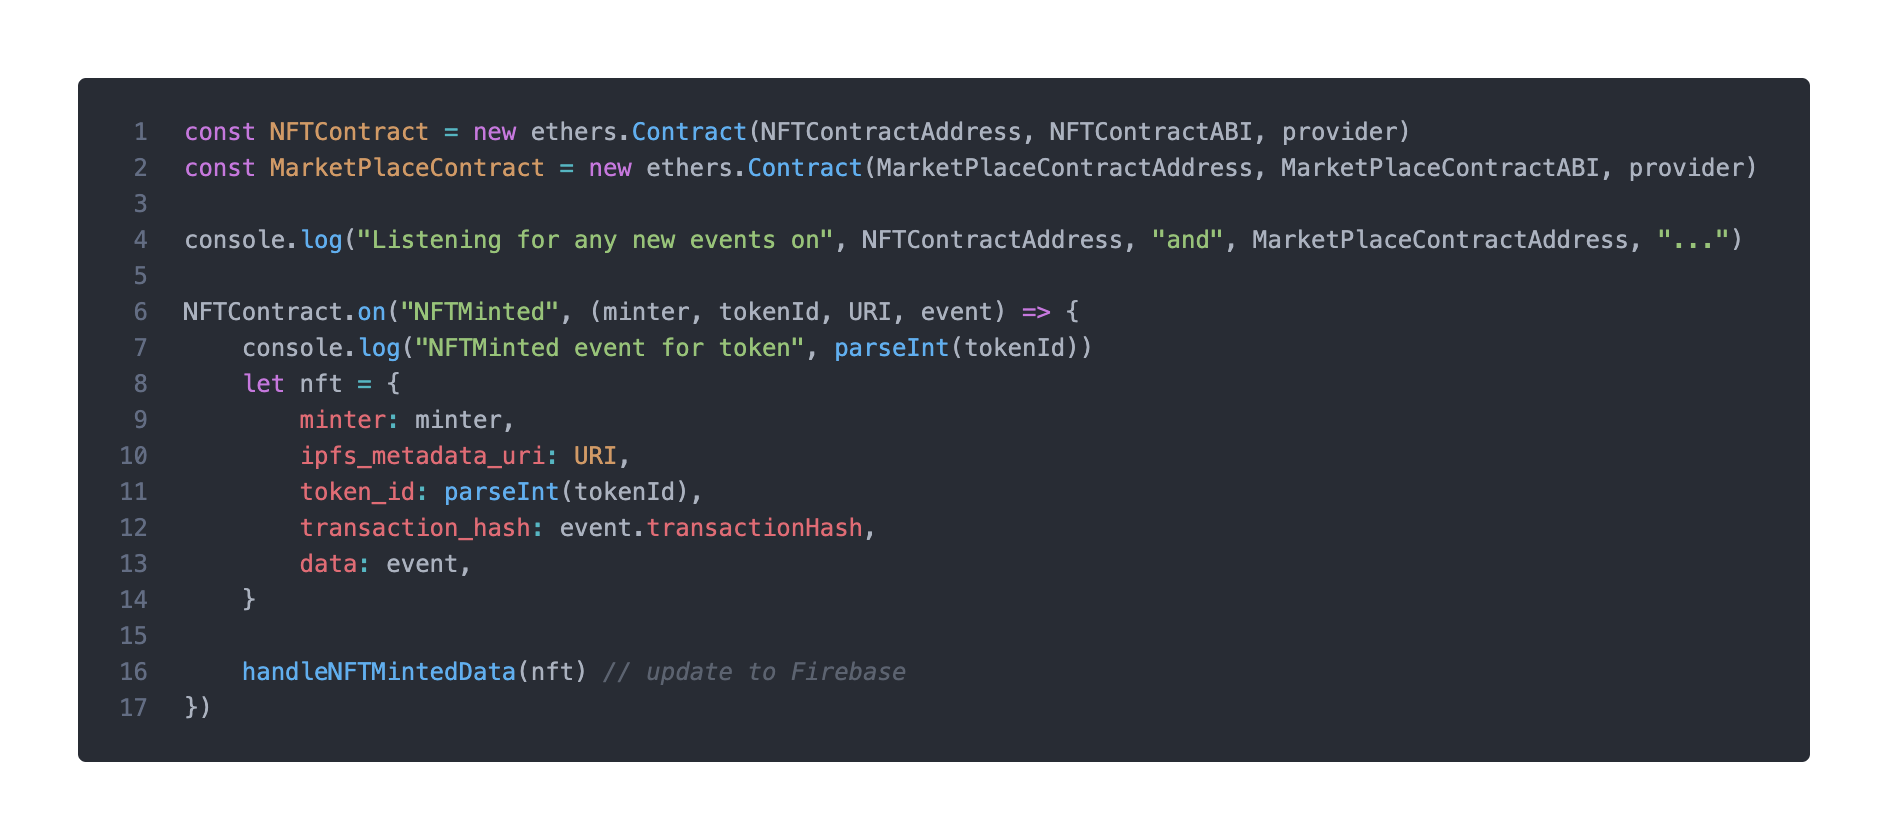
Do note that in the Solidity smart contract code level, in order for the contract to be listenable, the event has to be emitted (with data you want to broadcast). Refer to the NFT contract above for NFTMinted event implementation.
Seems like a dirty solution, but hey it works (for hackathon’s sake)!
6. Ironing out build errors
It seemed that there are lots of workarounds required in order to successfully build an Ethereum dApp in React Native. Here is some I would like to share:
-
Overriding certain Node modules with extraNodeModules in metro.config.js
-
@walletconnect/react-native-dapp library patch using postinstall
Conclusion
Overall, I’m happy that I am involved to work in this project and I look forward to join in the future more hackathons in the web3 space!
The full source code is located in my GitHub repository here:
Feel free to fork or clone to test it out.
I’m convinced that this project of mine has so much room for improvements, so let me know if you have suggestions.
Thanks for reading!