
Two years ago I wrote about the death of the web. That article Web is Dead made it to the front page of Hacker News and it seemed that a decent amount of people got the idea and were excited about it.
I later decided to make a library to help people get started with this “temporal web” framework. But apart from my seven stargazers on GitHub (love you guys) nobody cared. Brutal feedback!
I decided to put that idea aside and focused on other things. But I can’t help it: every couple of months or so that web4th idea is always coming back to my mind. So here I am with yet another attempt at proving that there could “something” interesting in that new format for the web.
This article is about showing how to go from 0 to production using the web4th starter kit.
0. Decide what to build
Maybe always the most difficult step. Turning questions into ideas, and ideas into a product…
In my case I realized that some people enjoyed my art pieces (i’m drawing on a bamboo notebook with double-ended fibre-tip pens) so that would make sense to have a place online for my art.
That’s the product we’re going to build in this article:
A digital art gallery to let people browse and collect my art pieces.
1. Draw the actions graph
You might be familiar with “user stories” but in the web4th we try to think in terms of “user actions”. And since temporality is at the heart of that format, the first step is to create a directed graph of actions. Theses actions are sequential: coming one after the other.
For my art gallery the first action would be: “browse art pieces”. And following this action we have the “see art piece” action: we want a user to see all of them and then focus on one.
Once a user is looking at an art piece, the next action could be: “collect art piece”. Starting the flow to mint an NFT into their wallet. And I also like the idea of letting the user bid on the physical copy of it: that’s the “buy art piece” action.
Here’s what my actions graph would look like:

We have two “primary” actions: “browse art pieces” and “browse collected”. They don’t have ancestors.
Notice also the dotted arrow for “mint art piece”. It just means that this action is dependent on a previous action: only if the “connect wallet” has succeeded we can let the user trigger that next action. And if a wallet is connected and the user triggers the “browse collected” action, we would skip the “connect wallet” action and display the art pieces they collected to let them trigger the next action “see art piece”.
Try to draw a simple actions graph for your app. Using the naming convention “VERB + NOUN” helps to put yourself in the user’s shoes.
2. Register your first action
Time to code! Fork the starter kit here and follow the “install” instructions:
Once you have the app running in your browser (localhost:8280), create a new file under src/app/actions/ that will represent your first “primary action” and add it to the registry.cljs file (commenting out the examples so that we have a clean slate). For my art gallery, my primary action is “browse art pieces” so I end up with the following new file:
;; src/app/actions/browse.cljs

(ns app.actions.browse
  (:require
   [app.actions.entrypoint :as actions]))

(actions/add-primary-action ::browse "See art pieces" {:default? true})
and the registry is updated to this:
;; src/app/actions/registry.cljs

(ns app.actions.registry
  (:require [app.actions.onboarding]
            [app.actions.browse]
            ;; [app.actions.examples.hello]
            ;; [app.actions.examples.pingpong]
            ;; [app.actions.examples.todolist]
            ))
If you reload the app, click “create new session” and ignore the onboarding message (we’ll modify it later on) you should see something like that:
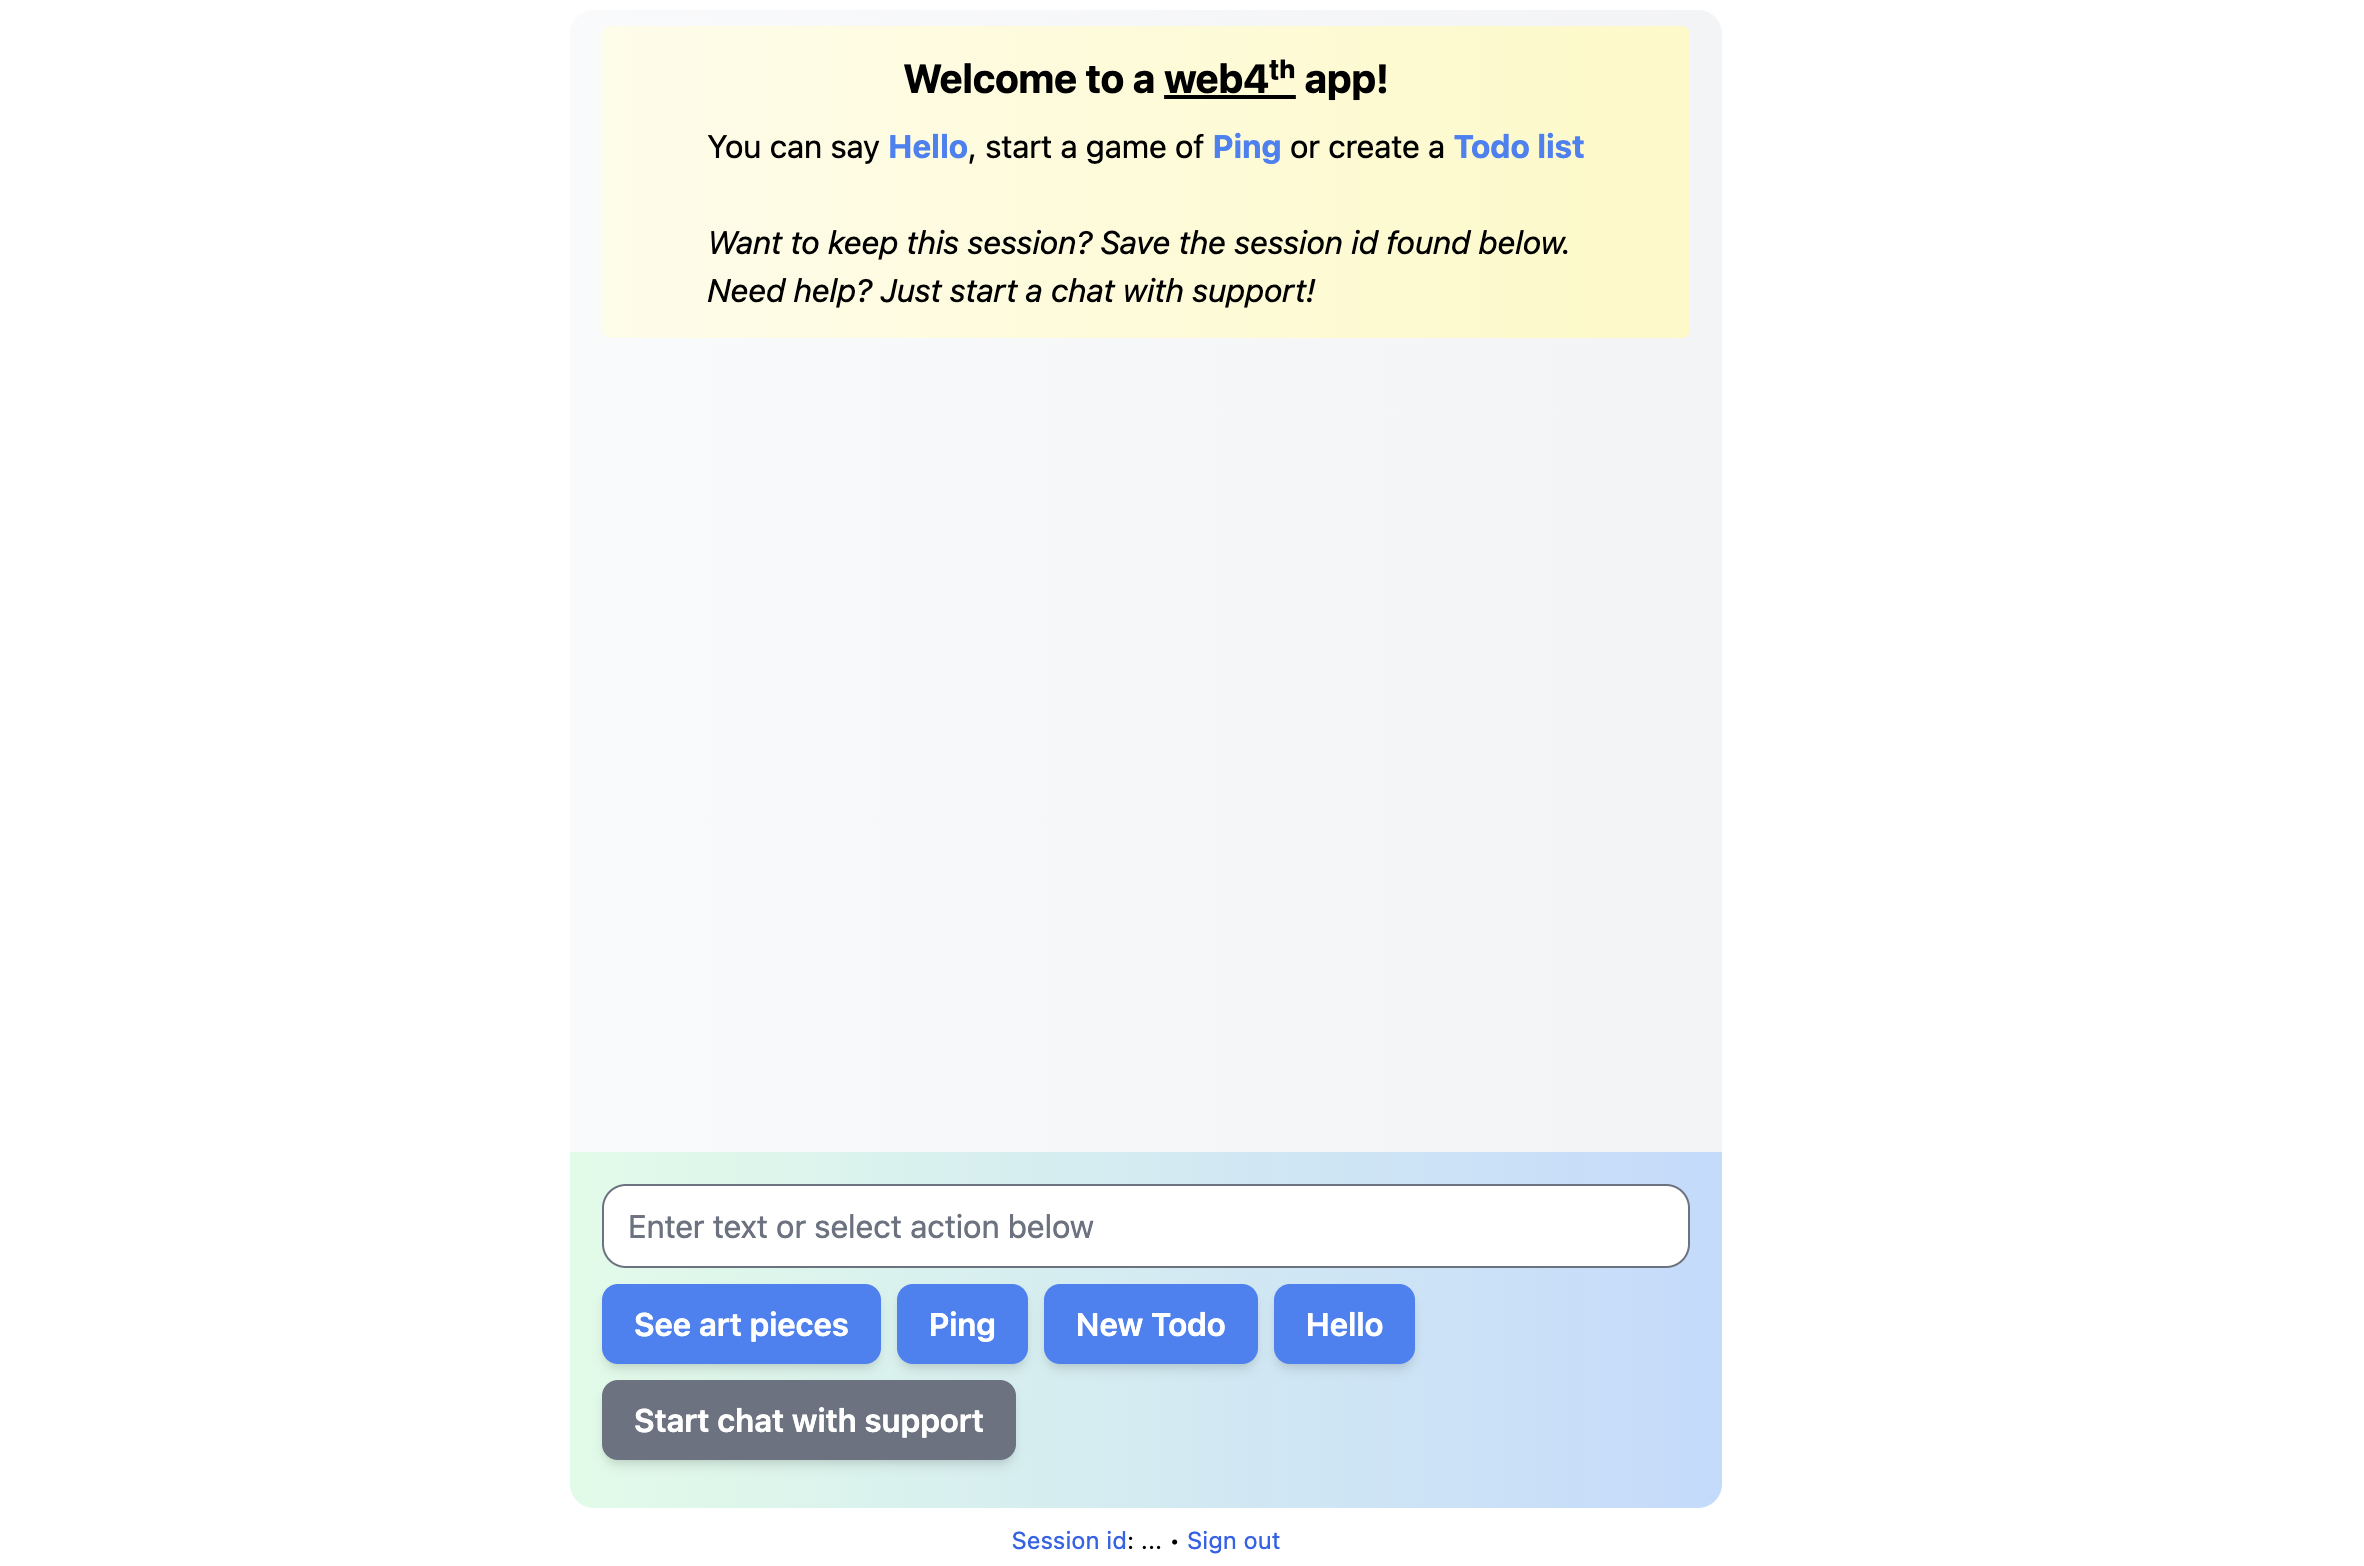
If you click on the blue button at the bottom of the screen you will get a message saying that the action is not registered.

We triggered the action but there is no component mapped to it, so it’s not very useful at the moment. Let’s see how to fix that in the next section.
3. Build your first component
In web4th, actions are mapped to components. Ask yourself this question: what will the user see when they trigger that action?
For my art gallery, the “browse art pieces” action should display a list of all the art pieces. So the component will just fetch them from the NFT contract and display them in a grid. I don’t have to pass any parameters to this component so the registration looks like this:
(defn c-art-pieces [] [:div "list of art pieces"])

(defmethod actions/get-action ::browse
  []
  {:component c-art-pieces})
If I go back to the app I should see that the action ::browse has been registered, and the c-art-pieces component being displayed.

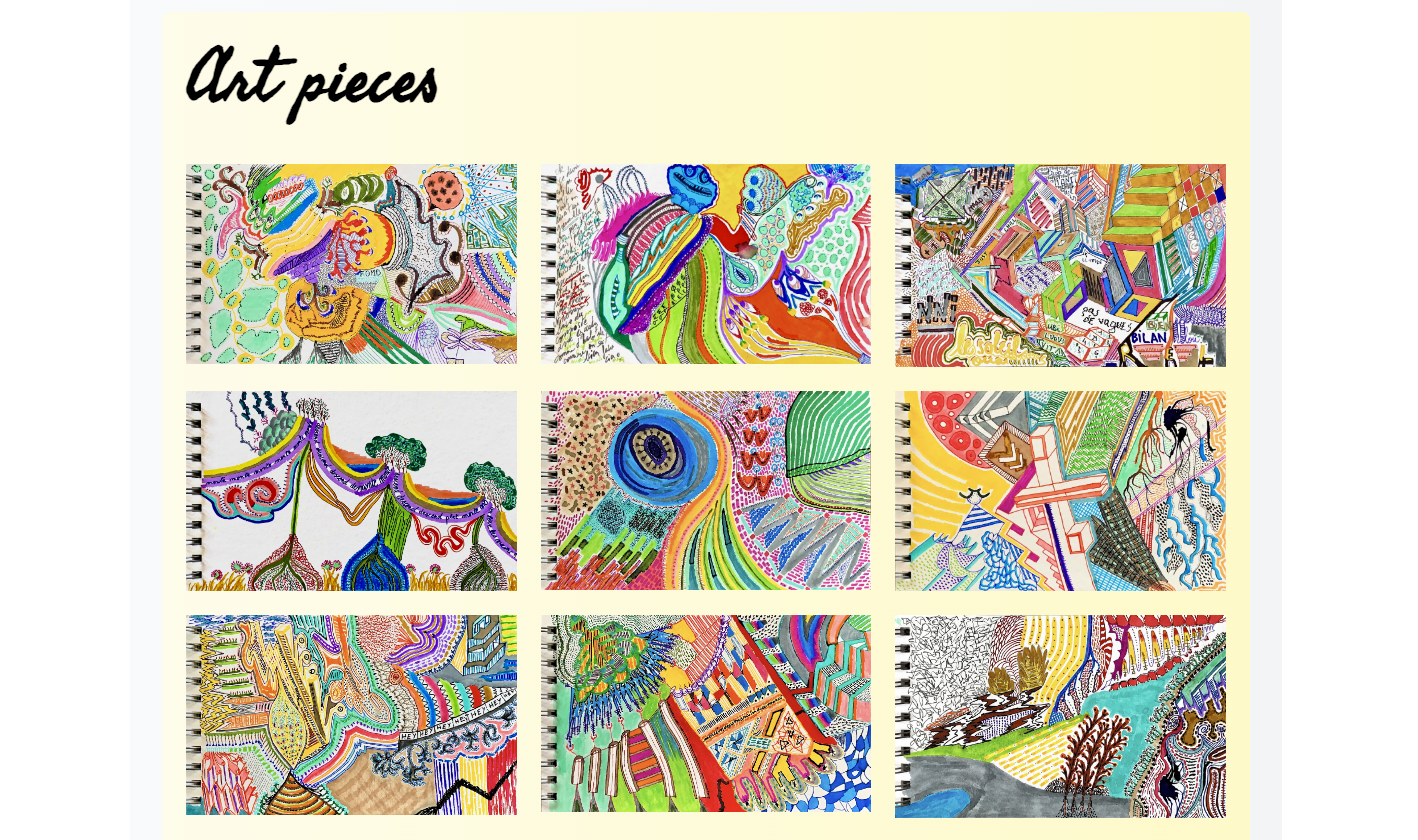
I can now iterate on that component with the usual code-save-reload loop that we all cherish. In my case, the code for my c-art-pieces is here and the user now sees the following:
Unless your “actions graph” was very simple, you surely have a child action of that primary action. Let’s now see how to trigger it from that first component.
4. Trigger the next action
It’s actually just a function call: actions/send
You can just start by sending this new action that you want to register from the component. This will probably be on a user interaction within your app: a click, a keystroke, or something similar. In my case the action “see art piece” will be triggered upon a click on the grid. Hence the following line in the code:
:on-click #(actions/send ::see-details art-piece)
When the user clicks the img element the ::see-details action is sent with an argument being the data about that particular art piece.
If I stop here and the user clicks on one image, the same “action not registered” message will be displayed. And again I can now register the action and build its matching component.
(defmethod actions/get-action ::see-details
  [_action _db art-piece-data]
  {:component art-piece
   :state art-piece-data})
As you can see on GitHub, the c-art-piece component is getting the art-piece data and wrapping it inside a “react-photo-view” component so that the image can go fullscreen. And from that component I’m triggering the “buy art piece” and “collect art piece” action.
I can keep building my app following this action/component loop until I reach the end of the actions graph.
Once you’ve finished your graph (!) come back here to chat about onboarding.
5. Prepare the onboarding
Your app is almost ready: you’ve registered actions and mapped them to components. This should help users achieve what they want to achieve with your app. One last thing to think of is actually the first thing they will see: the onboarding component.
In web4th there is a special action/component related to the onboarding process. It will be automatically displayed once a user starts interacting with your app. The opportunity is to give them a clear picture of what your app is about and prompt them to trigger some primary actions.
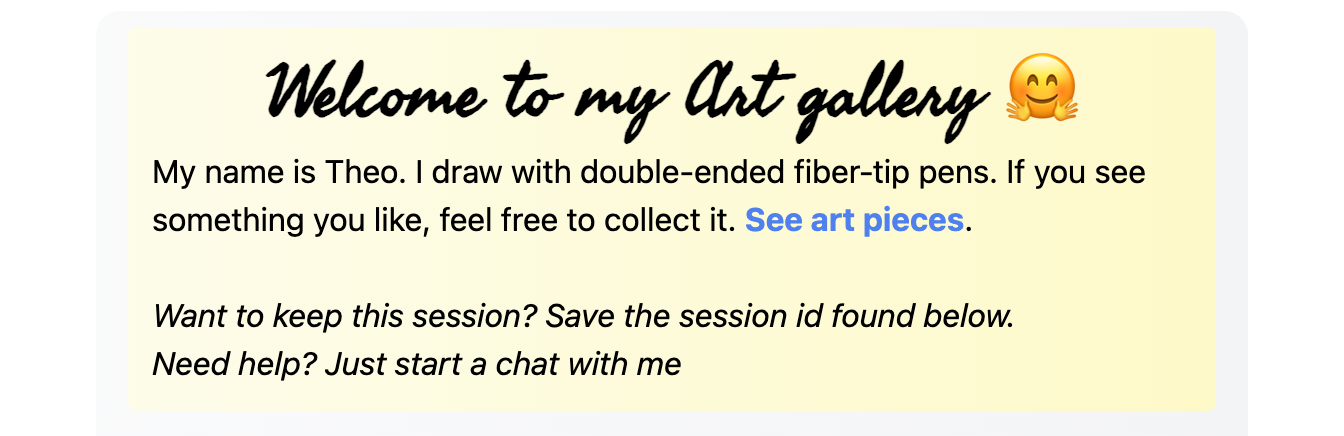
In the case of my art gallery, a new user will probably not have already collected my art pieces so I’m just introducing myself and letting them trigger the “browse art pieces” action:
Change the content inside the c-onboarding component in the src/app/actions/onboarding.cljs file to match your own requirements.
You’ll notice that I omitted to talk about the session concept in web4th. I apologize for that oversight but suggest you contact support for more info. Speaking of which…
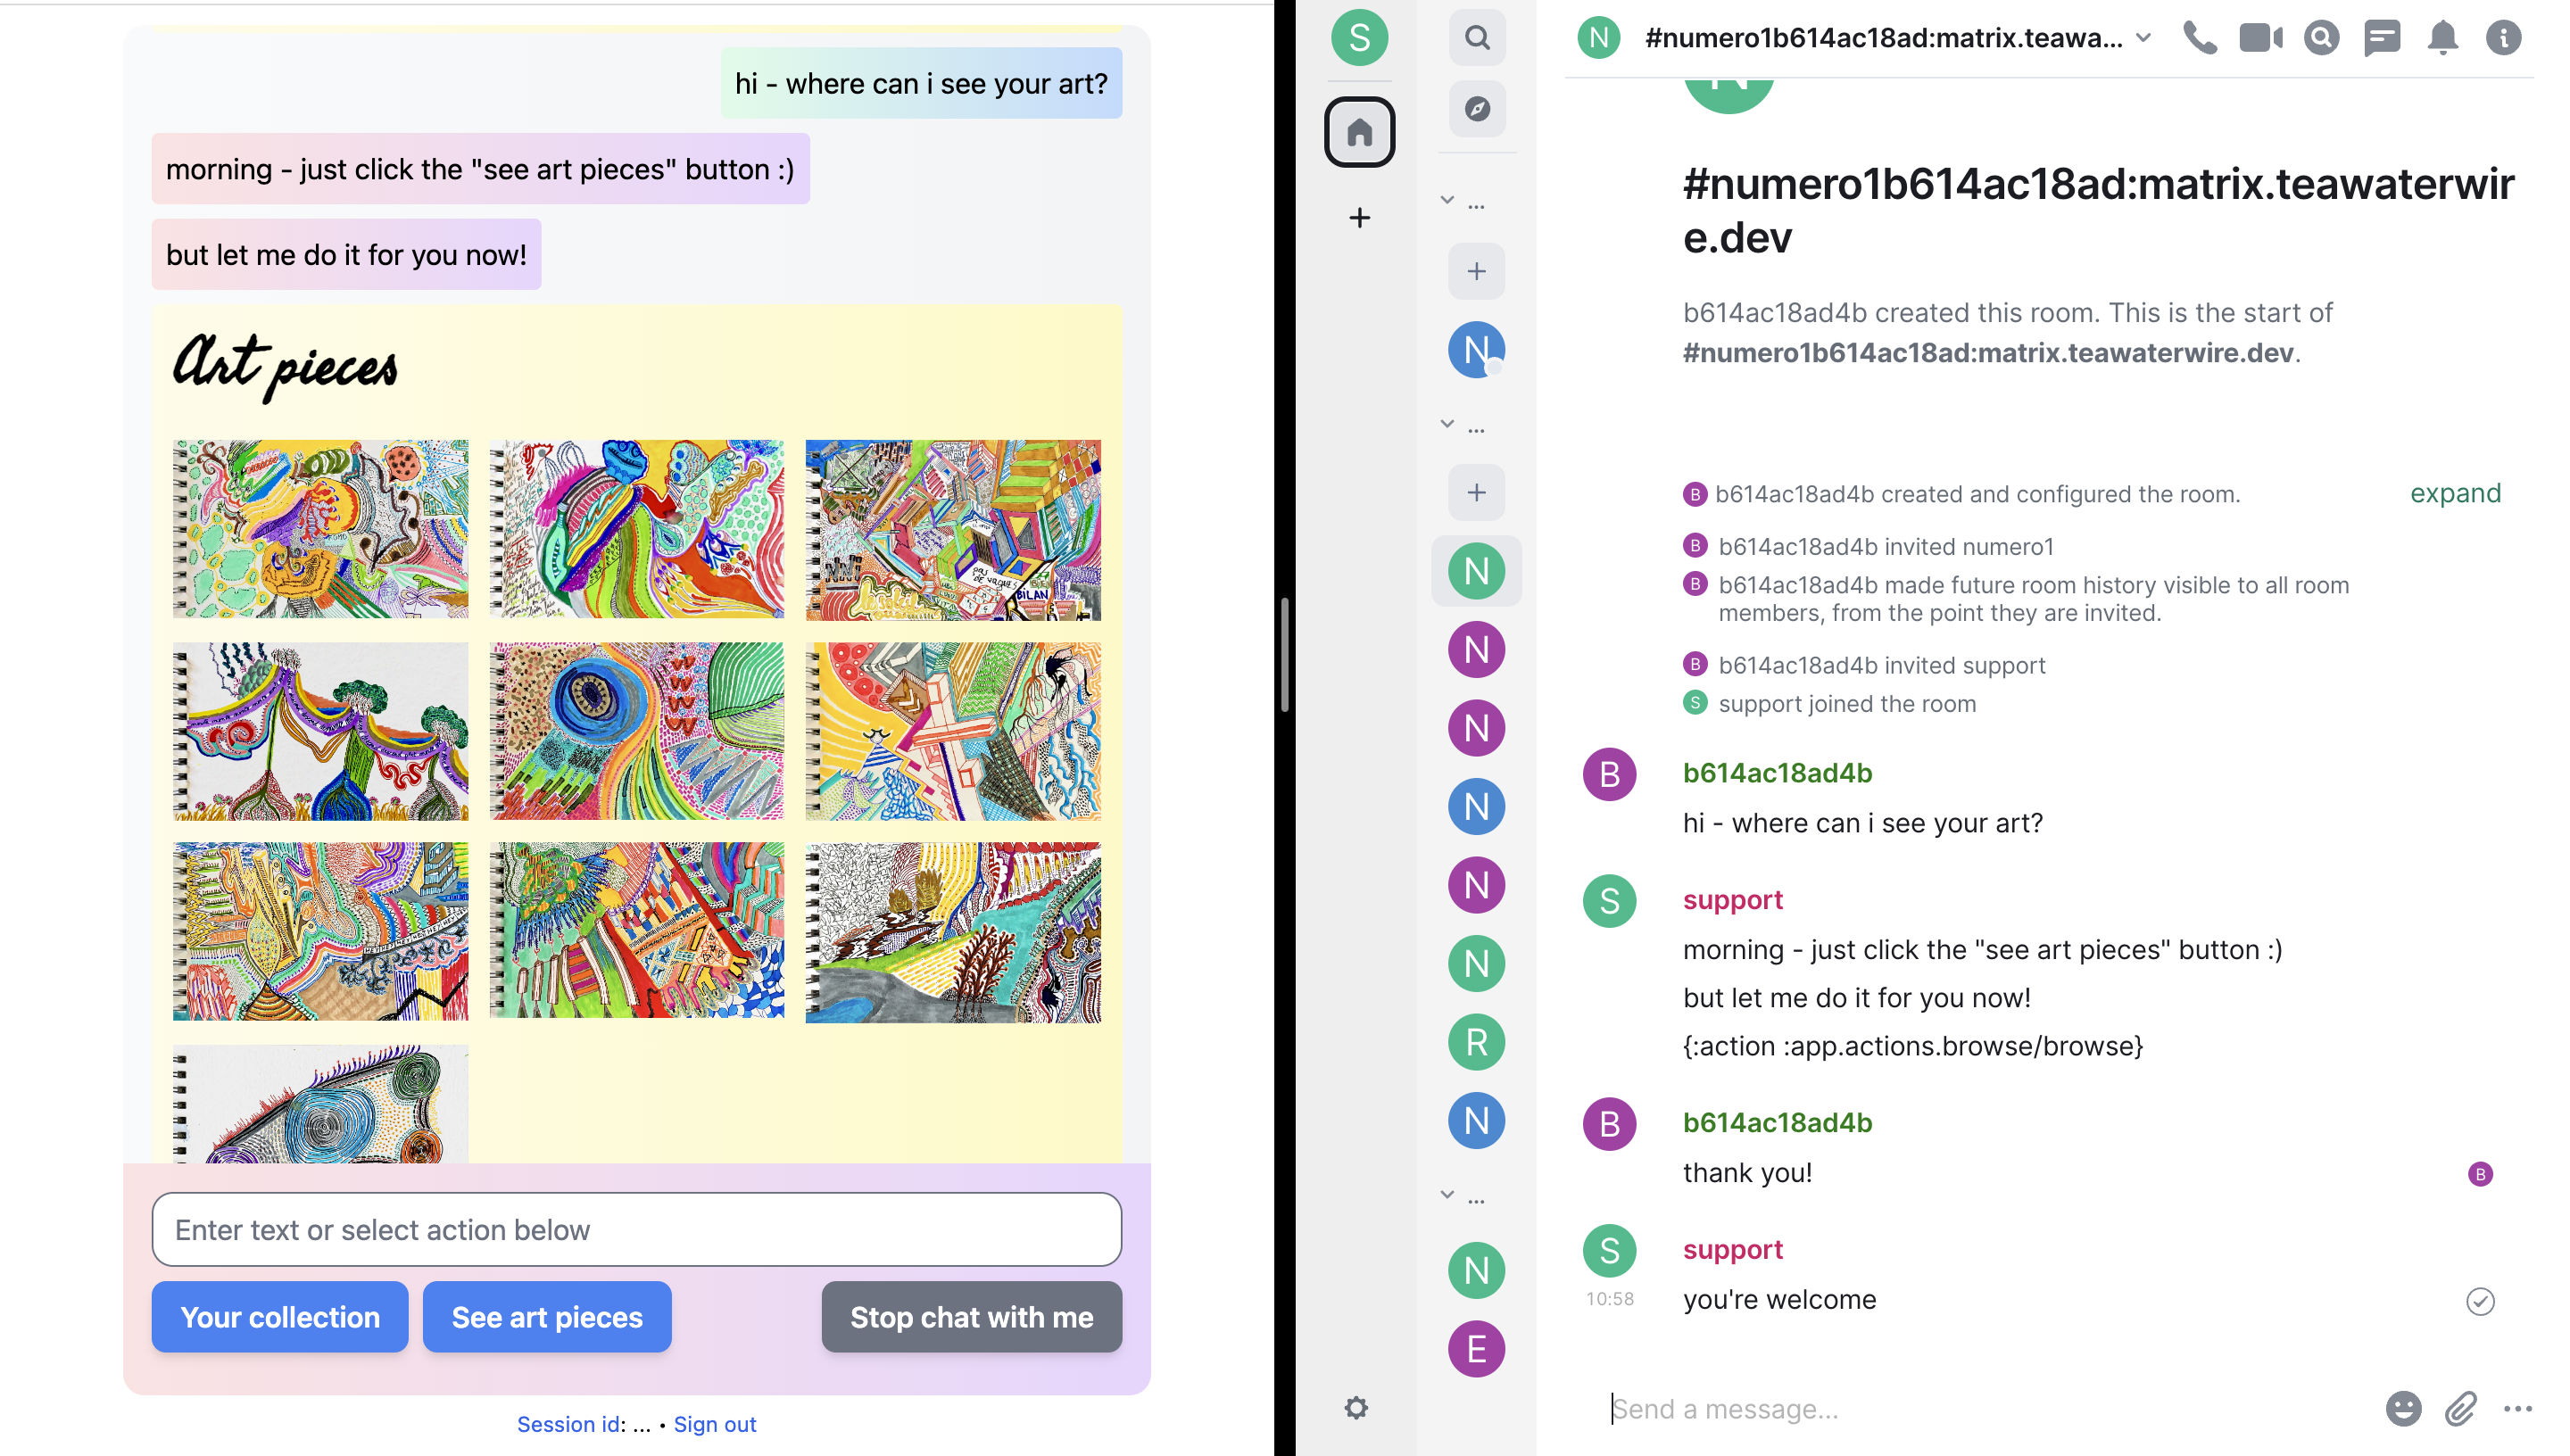
6. Set up support
It’s time to talk about the button at the bottom right of your screen: the support button.
Follow the 4 steps of the support section and when you’re done go back to your app and click “Start chat with support”. Trigger any action and write a message that could be from one of your users.
Now return to Element (you should be connected as the account you created before) and accept the invitation to join the room that has popped up. You should see the user’s message and even the action that was triggered.
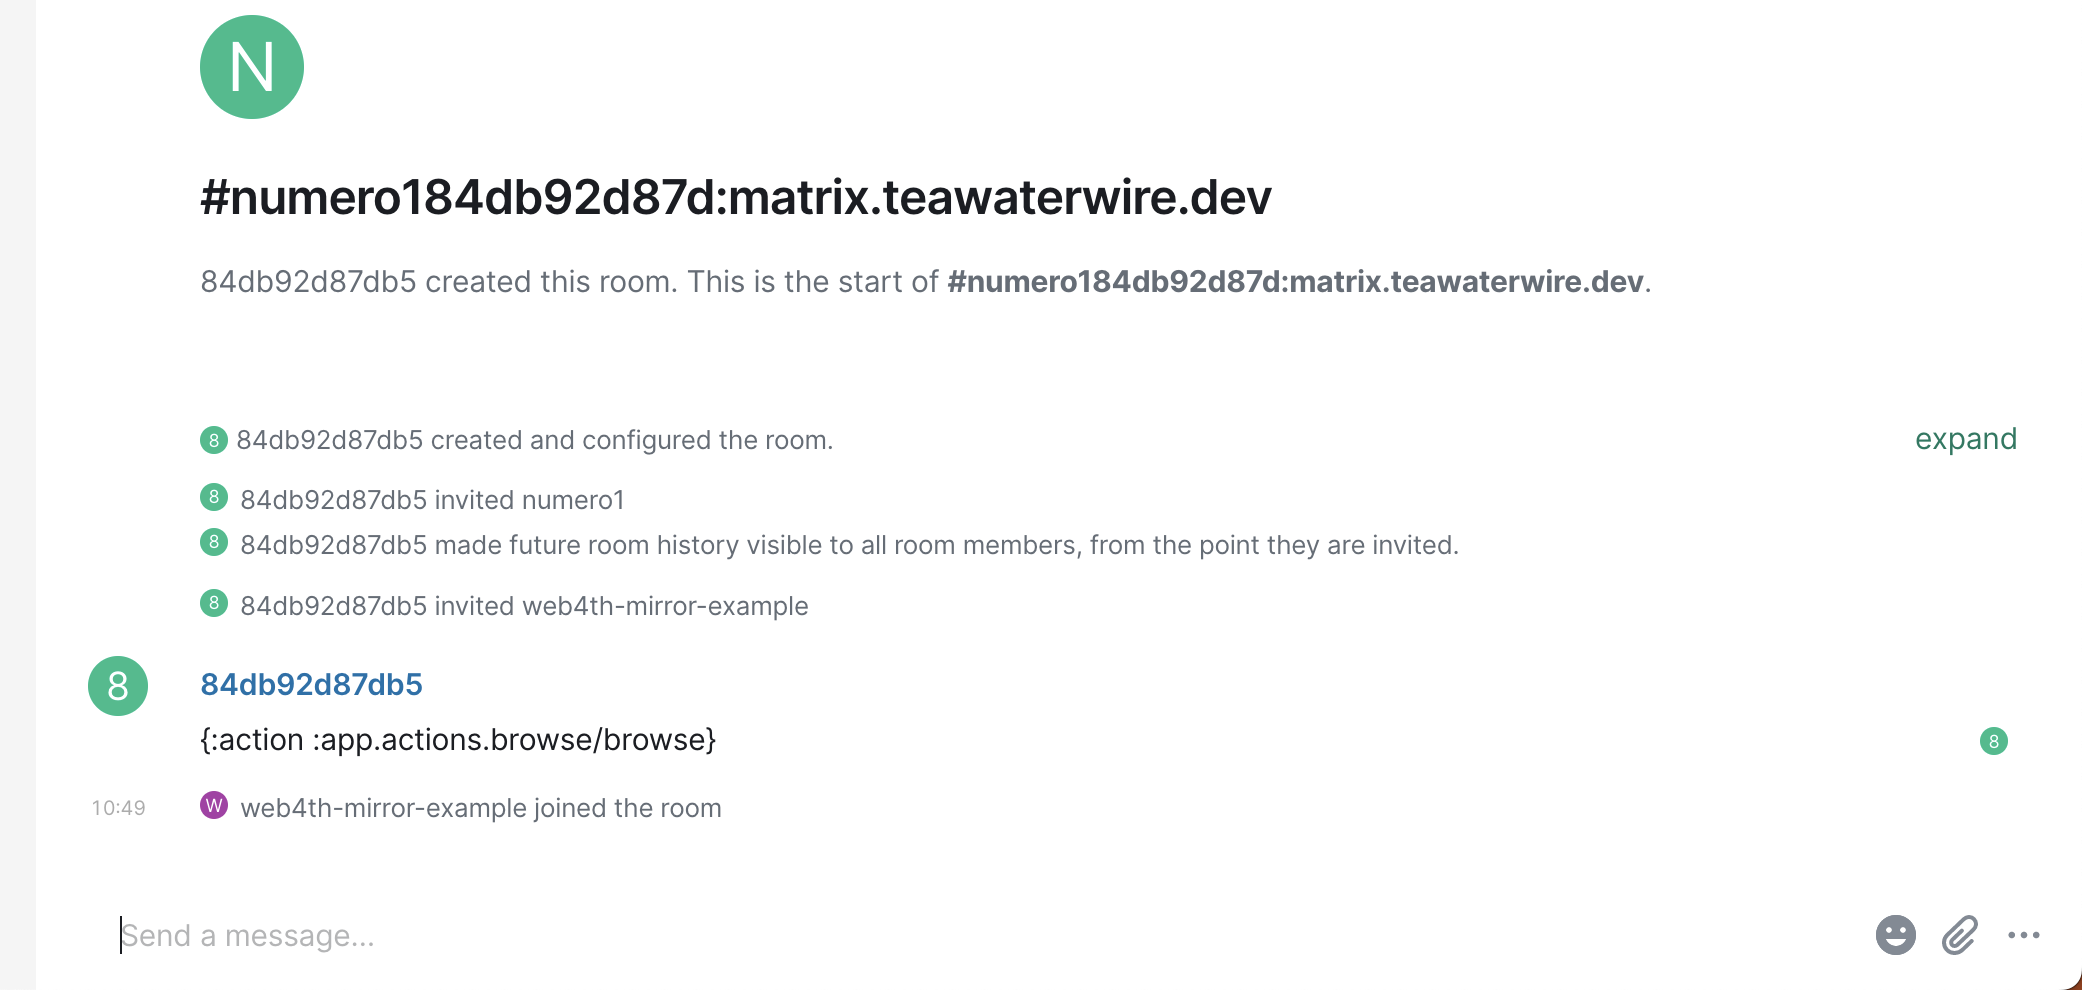
You can write back free-form text to help the user. But you can also send directly an action that will display its mapped component on the user’s side!
In web4th, support is not an after-thought but one click away for the user. Expect fast feedback loops when support is treated as first-class citizen.
In the case of my art gallery, support is just me:
7. Deploy to production
You registered actions, created components, prepared the onboarding and trained the support team (thyself). Let’s ship your app!
If you created a new repository on GitHub by clicking “Use this template” you’re ready for the next step. Otherwise make sure to push your code in a new repository.
Follow the instructions on the release section: configuring GitHub Actions to get your code and build the project properly before releasing it under GitHub Pages.
Once it’s done, share the url with the person that will be your first user and open the support client. The web4th ride is about to start.
And if you’re interested in my art you know where to go: https://art.teawaterwire.dev 👨🎨
8. Bonus
While building your web4th app you might have run into a conceptual problem with actions. For simplicity, I only talked about “active actions” triggered by the user. But there is another type that we can call “passive actions”. Actions of this type are triggered by events that are not directly originating from the user.
For example, in my art gallery, when a user collects one art piece the transaction will be processed later and it can also fail. If the transaction succeeds then a passive action is triggered: “art piece minted”. The component mapped to it will display a message confirming the collection of the art piece and a receipt of the transaction.

So feel free to go back to your actions graph and add some passive actions with a different naming convention: “NOUN + PAST PARTICIPLE VERB”.
Now there’s also another aspect of web applications that this tutorial is omitting: the backend. I built my art gallery as a frontend using a blockchain as a backend. But in general developers also interact with their own backends and databases.
There is no limitations as to what can be the backend for a web4th application. And if needed the backend can trigger (passive) actions in a user session by using the app-id that is explained in its own section.
For instance, I could notify a user who bought the physical copy of one of my art pieces when there’s an ETA for the delivery.
9. Compare with a normal web app
There are always trade-offs in programming. This web4th format is not different: it brings positive and negative things. But I think the only question we should ask ourselves to assess its worthwhileness is the following:
ARE USERS SUCCEEDING FASTER?
The users have a goal in mind. They want to achieve something with an app. They probably don’t care about what’s the technology underneath.
Many events can happen that can prevent users from succeeding: there could be a bug, or they just didn’t understand the interface, or they simply have doubts, etc.
Eventually they will succeed: the bug will be fixed, the support team will get back to them with clearer instructions, or just clear doubts, etc. But the question is: how much time will it take?
Time being our most valuable asset, any reduction of the average number of seconds required for a user to succeed on an app is, in my opinion, a good indicator.
I don’t have enough data to answer that question for web4th, but here are 3 reasons I think could explain why it could help users succeed faster:
-
Temporality: having the ability to scroll back in the history of their interactions with the app gives users a way to solve their problems faster (instead of going back to a page and trying to remember the set of actions that led to a particular state). Also, ChatGPT made this conversation format an acceptable standard.
-
Support: having support just one click away removes the usual friction of the “contact support” flows. The support team will also have more context and super powers (the ability to trigger actions that will be displayed as components on the user side).
-
Builders: thinking at the component level instead of at the page level reduces the complexity of making an app. Hopefully less shooting in the foot. The conversation format brings superior debugging capabilities (no need to ask the user what they’ve done). And finally we can expect more feedbacks from users, leading to better product decisions (maybe).
This was my attempt at showing the potential of the temporal web. Only time and real usage of such apps will tell if my intuition is correct or not.
Thank you for taking the time.
Fin.