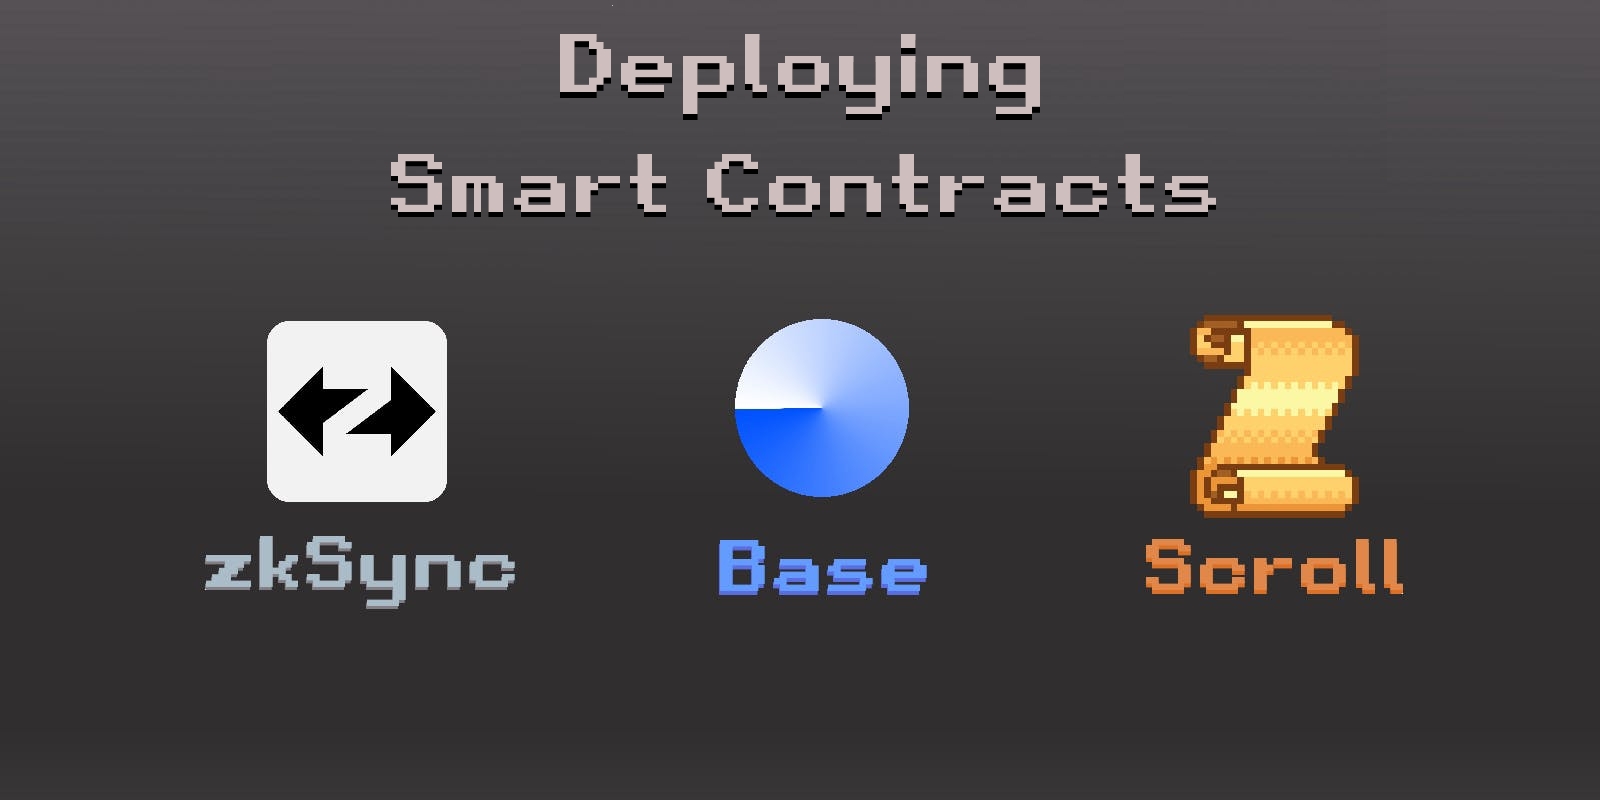
In this article, you will find 3 guides of deploying contracts on zkSync Era, Base, and Scroll.
Let’s get started!
zkSync Era
Deploy price: ~5$ in ETH
Deploy difficulty: Classic method (code) - difficult. Thirdweb method - easy.
Classic method:
-
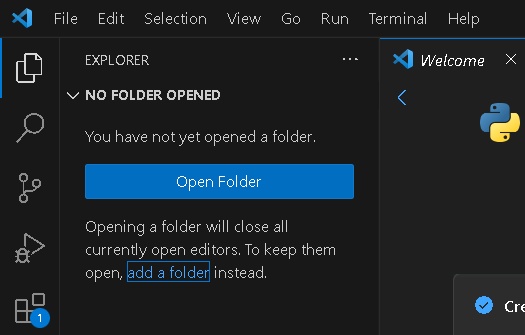
Download Visual Studio Code from the official website: https://code.visualstudio.com/
-
Choose English language and leave the checkboxes in their default state.
-
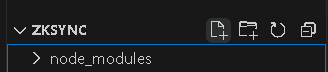
After the installation, create a folder on your desktop named
zksync

- Launch VSCode and open this folder
-
Download & install Node.js from its official website. During the installation, leave the settings unchanged. Afterwards, restart your PC.
-
Go back to VSCode, press CTRL + J to open the terminal.
-
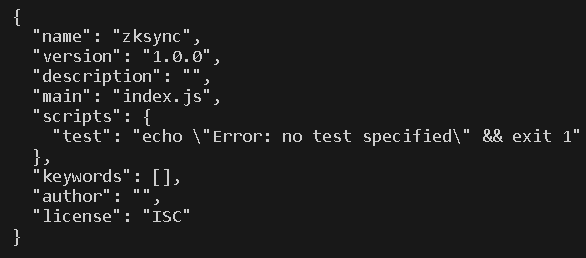
Insert the following command into the terminal:
npm init -y
- If you have such output, then everything is fine:
- Insert the following command and wait till the installation finishes
npm add -D typescript ts-node @types/node ethers@^5.7.2 zksync-web3@^0.14.3 @ethersproject/hash @ethersproject/web hardhat @matterlabs/hardhat-zksync-solc @matterlabs/hardhat-zksync-deploy
- Insert the following command which will install the OpenZeppelin contract library:
npm install @openzeppelin/contracts
- Press “+” and create the file
hardhat.config.ts
- Insert the following code in
hardhat.config.tsand press CTRL + S to save the file:
import "@matterlabs/hardhat-zksync-deploy";
import "@matterlabs/hardhat-zksync-solc";

module.exports = {
  zksolc: {
    version: "1.3.5",
    compilerSource: "binary",
    settings: {},
  },
  defaultNetwork: "zkSyncMainnet",

  networks: {
    zkSyncMainnet: {
      url: "https://zksync2-mainnet.zksync.io",
      ethNetwork: "mainnet",
      zksync: true,
    },
  },
  solidity: {
    version: "0.8.17",
  },
};
- Press on another “+” and create the
contractsfolder. Press on this folder and create thecontract.solfile in it. Any parameters (those in “ “ quotes) you can customize according to your needs (full token name & ticker). Insert the following code:
// SPDX-License-Identifier: MIT
pragma solidity ^0.8.9;

import "@openzeppelin/contracts/token/ERC20/ERC20.sol";
import "@openzeppelin/contracts/access/Ownable.sol";

contract Roccrypto is ERC20, Ownable {
    constructor() ERC20("roccrypto", "rocc") {
        _mint(msg.sender, 100 * 10 ** decimals());
    }

    function mint(address to, uint256 amount) public onlyOwner {
        _mint(to, amount);
    }
}
-
Press CTRL + S to save your file
Here we create a simple ERC-20 Token with the ticker
rocc. Any other contracts can be used from OpenZeppelin documentation. However, in order to deploy them, we have to understand JavaScript/TypeScript programming languages. If you want to deploy some other contracts which are not mentioned in this guide, and you don’t know any of this programming languages - use ChatGPT. It will easily write thedeploy.tsscript for the contract you want to deploy. -
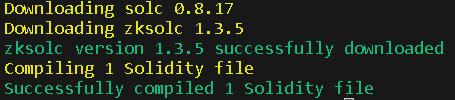
Compile the contract by inserting the following command:
npx hardhat compile
- If you have such output, then everything is fine:
- Open the
zksyncfolder and create a new folder nameddeploy. In that file we must create the typescript filedeploy.ts. Insert the following code and change the0x123…addreess, to which the tokens will be minted. Press CTRL + S:
import fs from "fs";
import { utils, Wallet } from "zksync-web3";
import * as ethers from "ethers";
import { HardhatRuntimeEnvironment } from "hardhat/types";
import { Deployer } from "@matterlabs/hardhat-zksync-deploy";

const PRIV_KEY = fs.readFileSync(".secret").toString();

export default async function (hre: HardhatRuntimeEnvironment) {
  console.log(`Running deploy script for the Roccrypto contract`);

  const wallet = new Wallet(PRIV_KEY);

  const deployer = new Deployer(hre, wallet);
  const artifact = await deployer.loadArtifact("Roccrypto");

  const roccryptoContract = await deployer.deploy(artifact, []);
  console.log("constructor args:" + roccryptoContract.interface.encodeDeploy([]));

  const contractAddress = roccryptoContract.address;
  console.log(`${artifact.contractName} was deployed to ${contractAddress}`);

  // Mint some tokens to an address.
  const to = "0x123..."; // Адрес куда минтить токены.
  const amount = ethers.utils.parseEther("10"); // Сколько токенов нужно заминтить на этот адрес
  const mintHandle = await roccryptoContract.mint(to, amount);
  await mintHandle.wait();

  console.log(`Minted ${amount} tokens to ${to}`);
}
-
Create a file named
.secretin generalzksyncfolder. We have to insert a private key from which the contract will be deployed. Keep in mind, that your address has to have a balance of ~5$ in ETH in zkSync Era mainnet. It is highly not recommended to hold a signifficant balance if you are unsure about your next actions. Please test first and then deploy on multiple accounts. I am not responsible for your funds. -
Finally, deploy the contract with the command:
npx hardhat deploy-zksync
We’ve successfully deployed our contract and minted some rocc tokens to our address.

Thirdweb method:
You can also deploy zkSync smart contracts by using Thirdweb. If you simply don’t like the classic method - you better use this one.
- Go to Thirdweb website and find the contract we need -
Token
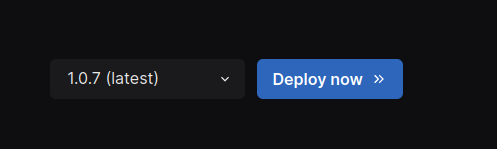
- Press
Deploy now
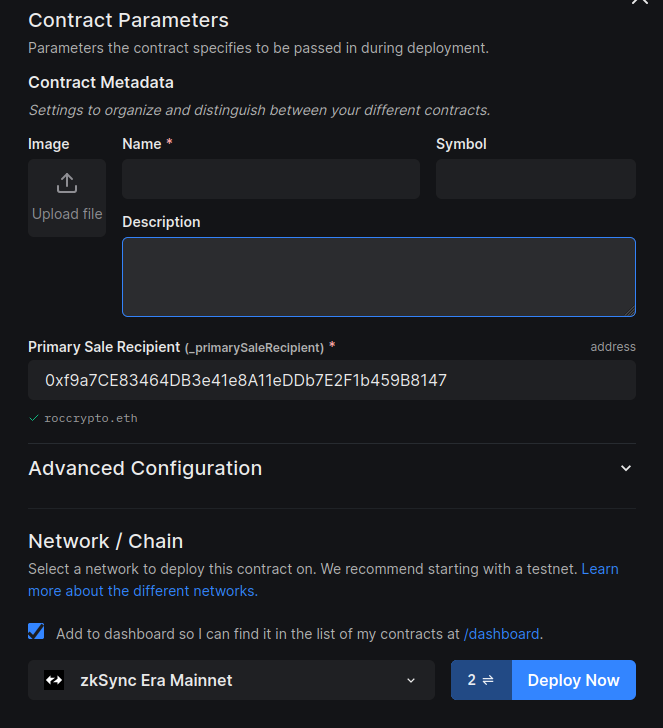
-
Fill in the details of our token and make sure to select
zkSync Era Mainnet. -
Press
Deploy Nowand sign the transaction.
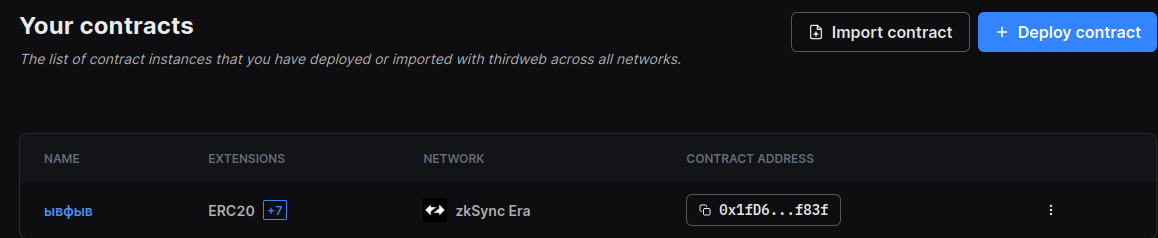
- That’s it, we’ve successfully deployed our contract:
Base
Deploy price: FREE (Goerli ETH)
Bridge: bridge.base.org/deposit
Deploy difficulty: Easy
To begin with, use the bridge to obtain ETH to your wallet.
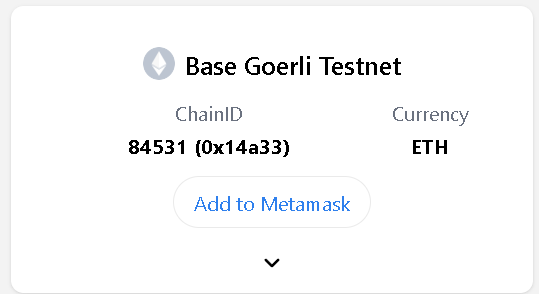
- Go to Chainlist, find
Base Goerli Testnet, and connect your wallet to it. Make sure you switched the network afterwards.
-
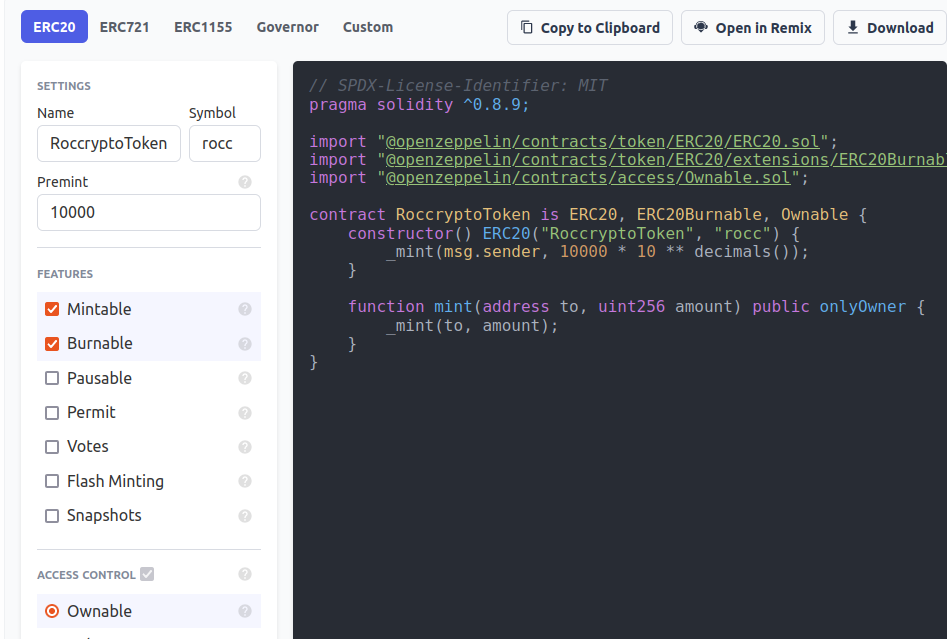
Choose
ERC-20token and fill in the parameters according to your preferences. Check the boxes forMintableandBurnable
-
Press
Open in Remix -
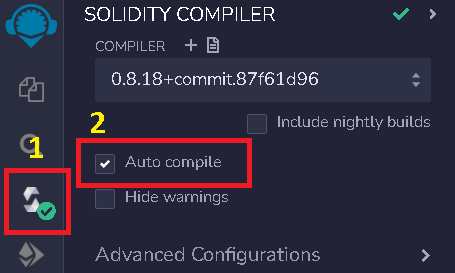
Check the box for
Auto compile
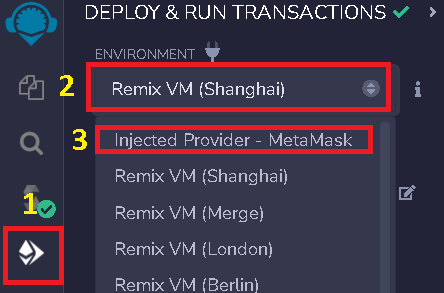
- Choose
Injected Provider - Metamaskand connect the wallet to the website.
- Press the
Deploybutton and confirm the transaction in Metamask

Now we have successfully deployed the contract on Base! However, to avoid repeating the same contracts every time, I suggest experimenting and deploying different ones.

Scroll
Deploy price: FREE (Goerli ETH)
Bridge: scroll.io/bridge
Deploy difficulty: Easy
To begin with, use the bridge to obtain ETH to your wallet.
- Go to Chainlist, find
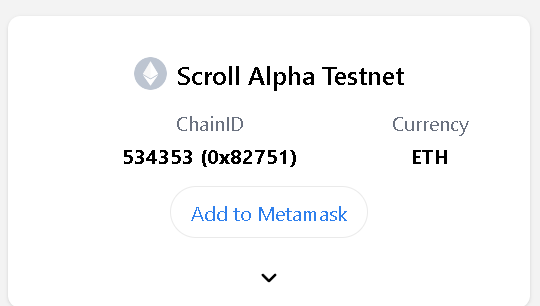
Scroll Alpha Testnetand connect your wallet to it. Make sure you switched the network afterwards.
-
Choose
ERC-20token and fill in the parameters according to your preferences. Check the boxes forMintableandBurnable
-
Press
Open in Remix -
Check the box for
Auto compile
- Choose
Injected Provider - Metamaskand connect the wallet to the website.
- Press the
Deploybutton and confirm the transaction in Metamask
Congratulations! We have successfully deployed our final contract!