CrossFi Chain is a Layer 1 blockchain with a modular architecture, consisting of two integral parts: Cosmos and EVM.
The overall testnet program will last ~3 months. For users: 2.5 months (from March 15). 1.18% of the total supply is allocated for rewards for users.
Registration in TestPad. Faucet. Authorization in xfiConsole. Tasks.
1.Registration in TestPad. Faucet. Let's open the site. Click Sign in, connect MM. We sign transactions. Then click Sign up, log in and get to the TestPad dashboard.
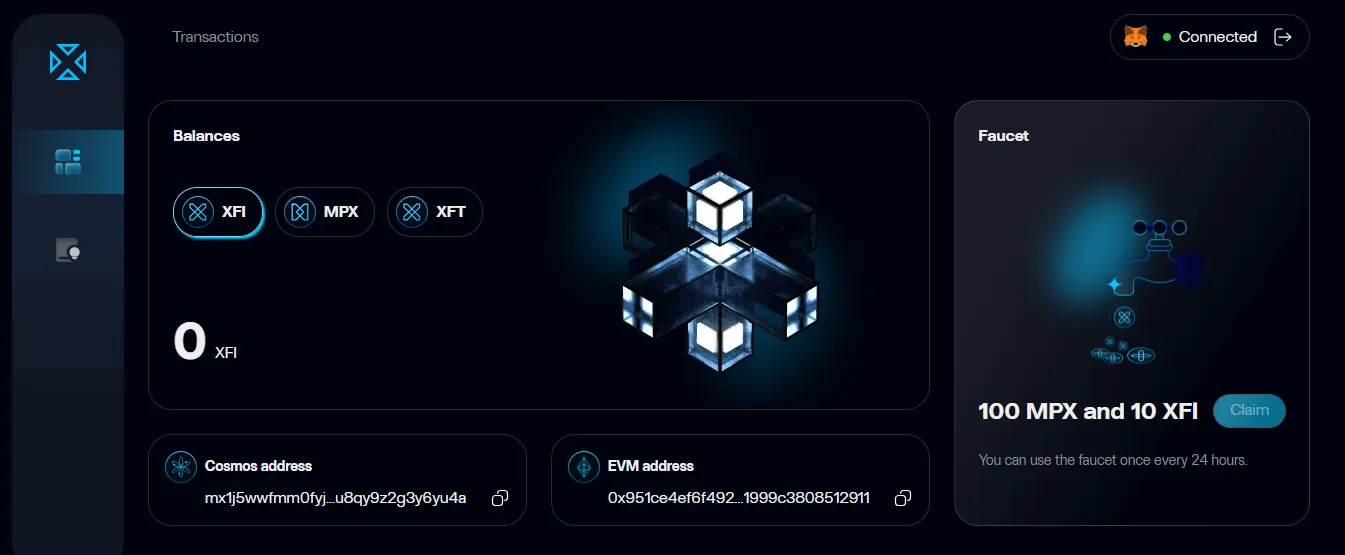
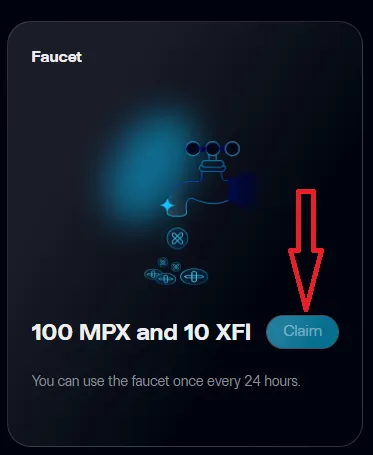
On the right we see Faucet. We receive MPX and XFI tokens once a day. To receive a token, you need to be authorized through Telegram.
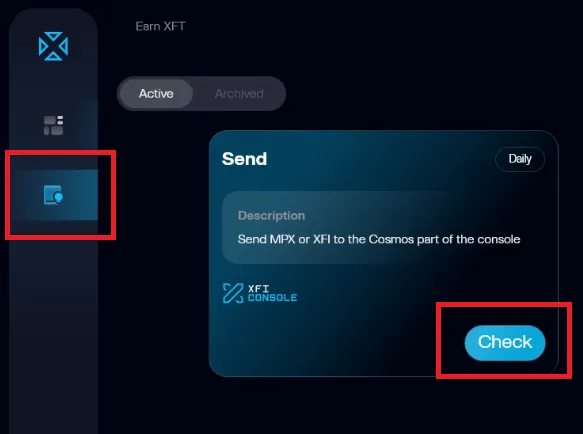
On the left there is a section “Earn XFT”. Daily tasks appear in it, for completing which you receive an XFT token.
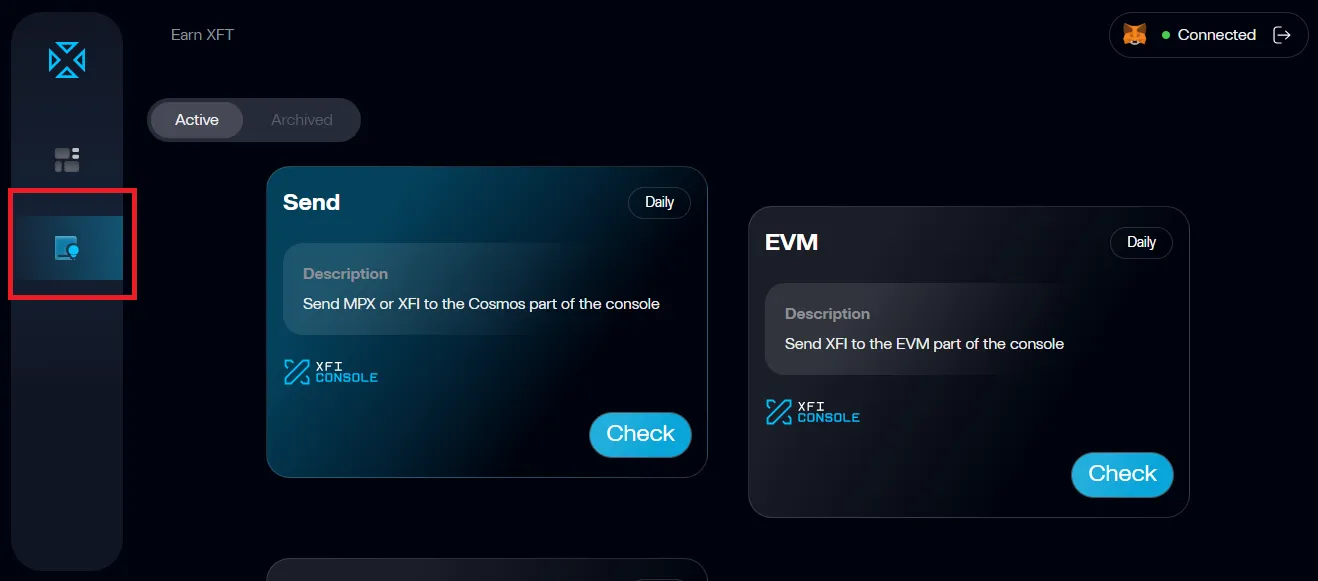
In the “Archived” section, all completed tasks are listed.

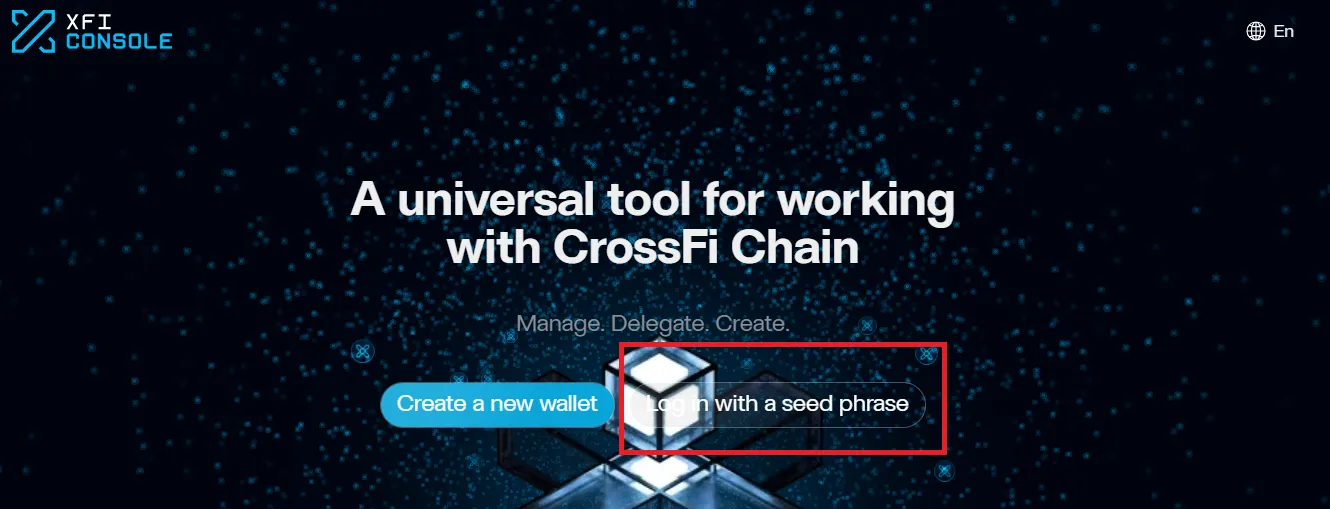
- Authorization in xfiConsole. Let's open the site. We do authorization using the seed-phrase (Memo-phrase) of the MM from which you entered TestPad.
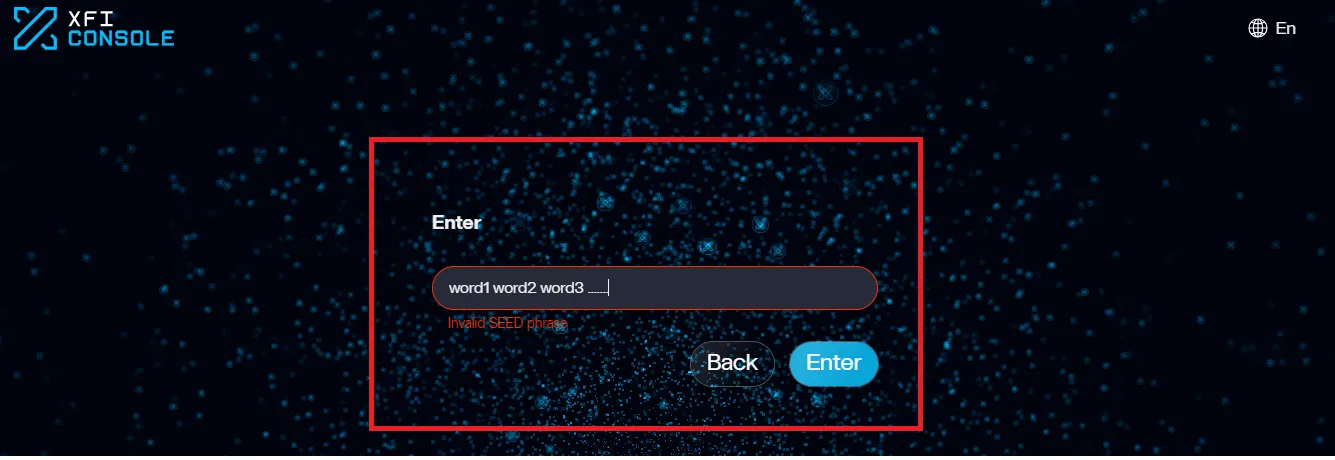
We get to xfiConsole.
- Assignments. At the moment we have 6 tasks that are updated once a day.
Task No. 1. Sending any amount of MPX or XFI token via the Cosmos network. Take any of your addresses in the Cosmos network, or you can send them to our validator address. mx102082exx8jsp00u667n3c30pwynky3y9q8agk5
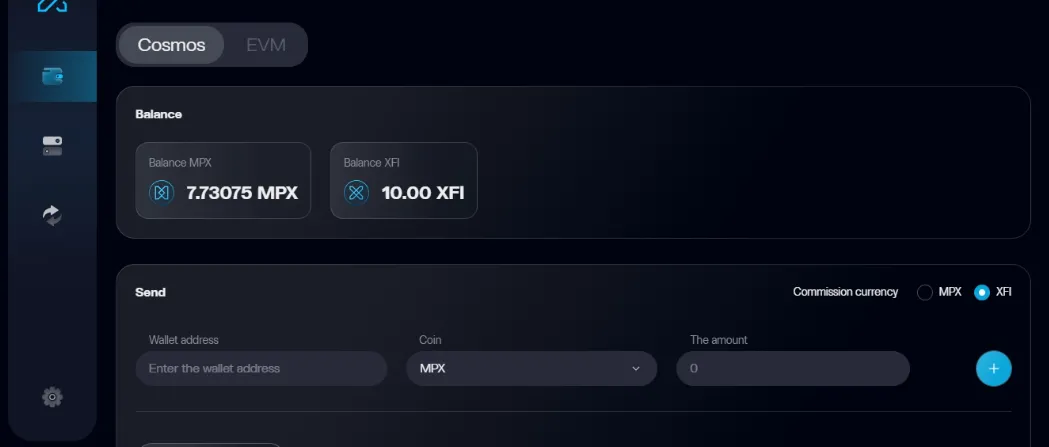
Go to xfiConsole. “Wallet” section.
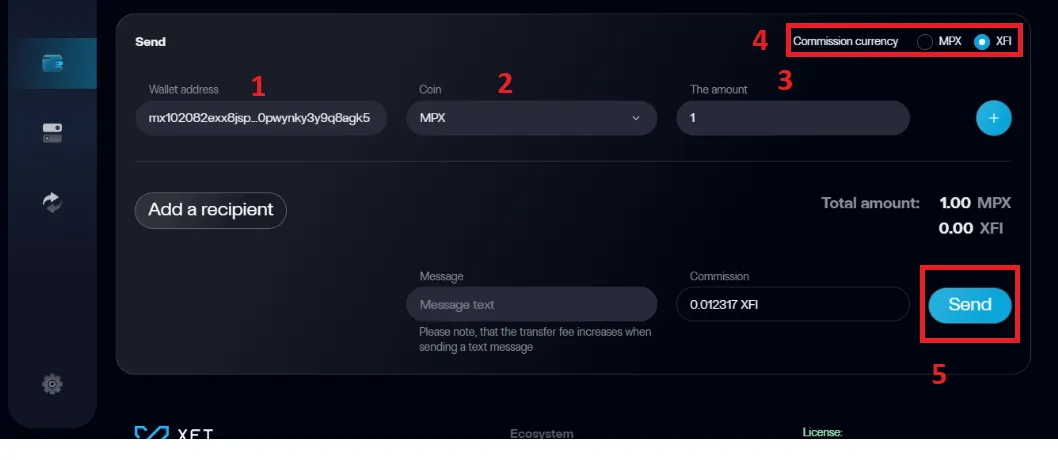
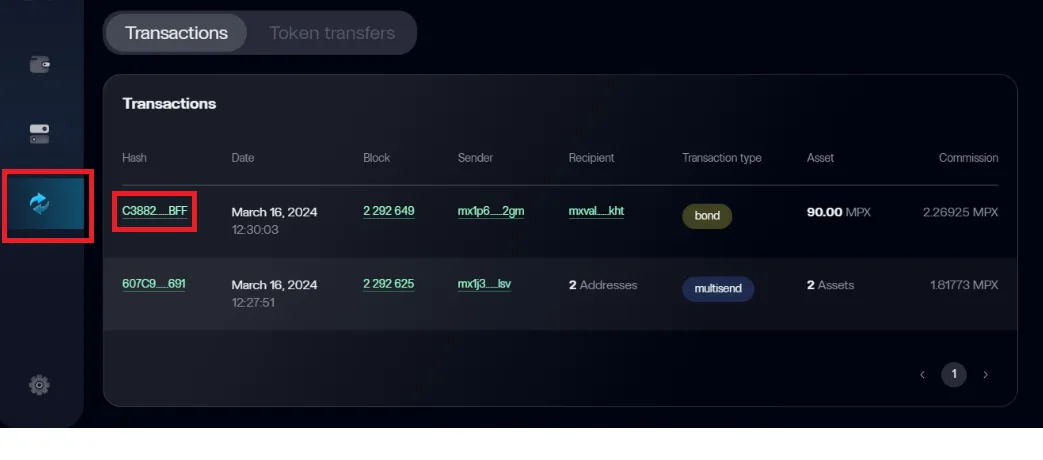
1-Indicate the address. 2-Select which token to send. 3-Indicate the quantity. 4-Choose in which token we pay the commission. After the tokens have been sent. You need to confirm the completion of the task; to do this, go to the “Operations history” tab. It displays completed transactions for all time. Copy the “Hash” of the completed transaction.
Let's go to TestPad. “Earn XFT” section. Press the “Check” button on the first task. And paste the hash copied earlier.
That's it, the task is completed. Each task must be confirmed with a hash.
Task No. 2. Sending any amount of XFI token via the EVM network. Send to any of your EVM addresses. Or you can send it to our validator address 0x7A9e7564C63ca017bF9ad7A71c45E17127624485
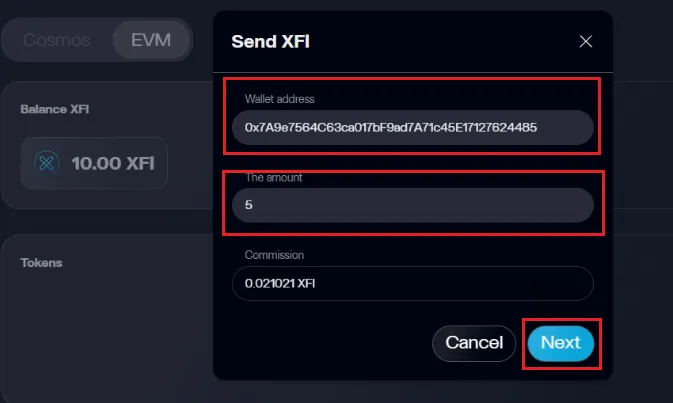
Go to xfiConsole. “Wallet” section. Select EVM. Click “Send”.
We indicate the wallet address and the number of tokens. Click “Next”.
On the next window, check the entered data and click “Send”.

Don't forget to copy the hash and confirm the completion of the task.
Task No. 3. Multisend 1. Sending any amount of MPX or XFI token to 2 or more wallets at a time. Use any of your addresses in the Cosmos network. Or you can take ours: mx102082exx8jsp00u667n3c30pwynky3y9q8agk5 mx1p6naahy22x5wr75khz67mz9j8xpxggnumx52gm
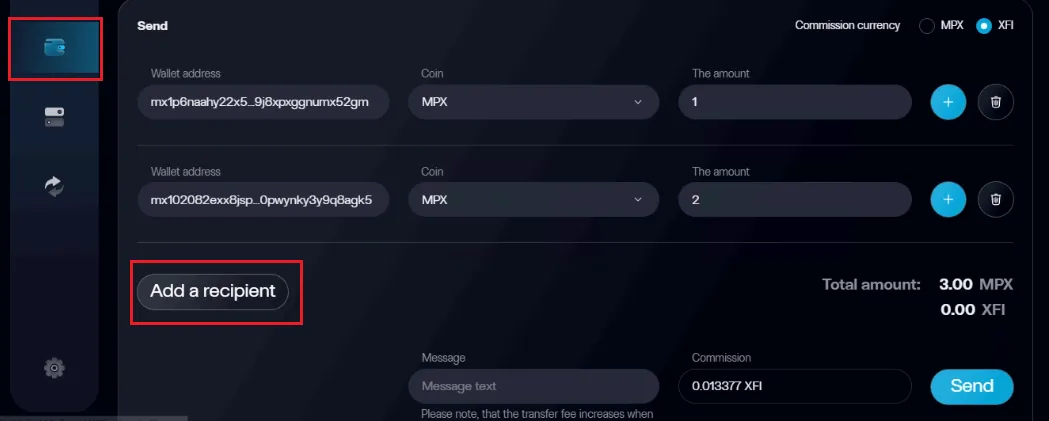
Go to xfiConsole. “Wallet” section. Click the “Add Recipient” button, another field will appear to fill out. Further everything is as in Task No. 1. We indicate the wallet addresses, coin and quantity. Click “Send”.
Don't forget to copy the hash and confirm the completion of the task.
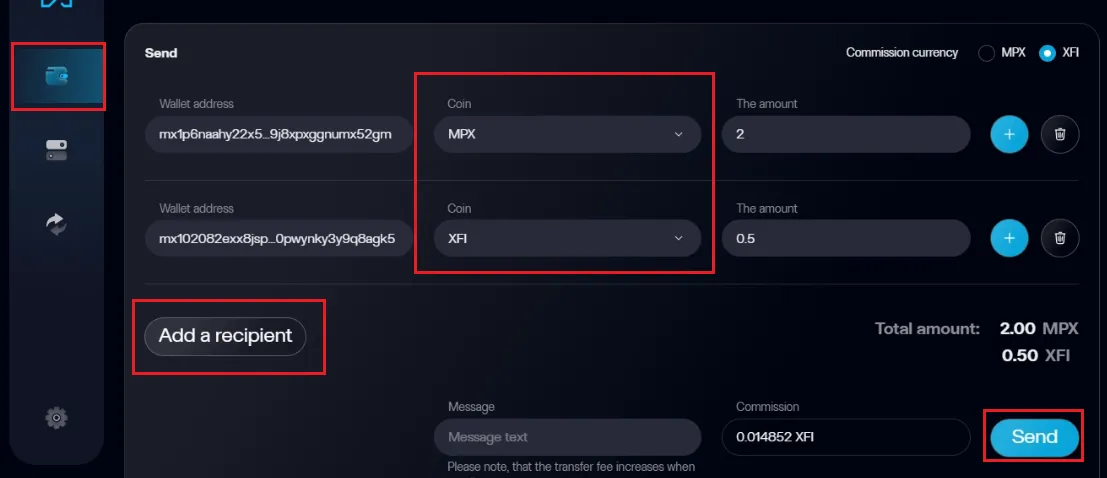
Task No. 4. Multisend 2. Sending any amount of MPX and XFI token to 2 or more wallets at a time. Use any of your addresses in the Cosmos network. Or you can take ours: mx102082exx8jsp00u667n3c30pwynky3y9q8agk5 mx1p6naahy22x5wr75khz67mz9j8xpxggnumx52gm
Go to xfiConsole. “Wallet” section. Click the “Add Recipient” button, another field will appear to fill out. Next, everything is the same as in Task No. 3, only we select different coins to send. We indicate the addresses of wallets, coins and quantities. Click “Send”.
Don't forget to copy the hash and confirm the completion of the task.
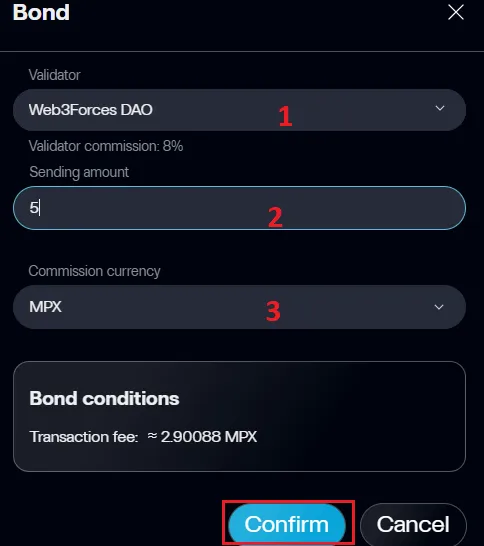
Task No. 5. Delegating the MPX token to the validator. We delegate tokens to the “Web3Forces DAO” validator
Go to xfiConsole. “Staking” section. Click “Bond”.

Find our validator in the list. Indicate the number of MRX tokens (the more you stake, the more XFI tokens you earn). Select the MRX token. Click “Confirm”.
After you have made the delegation. The validator will be displayed.
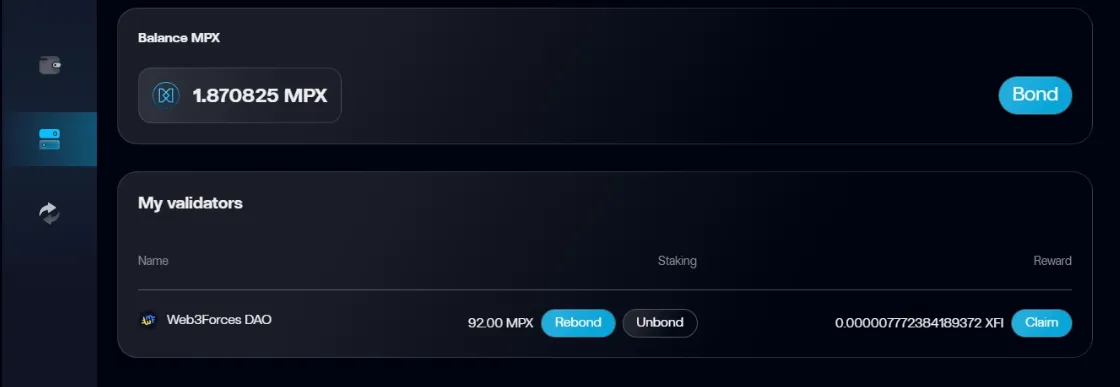
Don't forget to copy the hash and confirm the completion of the task.
Task No. 6. Currently not available as there is no XFT token. As soon as the task becomes available for completion, we will update this guide.
https://web3forces.com/ https://twitter.com/web3forces