
1. What is Stylus?
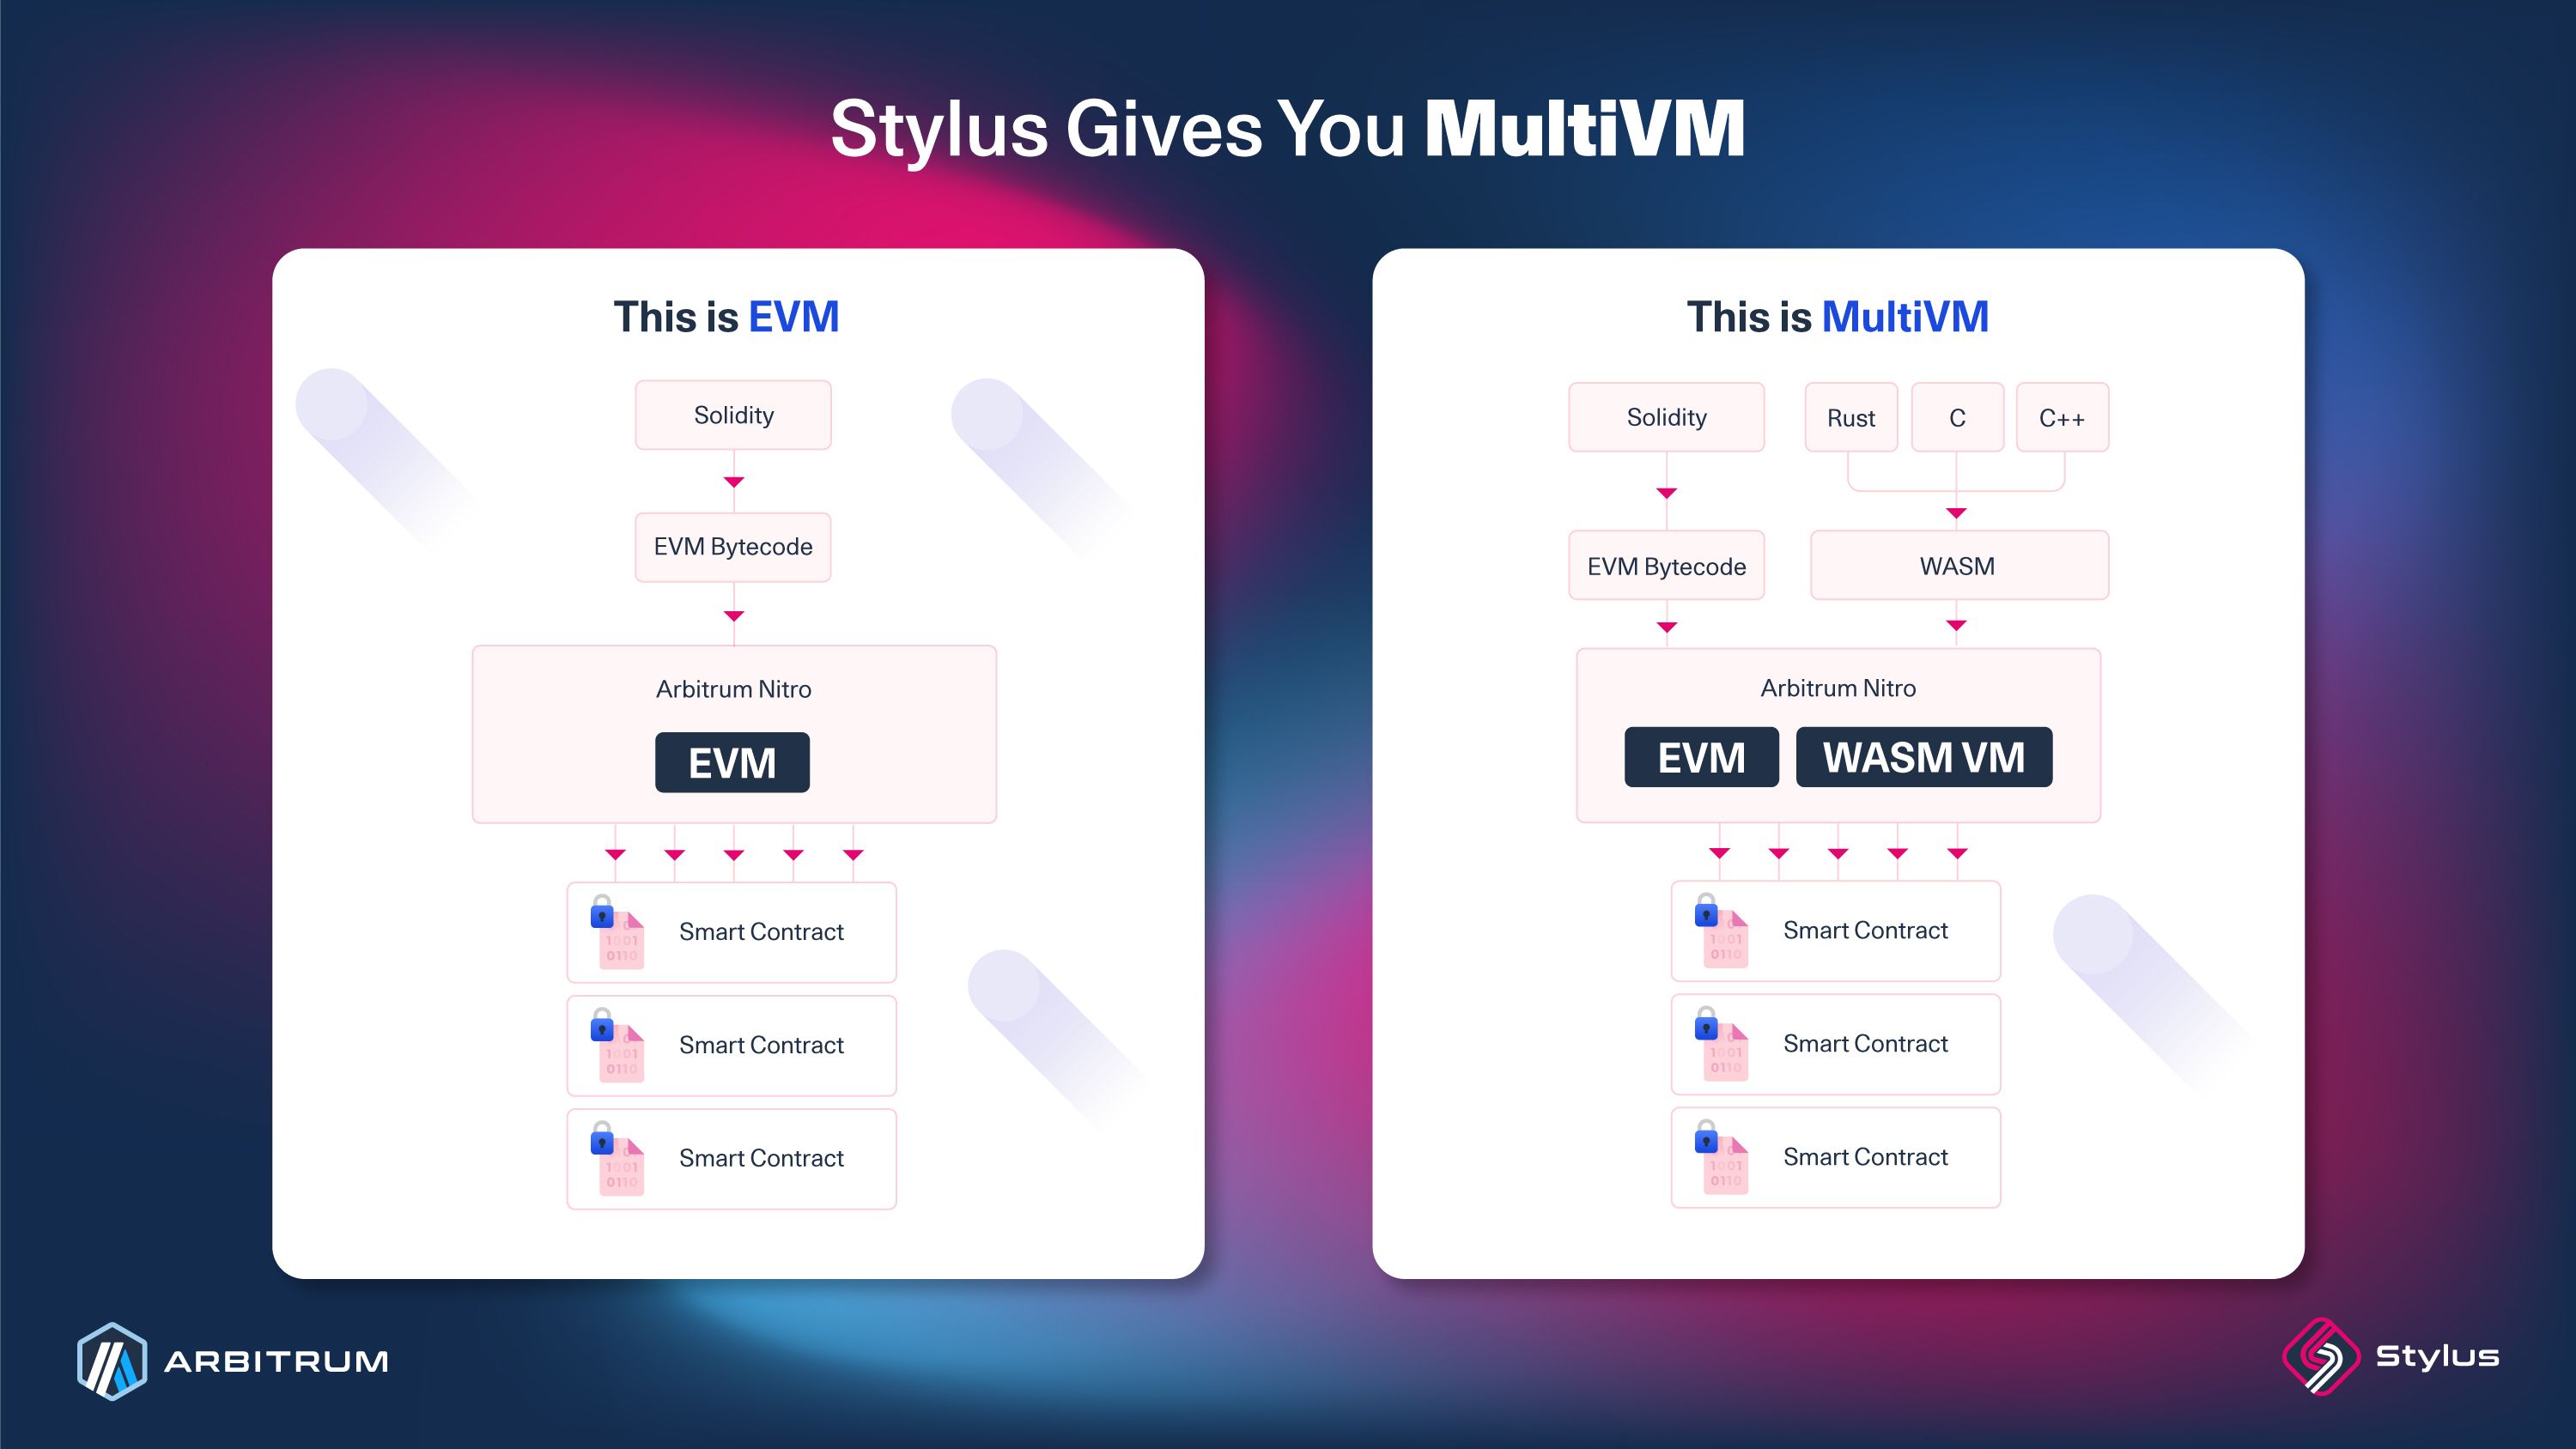
Stylus is a tool set that allows developers to write smart contracts using languages that compile to WASM, like Rust, C, and C++.
Stylus contracts benefit from Arbitrum's EVM equivalence through a coequal WASM virtual machine, meaning Solidity and Stylus contracts can seamlessly interact.
Stylus contracts are faster and have lower gas fees due to the efficiency of WASM. Additionally, Stylus optimizes memory use, enabling RAM consumption on the blockchain, unlocking new possibilities.
It’s an upgrade to Arbitrum Nitro, adding a WASM VM to the existing EVM system in a MultiVM setup.
2. How does an Stylus Rust Smart Contract look?
For this example we are going to use a Counter, it is the most basic contract to learn how a rust contract looks, for the moment you don’t need to copy or do anything with the code, just understand it as later we will know how to get it in the IDE.
A counter is simple contract that defines a count value in storage that can be incremented, decremented, and set to a specific number. Here is the Solidity approach to implement it:
contract Counter {
    uint256 public number;

    function setNumber(uint256 newNumber) public {
        number = newNumber;
    }

    function increment() public {
        number++;
    }
}
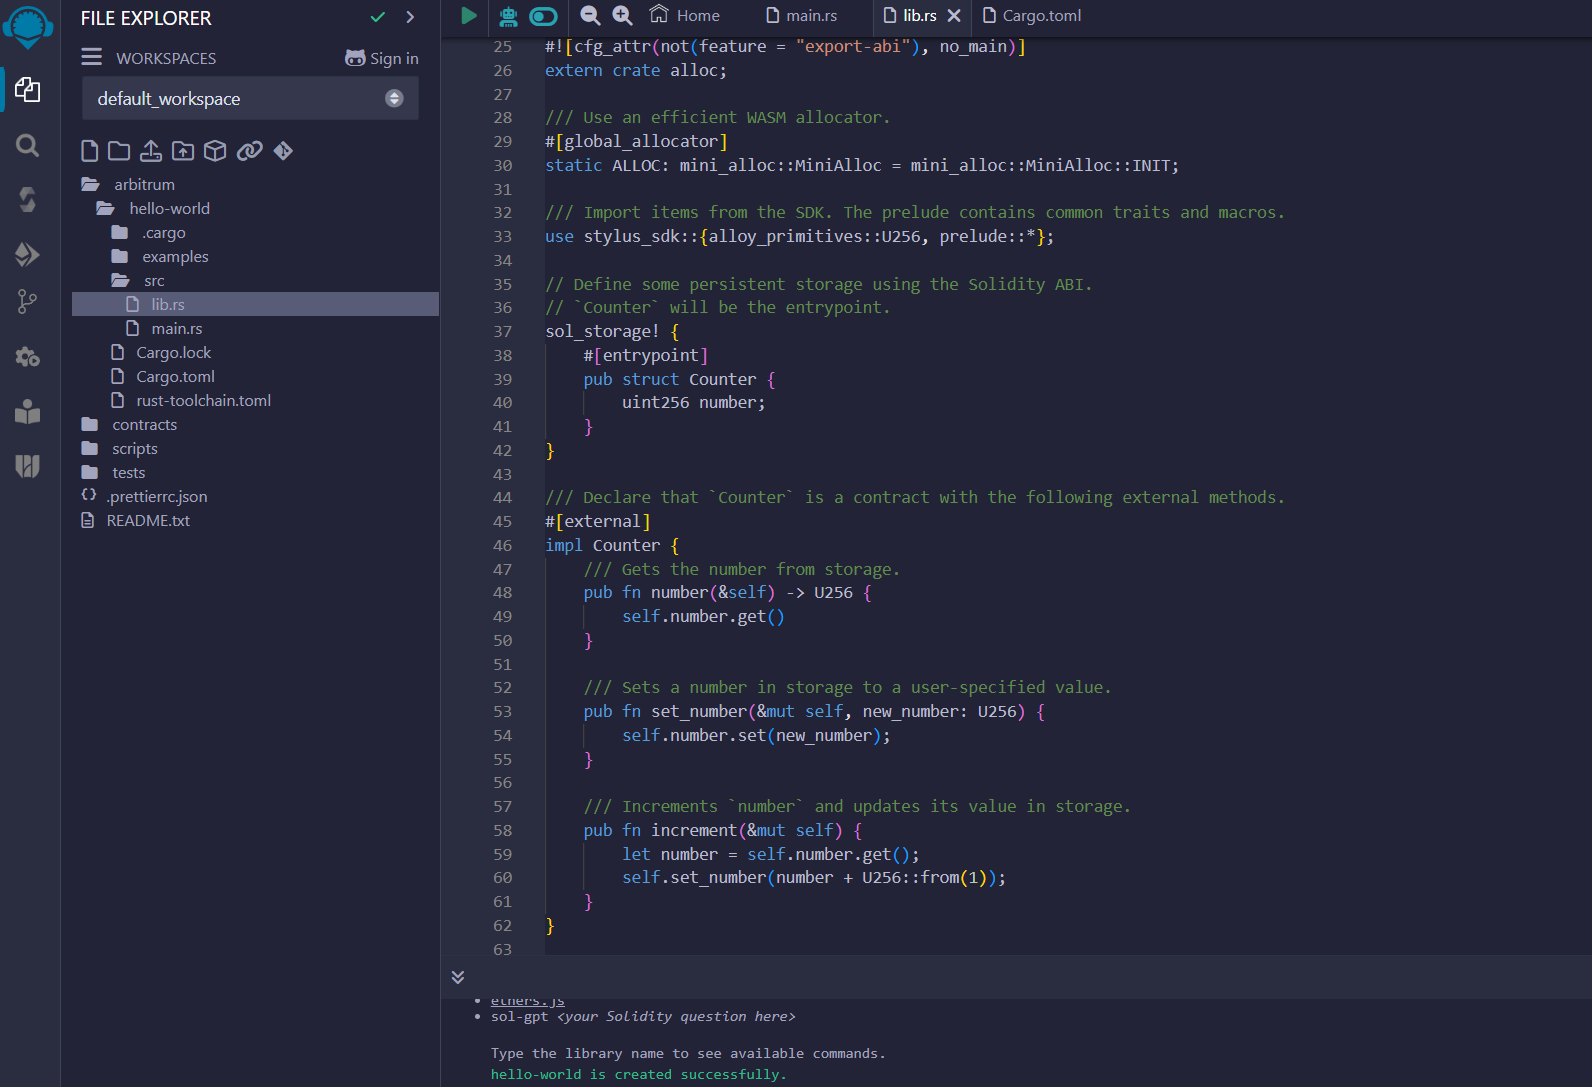
Now we need to translate this simple contract to Rust, here is what it looks like:
// Allow `cargo stylus export-abi` to generate a main function.
#![cfg_attr(not(feature = "export-abi"), no_main)]
extern crate alloc;

/// Use an efficient WASM allocator.
#[global_allocator]
static ALLOC: mini_alloc::MiniAlloc = mini_alloc::MiniAlloc::INIT;

/// Import items from the SDK. The prelude contains common traits and macros.
use stylus_sdk::{alloy_primitives::U256, prelude::*};

// Define some persistent storage using the Solidity ABI.
// `Counter` will be the entrypoint.
sol_storage! {
    #[entrypoint]
    pub struct Counter {
        uint256 number;
    }
}

/// Declare that `Counter` is a contract with the following external methods.
#[external]
impl Counter {
    /// Gets the number from storage.
    pub fn number(&self) -> U256 {
        self.number.get()
    }

    /// Sets a number in storage to a user-specified value.
    pub fn set_number(&mut self, new_number: U256) {
        self.number.set(new_number);
    }

    /// Increments `number` and updates its value in storage.
    pub fn increment(&mut self) {
        let number = self.number.get();
        self.set_number(number + U256::from(1));
    }
}
We also need to declare the main file and cargo.toml, the main function will generate the ABI as our Solidity contract will do indicating the license and the compiler version, and the cargo will store our dependencies and package info
#![cfg_attr(not(feature = "export-abi"), no_main)]

#[cfg(feature = "export-abi")]
fn main() {
    stylus_hello_world::print_abi("MIT-OR-APACHE-2.0", "pragma solidity ^0.8.23;");
}
[package]
name = "stylus-hello-world"
version = "0.1.5"
edition = "2021"
license = "MIT OR Apache-2.0"
homepage = "https://github.com/OffchainLabs/stylus-hello-world"
repository = "https://github.com/OffchainLabs/stylus-hello-world"
keywords = ["arbitrum", "ethereum", "stylus", "alloy"]
description = "Stylus hello world example"

[dependencies]
alloy-primitives = "0.3.1"
alloy-sol-types = "0.3.1"
mini-alloc = "0.4.2"
stylus-sdk = "0.5.0"
hex = "0.4.3"

[dev-dependencies]
tokio = { version = "1.12.0", features = ["full"] }
ethers = "2.0"
eyre = "0.6.8"

[features]
export-abi = ["stylus-sdk/export-abi"]
debug = ["stylus-sdk/debug"]

[[bin]]
name = "stylus-hello-world"
path = "src/main.rs"

[lib]
crate-type = ["lib", "cdylib"]

[profile.release]
codegen-units = 1
strip = true
lto = true
panic = "abort"
opt-level = "s"
As you can see we need a little bit more of configuration but we can now write our smart contracts in Rust 🦀 without having to learn a new language, isn’t it awesome?
3. How to deploy your first Rust contract
Now that we have our contract we need to deploy it to the blockchain, for this tutorial we are going to use an online IDE called Remix, it is the most common place to deploy simple Solidity contracts or when you can’t install all the dependencies. In this case we are going to use an amazing plugin developed by WELLDONE Studio to enable the development and deploy of smart contracts using Rust.
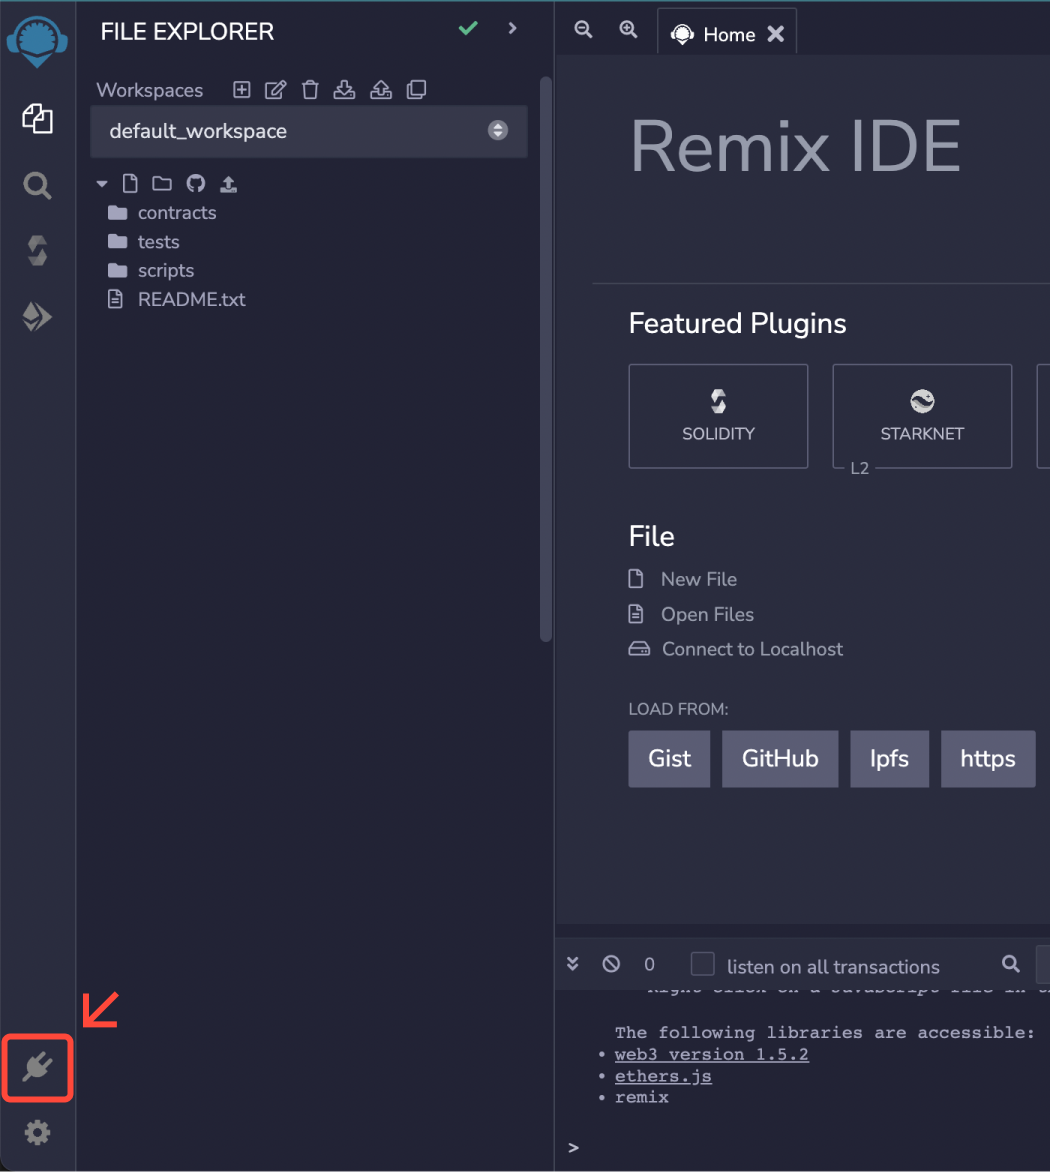
3.1 Setting up Remix
Step 1: Click Plugin Manager button in the left bar.
Step 2: Search for Arbitrum Stylus and click the Activate button.
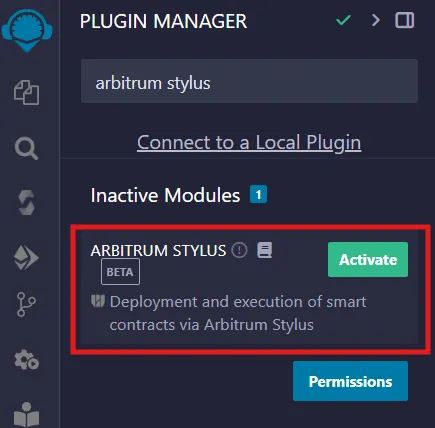
If the plugin has been successfully added, you can run the Arbitrum Stylus plugin by clicking the icon shown in the left bar.
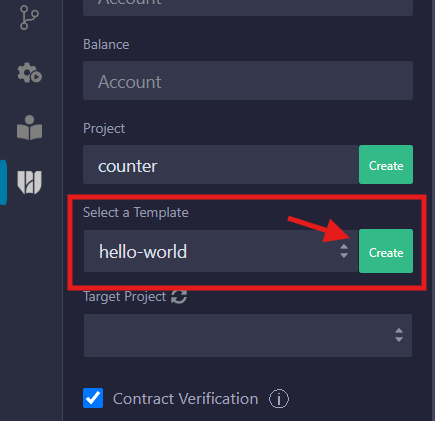
Now that we have the plugin installed we are going to create the project with the hello-world template, it will create a folder in our workspace called arbitrum with all the files we saw before.
3.2 Building and deploying to Arbitrum
It’s time to build the contract, we need to connect our wallet to be able to compile it, remix will asks us for some permissions to grant, the plugin needs them to compile so accept them all. After some moments we will see the Build Completed. message in the console and we will be finally able to deploy to the blockchain a Rust smart contract, what a time to be alive, right?
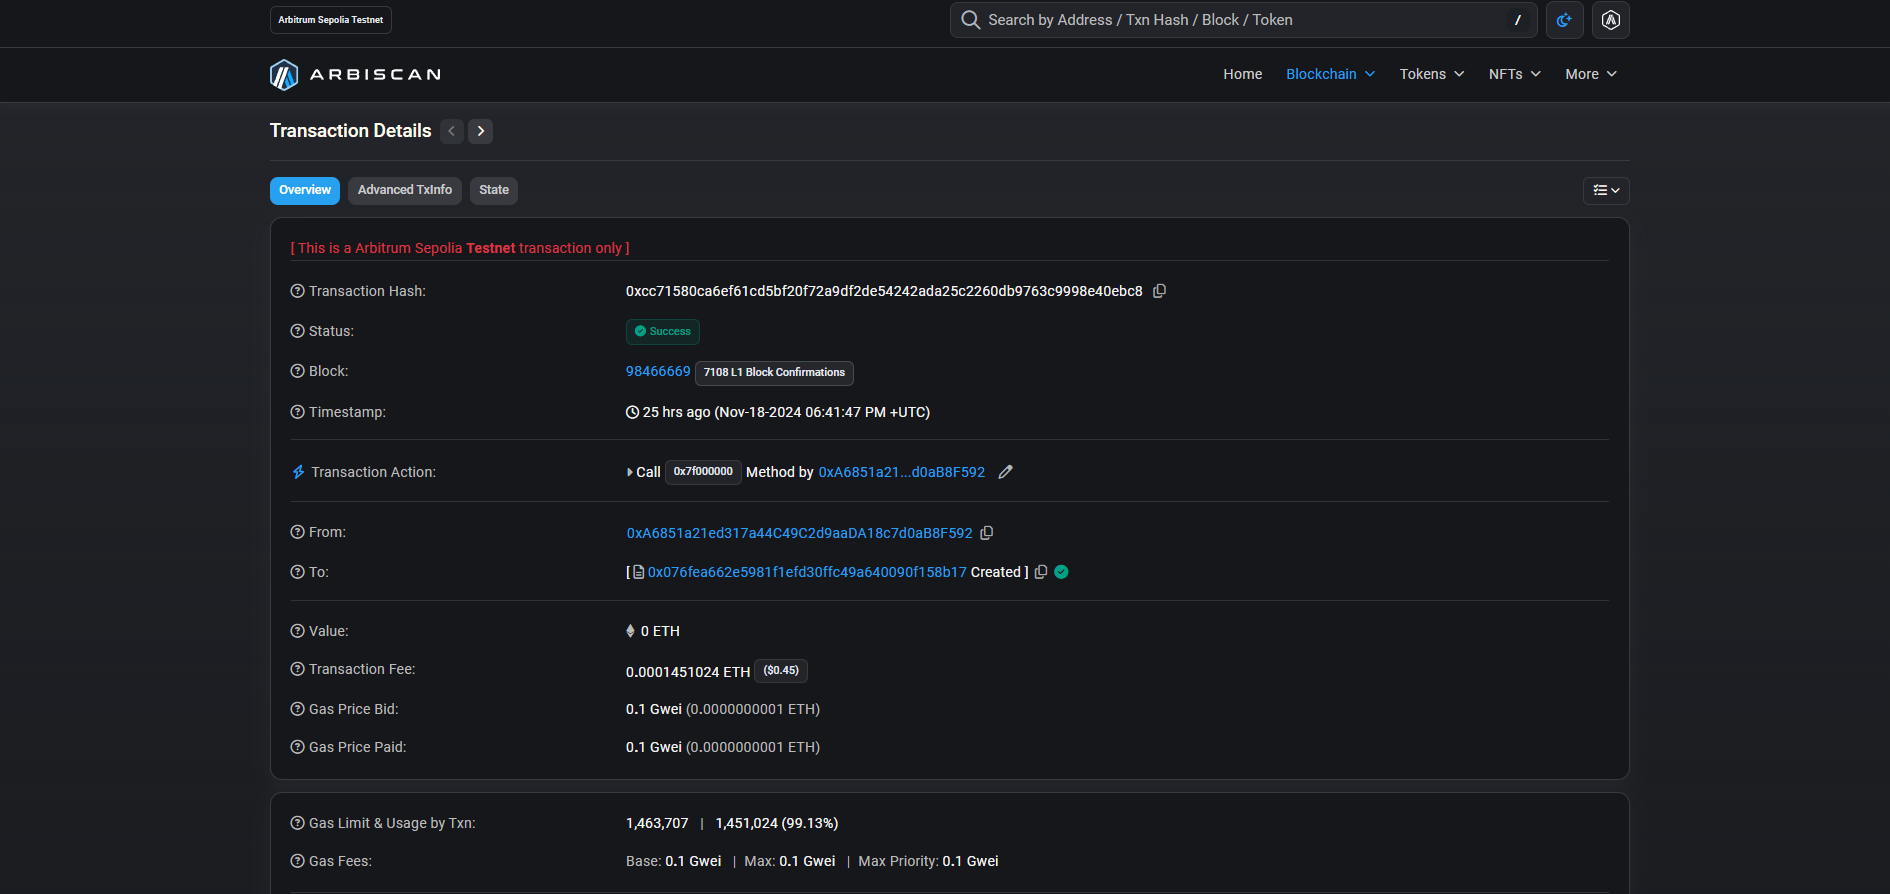
Click the deploy button and sign the transaction, if you need some gas for it you can use this Arbitrum Sepolia faucet.
And….. BOOM. You just deployed your first Rust smart contract in Arbitrum, some cheers for you!
4. Intro to scaffold and requirements
Scaffold-ETH is an open-source, up-to-date toolkit for building decentralized applications (dapps) on the Ethereum blockchain. It's designed to make it easier for developers to create and deploy smart contracts and build user interfaces that interact with those contracts.
Scaffold is built using well known tools in the Ethereum developing ecosystem, both in contract development and front end solutions, such as NextJS as framework with TalwindCSS for rapid styling prototyping, RainbowKit as wallet aggregator, Hardhat and Foundry as smart contract development tools and also Viem / Wagmi to connect to the Ethereum network(s) and TypeScript for interface and safe typing on Javascript.
We are going to use Scaffold-ETH for our tutorial in order to demonstrate how easy it is to test your contracts once deployed using Stylus (and Remix) through a easy-to-use interface that can communicate with your contract methods as any other EVM compatible contract would do.
Open a terminal and type, It should output a version equal or greater than v18.17. If not, you should update!
node --version
Now, Scaffold-ETH is also package manager opinionated so if you do not have yarn installed in your machine you need to install that first.
npm i --global yarn

// Check yarn is installed properly
yarn --version

// Should output something like
3.2.3
Now we are ready to install Scaffold-ETH
npx create-eth@latest
It will ask to install a needed package, enter y. Then go over the installation menu. When asked about installing hardhat or foundry select none. We already have our smart contracts deployed through Remix 😁
5. What to modify in our App
We need to add Abritrum Sepolia (Testnet for Arbitrum) to our set of networks so we can connect seamlessly using RainbowKit. In order to to that go to
packages/nextjs/scaffold.config.ts
and locate the following code
targetNetworks: [chains.mainnet]
Add Arbitrum Sepolia to the array of networks
targetNetworks: [chains.arbitrumSepolia],
One of the beauties of Scaffold-ETH is that is comes come predefined api keys for WalletConnect and Alchemy so you can connect your wallet and start interacting with the blockchain right away.
However, if you want to deploy your own version of Scaffold-ETH or want to use your own api keys you will need to rename your env.example file to env.local and place your keys there
NEXT_PUBLIC_ALCHEMY_API_KEY=<YOUR ALCHEMY PROJECT ID KEY>
NEXT_PUBLIC_WALLET_CONNECT_PROJECT_ID=<YOUR WALLET CONNECT PROJECT ID KEY>
Now, in order to interact with our contract we need to import its ABI code into Scaffold-ETH. Go to packages/nextjs/contracts/externalContracts.ts
From Remix, copy the ABI code from the UI by clicking on its respective button.
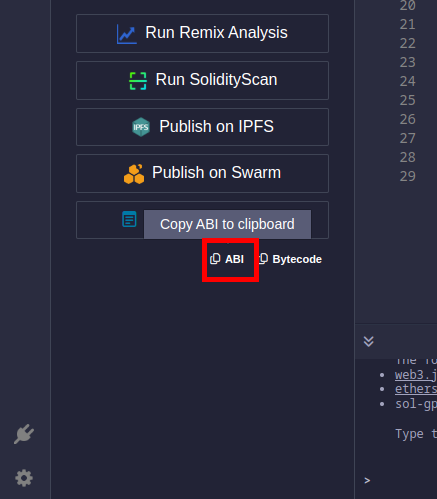
Paste it into your externalContracts.ts file declaring it as a const like this
const externalContracts = {
    1: {
        COUNTER: {
            address: "YOUR CONTRACT ADDRESS",
            abi: [
                {
                    "inputs": [],
                    "name": "increment",
                    "outputs": [],
                    "stateMutability": "nonpayable",
                    "type": "function"
                },
                {
                    "inputs": [],
                    "name": "number",
                    "outputs": [
                    {
                        "internalType": "uint256",
                        "name": "",
                        "type": "uint256"
                    }
                    ],
                    "stateMutability": "view",
                    "type": "function"
                },
                {
                    "inputs": [
                    {
                        "internalType": "uint256",
                        "name": "new_number",
                        "type": "uint256"
                    }
                    ],
                    "name": "setNumber",
                    "outputs": [],
                    "stateMutability": "nonpayable",
                    "type": "function"
                }
            ]
        }
    }
} as const;
6. How to run it
Now we are ready to fire up our app
yarn start
Go to Debug Contracts page by clicking on its respective menu button to start interacting with your contracts. You should see something like this
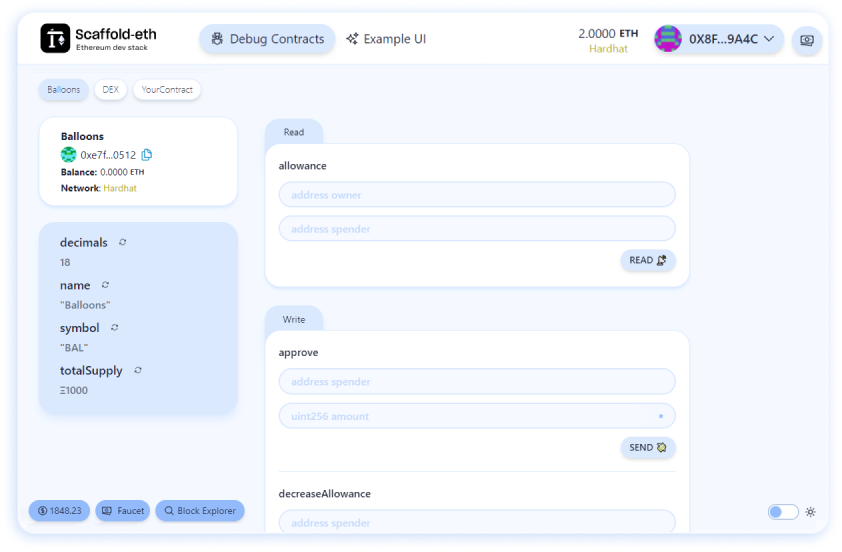
That’s it!, you can start calling your contract’s methods and check the logs after every transaction.
Here is an example for the whole application using [insert smart contracts from Remix] with a list of available faucets to get you started with Stylus on Arbitrum.
Here is a repository used for the tutorial with everything preinstalled and configured to start testing!
7. Conclusion
Developing smart contracts with Stylus is not only a game changer but with tools such as Scaffold-ETH we can safely test our faster, more efficient contracts deployed with an online tool such as Remix and then see how Stylus performs onchain. As Stylus continues to evolve, it will likely become a key tool in the blockchain developer's toolkit, offering both flexibility and efficiency in contract development…and you are already on it. Congratulations! 🎉
Tip: Stylus really shines on contracts when dealing with more intensive computations 😉
Thank you for reading, this tutorial has been created in collaboration with Roabhi. If you have any questions or need further assistance, please feel free to contact me. You can connect with me on X / Twitter or LinkedIn.