
Setting up our Starknet onchain-game DAPP
You want to make your first on-chain game on Starknet but you don’t know how to do it?
Let’s create one together!
What are we going to create?
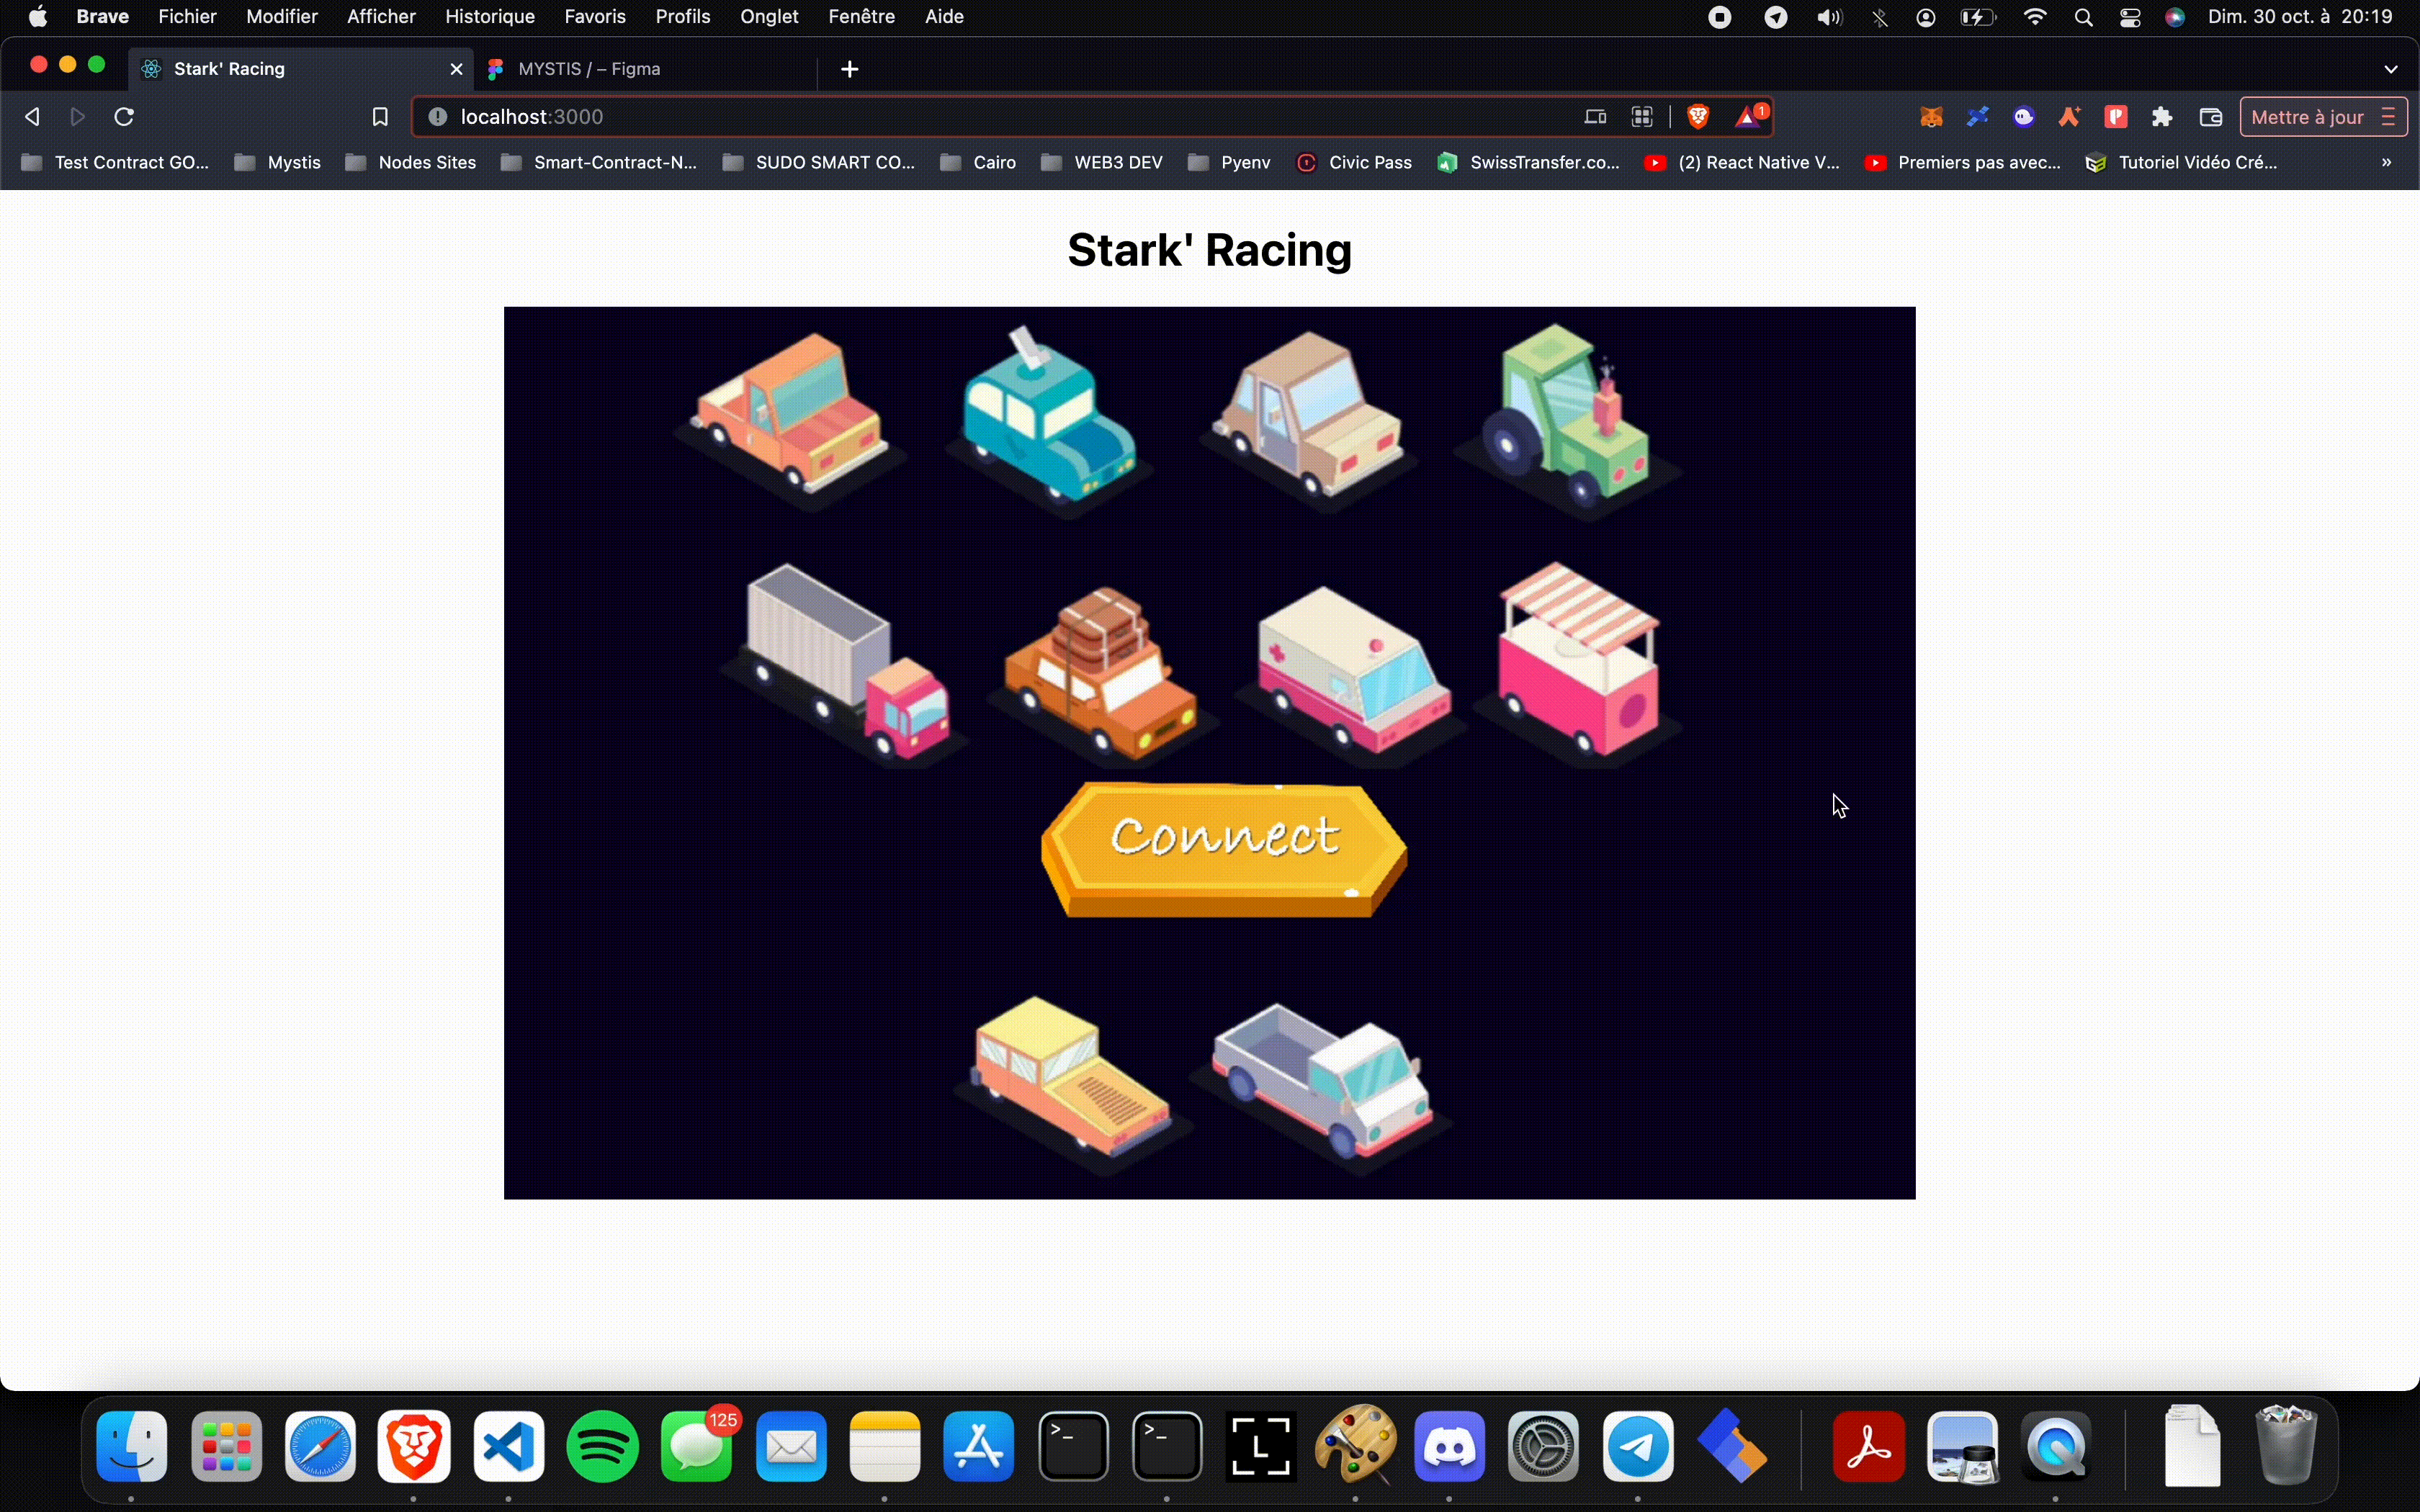
We are going to create a browser game on-chain : Stark’ Racing. In this game, we will be able to:
-
Connect our wallet directly on Phaser
-
Mint a car with a random speed property (between 0 and 100)
-
Race against another car. 🏎
The fastest car (greatest speed) will win the race and will be rewarded with our $SPEED token.
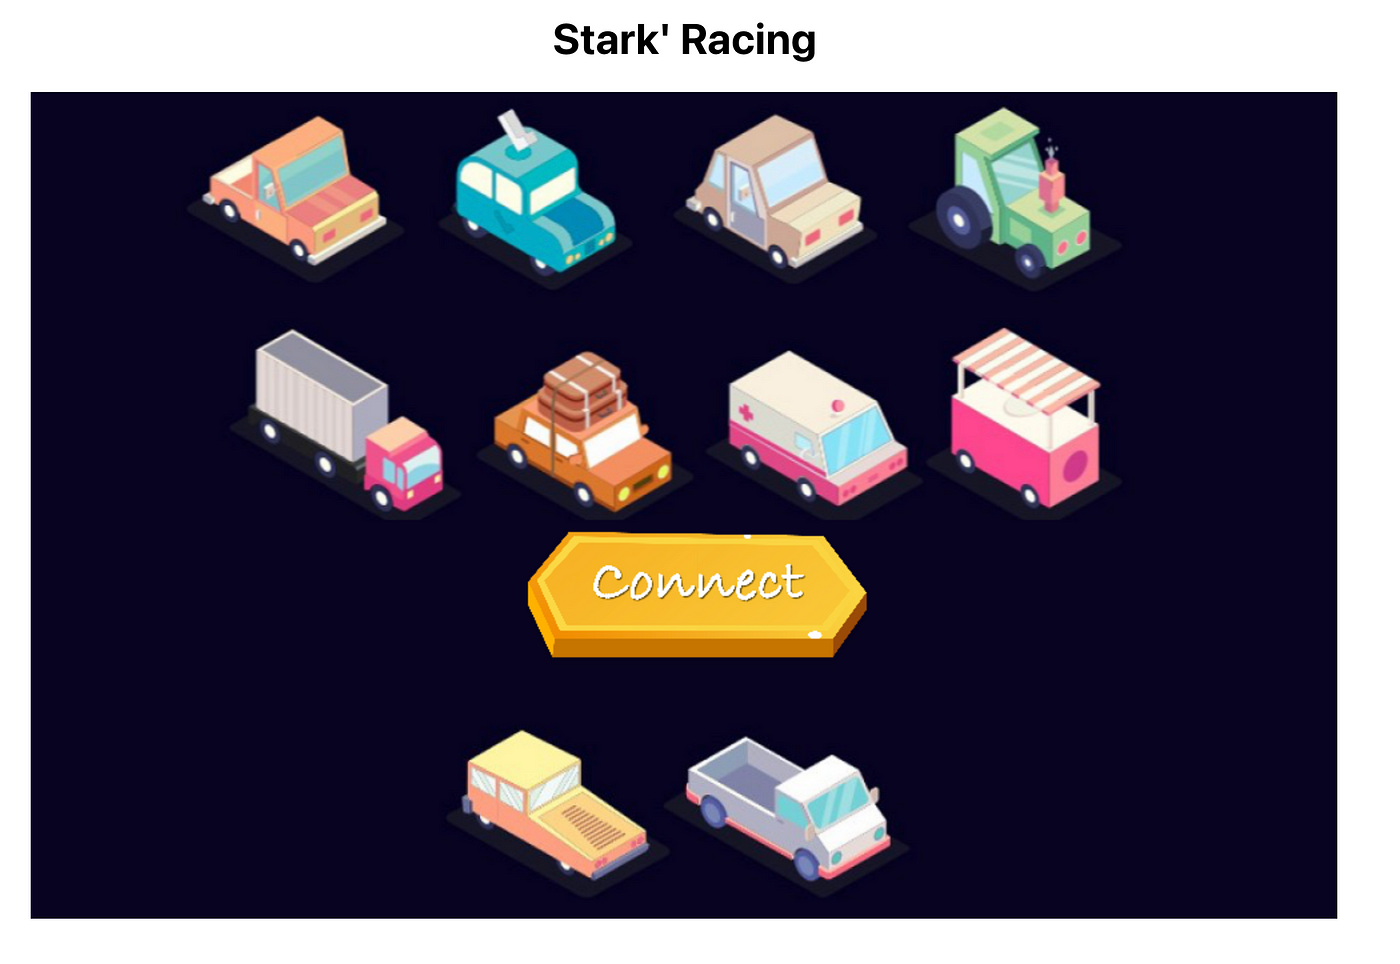
You can find below the rendering of our game:
In this first part of our serie “Create your first on-chain game on Starknet ”, we will see how to :
-
Setup our game project
-
Create our first game scene with Phaser
-
Create our Phaser component and a plugin to define the wallet connection function (Argent or other StarkNet wallets)
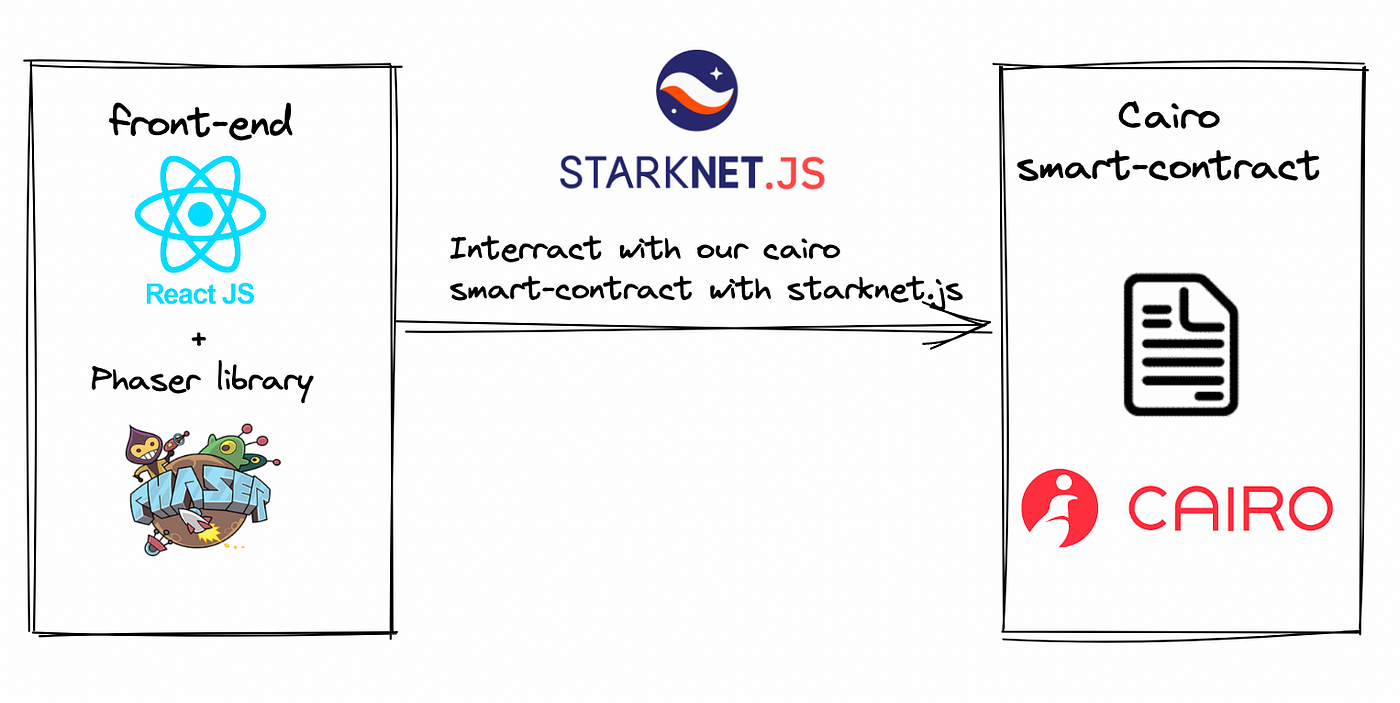
Here is what we will use as technologies:
What is Phaser?
Phaser is an open source HTML5 game development framework.
With Phaser we can create native Apps on Desktop and Mobile browser using Javascript and HTML5. (We can also use TypeScript).
Why Phaser?
Phaser is realy easy to handle. It will help us to create our own browser game in Javascript/TypeScript. We will be able to call all our smart-contract functions in Phaser like in a normal DAPP with StarknetJS.
Requirement:
We are going to use React and few Node libraries like Starknet.js / Phaser / @argent/getstarknet.
So we have to install NodeJS on our computer.
Let’s build Stark’ Racing!
First we need to create our React application :
npx create-react-app starknet-game-phaser
Then we can install our dependencies with :
npm i @argent/get-starknet phaser
You can find all the assets needed in the project repository. You can click on the GitHub link and import them in your public folder.
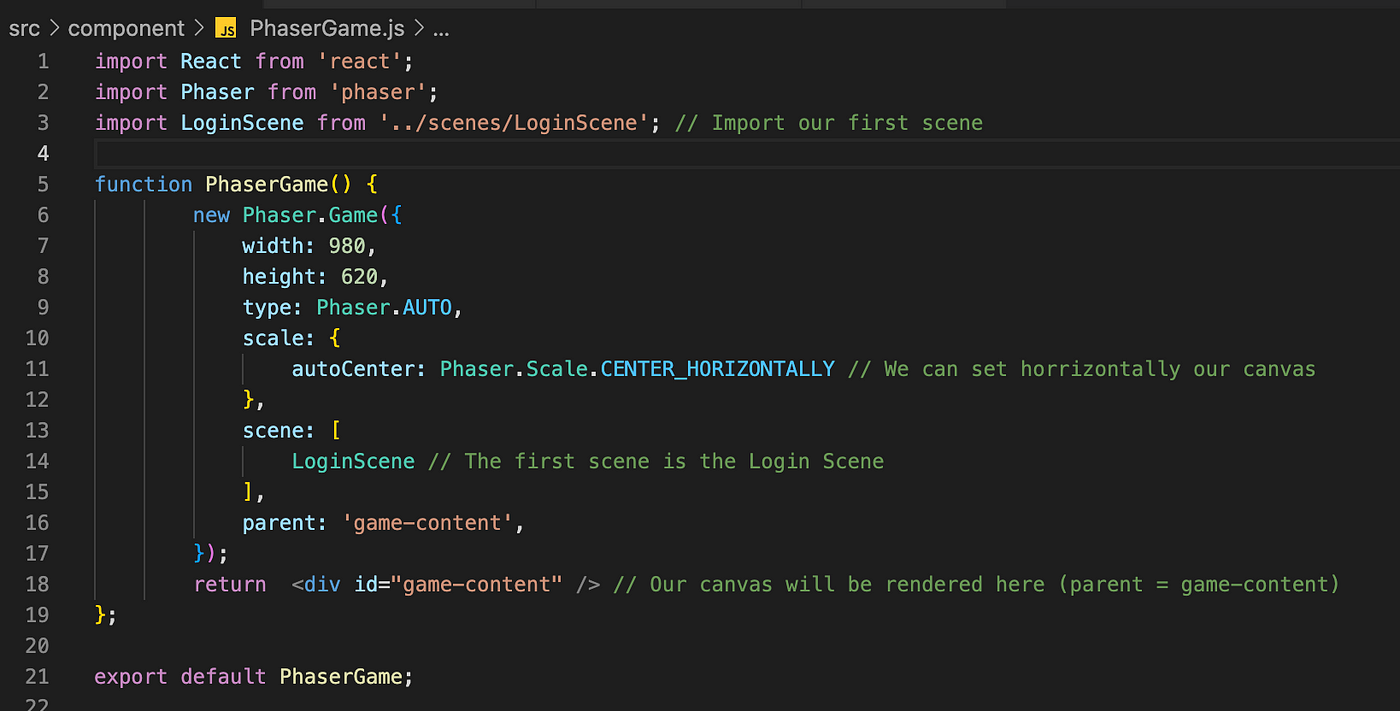
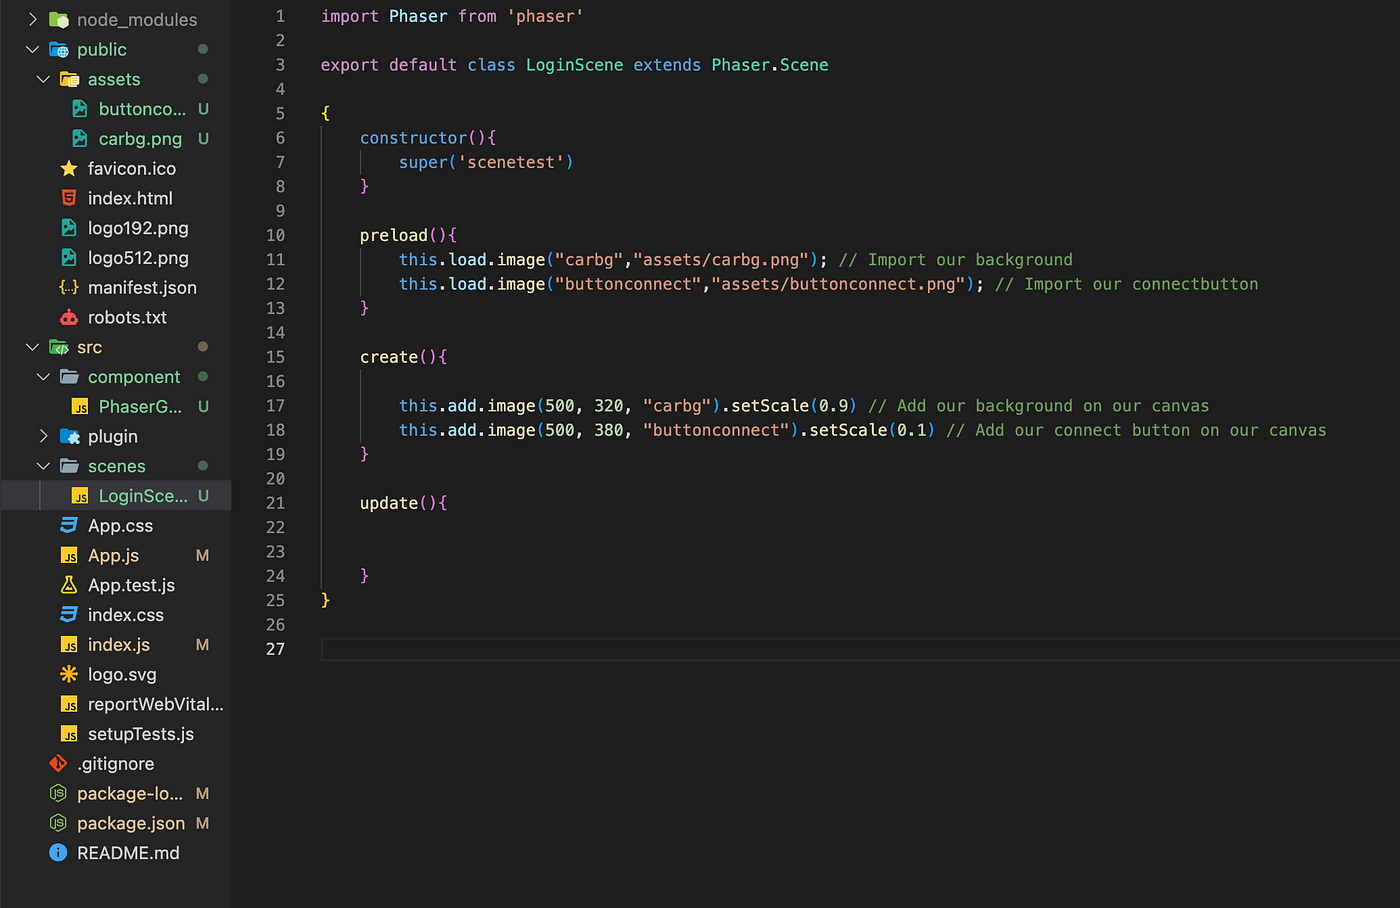
We can now create a component folder with our PhaserGame component. In this folder, we will create our Phaser canvas with our first scene : the LoginScene.
This his what our LoginScene looks like :
-
First we need to import all our assets
-
Then we can position our assets on our Canvas
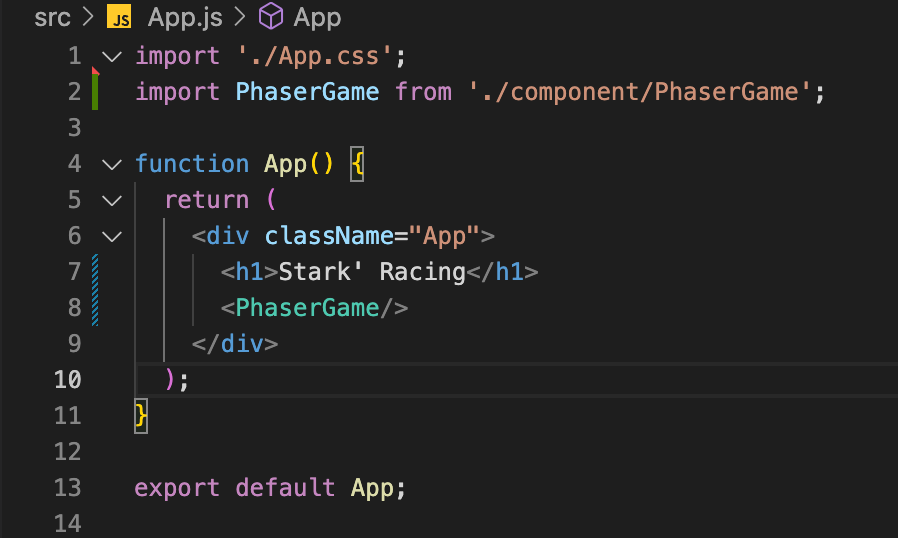
In our App.js, we can import our PhaserGame component and run our app with :
npm start
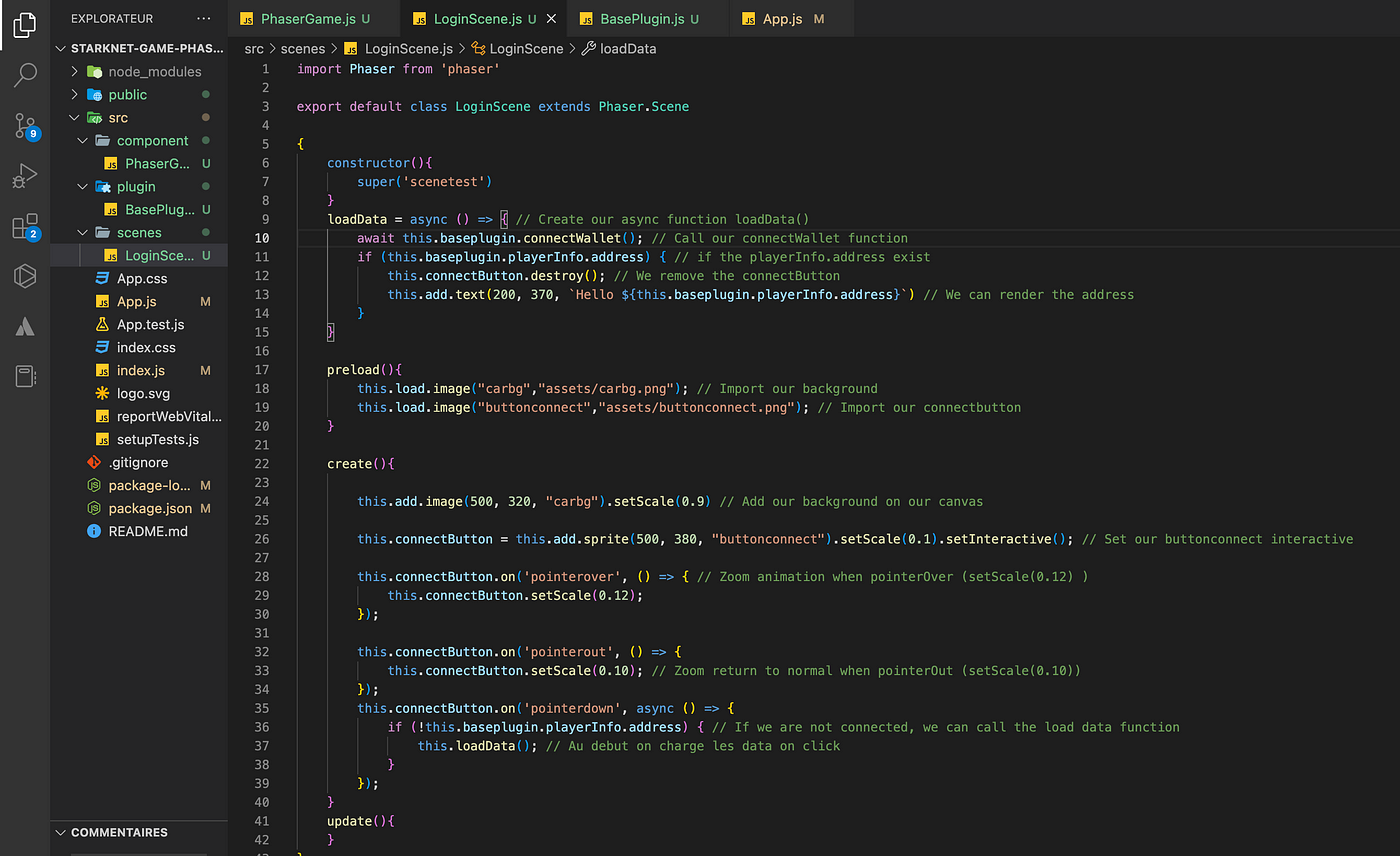
Now we want to call some functions in our phaser game. Like the connect wallet one, when we click on the “Connect” button.
To do so, we need to create a new plugin. In this one we will create our “connect wallet” function and call it “onClick”.
In that function, we are going to input a variable : the user address. We will use this variable later.
We are also going to handle the errors by forcing the user to connect and play only via the testing Goerli network.

We now have to import a new plugin “BasePlugin” in our PhaserGame component.
We can now call our “onClick” function on our “LoginScene” scene to make the rendering dynamic. We can now see the user address displayed on the game page when we are connected.
Let’s see the result of our modifications :
We have set up well the basis of our game with :
-
A functional connection system by creating a plugin to call the “connectWallet()” function.
-
Stored the user address in the object “playerInfo” to display it in game.
Then we stored our address in an object “PlayerInfo” to display it in our game.
this.playerInfo = { address: null,}
Thanks for having read the first article of our series “Create your first on-chain game on Starknet” for Matchbox_Dao, in partnership with Argent and Mystis.
Article written by @ExyUzi