What is Scaffold-ETH 2?
In case you have been living under a rock for the last few years, one of the slickest toolkits for building on Ethereum is Scaffold-ETH. The main advantage to using Scaffold-ETH is that it is open-source, easy to use and comes with everything you will need to build and ship a decentralize application! 🚀
⚙️ The new and improved version 2 of Scaffold-ETH is built using NextJS, RainbowKit, Hardhat, Wagmi, and Typescript
-
✅ Contract Hot Reload: Your frontend auto-adapts to your smart contract as you edit it.
-
🔥 Burner Wallet & Local Faucet: Quickly test your application with a burner wallet and local faucet.
-
🔐 Integration with Wallet Providers: Connect to different wallet providers and interact with the Ethereum network.
If you want to learn more about Scaffold-ETH 2, checkout the projects README on Github.
Why should I use The Graph?
If you are building on Ethereum then you know that events are a critical part of your smart contract and are super important to help communicate changes to your front end and at the same time keep historical data about the dapp and its users. However dapps with large amounts of events being rendered in the frontend can exhibit major performance issues. This is where The Graph saves the day.
The Graph is a decentralized protocol for indexing and querying data from blockchains, starting with Ethereum. It makes it possible to query data that is difficult to query directly.
Developers who want to take advantage of The Graph protocol create Subgraphs. A subgraph is the secret sauce and tells how and where to extract and organize the blockchain data so that it can be easily queried via GraphQL.
If you want to learn more about The Graph you can visit their docs here.
OK, so you want to build a dapp quickly and you want to also dabble with The Graph, where do you start? Well… you are in the right spot. Let’s get into this!
Setup Scaffold-ETH 2
First, we will start out with a special build of Scaffold-ETH 2 written by Simon from Edge and Node… Thanks Simon! 🫡
You will need the following installed on your machine before getting started.
Prerequisites
First, we will start out with a special build of Scaffold-ETH 2 written by Simon from Edge and Node… Thanks Simon! 🫡
git clone -b subgraph-package \
  https://github.com/scaffold-eth/scaffold-eth-2.git \
  scaffold-eth-2-subgraph-package
Once you have this checked out on your machine, navigate into the directory and install all of the dependencies using yarn.
cd scaffold-eth-2-subgraph-package && \
  yarn install
Next**,** we will want to start up our local blockchain so that we can eventually deploy and test our smart contracts. Scaffold-ETH 2 comes with Hardhat by default. To spin up the chain just type the following yarn command…
yarn chain
You will keep this window up and available so that you can see any output from hardhat console. 🖥️
Next we are going to spin up our frontend application. Scaffold-ETH 2 comes with NextJS by default and also can be started with a simple yarn command. You will need to open up a new command line and type the following…
yarn start
You will also want to keep this window up at all times so that you can debug any code changes you make to NextJS, debug performance or just check that the server is running properly.
Next, you will want to open up a third window where you can deploy your smart contract, along with some other useful commands found in Scaffold-ETH. To do a deploy you can simply run the following…
yarn deploy
You should get a tx along with an address and amount of gas spent on the deploy. ⛽
If you navigate to http://localhost:3000 you should see the following NextJS application. Explore the menus and features of Scaffold-ETH 2! Someone call in an emergency, cause hot damn that is fire! 🔥
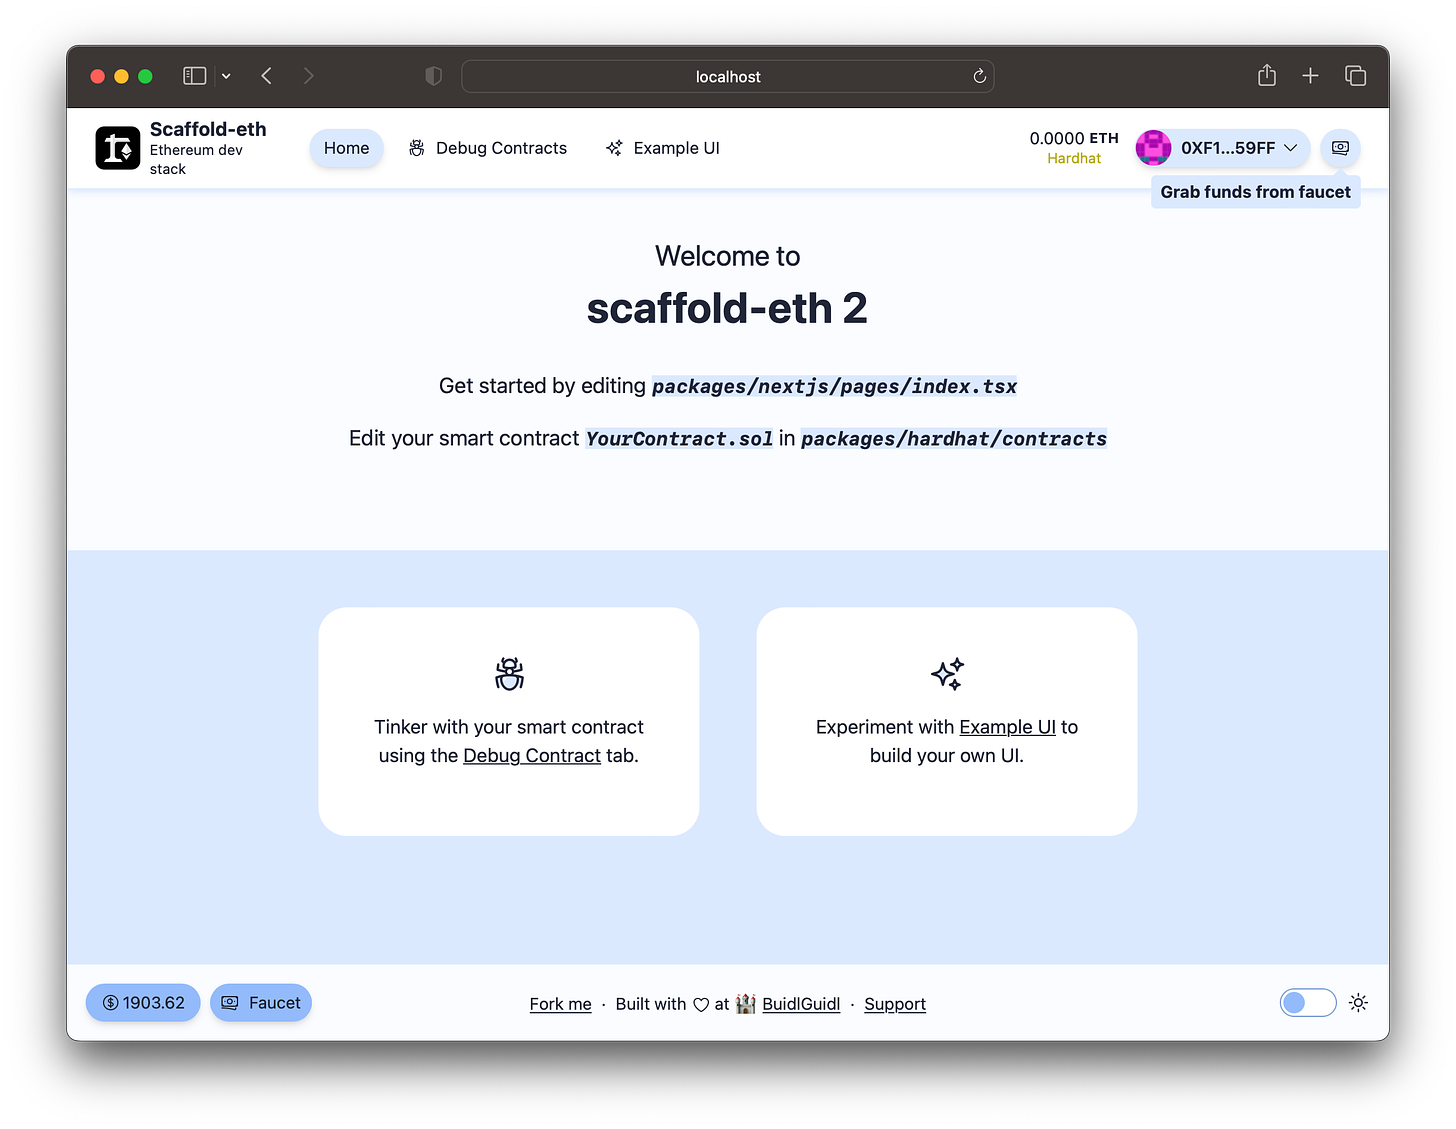
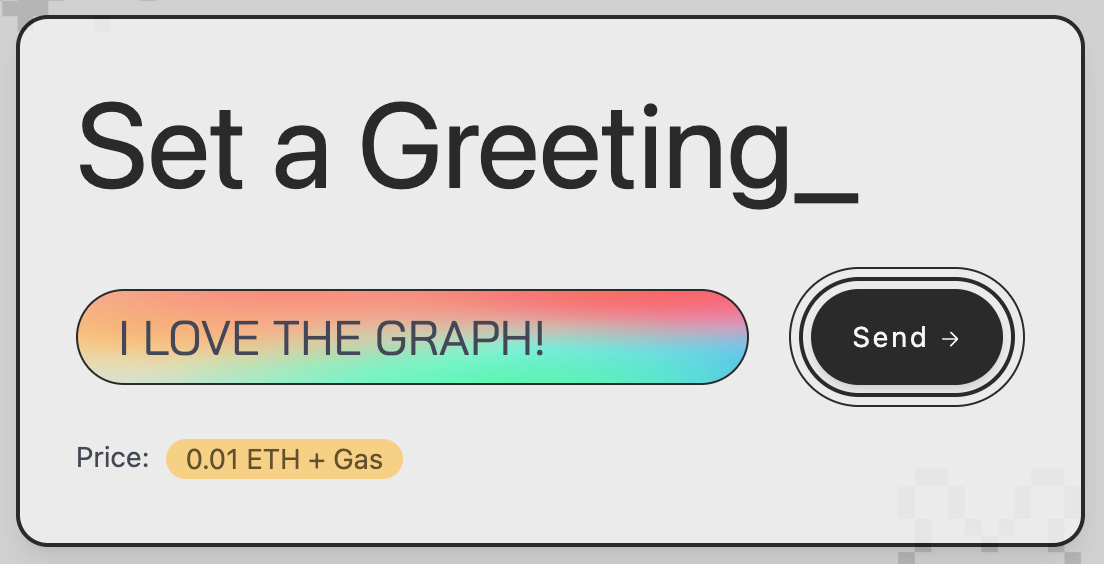
If you want to test that your dapp is functioning properly, grab some ETH from the faucet (upper right hand corner) and head over to the Example UI tab. Here you can set a new greeting! Just type whatever you like and click “Send” to execute a transaction.
Setup The Graph
Now that we have spun up our blockchain, started our frontend application and deployed our smart contract, we can start setting up our subgraph and utilize The Graph!
First, you will want to run the following to clean up any old data.
yarn clean-node
We can now spin up a graph node by running the following command… 🧑🚀
yarn run-node
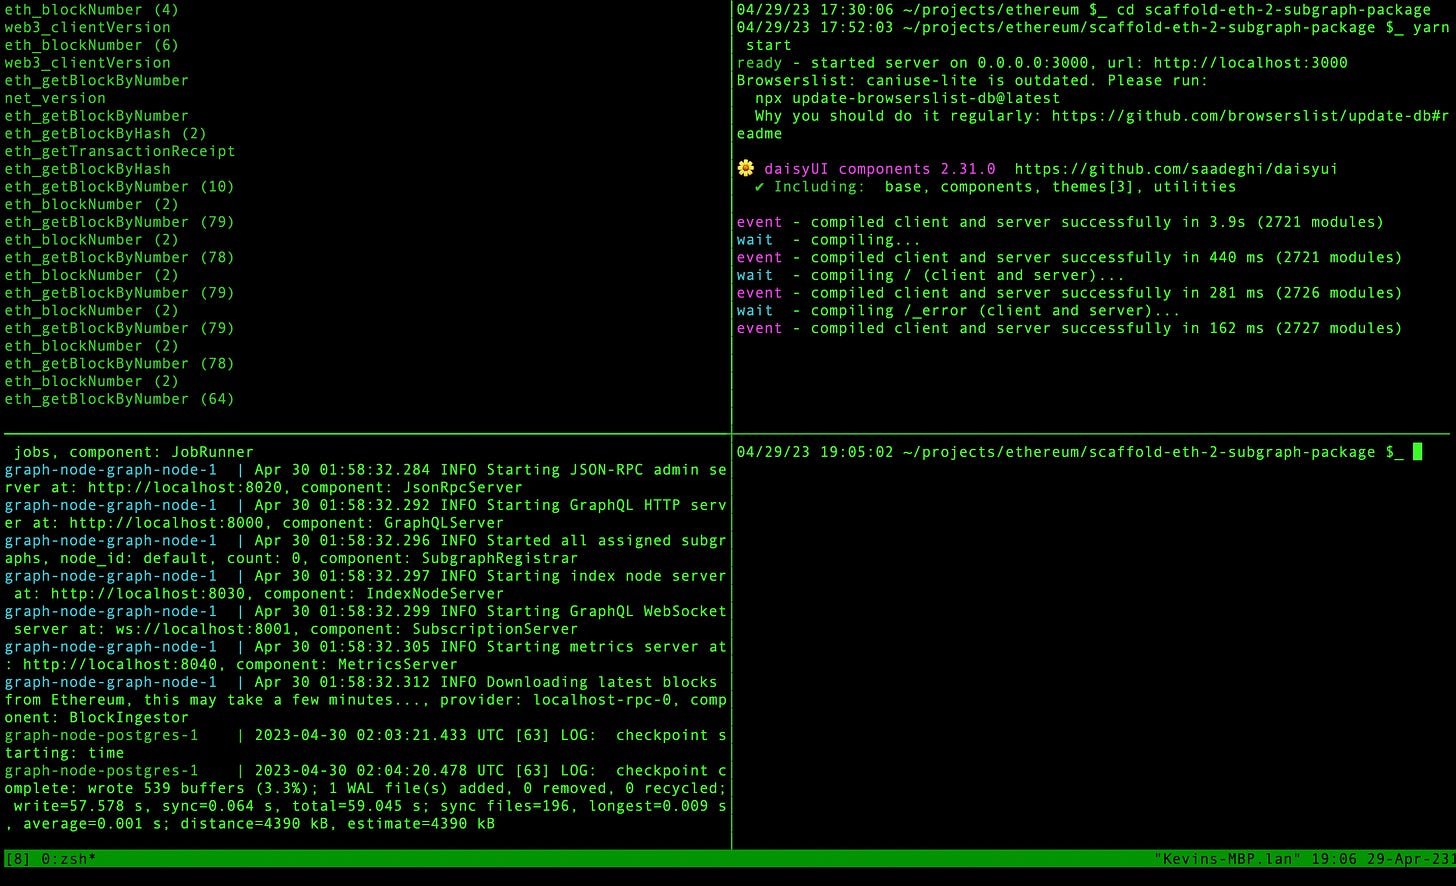
This will spin up all the containers for The Graph using docker-compose. You will want to keep this window open at all times so that you can see log output from Docker.
Note: If you are running Docker Desktop on Mac you might encounter the following errors… If so please checkout this fix below.
CRIT Database does not use C locale. Please check the graph-node documentation for how to set up the database locale, error: database collation is `en_US.utf8` but must be `C`, pool: main, shard: primary, component: ConnectionPool thread 'tokio-runtime-worker' panicked at 'Database does not use C locale. Please check the graph-node documentation for how to set up the database locale: database collation is `en_US.utf8` but must be `C`', store/postgres/src/connection_pool.rs:976:13 note: run with `RUST_BACKTRACE=1` environment variable to display a backtrace thread 'main' panicked at 'called `Result::unwrap()` on an `Err` value: JoinError::Panic(...)', /graph-node/store/postgres/src/connection_pool.rs:484:10
To fix this, stop the existing node and clean up the data. 🧹
yarn stop-node && yarn clean-node
Then add the following to the environment section of your docker-compose.yml file.
      # workaround for https://github.com/docker/for-mac/issues/6270?
      PGDATA: "/var/lib/postgresql/data"
      POSTGRES_INITDB_ARGS: "-E UTF8 --locale=C"
Then go ahead and start it up again.
yarn run-node
As stated before, be sure to keep this window open so that you can see any log output from Docker. 🔎
Now we can open up a fourth window to finish setting up The Graph. 😅 If you have been following along your windows should look something like this… bonus points if you use tmux like me. ;)
In this forth window we will create our local subgraph! You will only need to do this once.
yarn local-create
You should see some output stating your Subgraph has been created along with a log output on your graph-node inside docker.
Next we will ship our subgraph! You will need to give your subgraph a version after executing this command. (e.g. 0.0.1).
yarn local-ship
This command does the following all in one… 🚀🚀🚀
-
Copies the contracts ABI from the hardhat/deployments folder
-
Generates the networks.json file
-
Generates AssemblyScript types from the subgraph schema and the contract ABIs.
-
Compiles and checks the mapping functions.
-
… and deploy a local subgraph!
You should get a build completed output along with the address of your Subgraph endpoint.
Build completed: QmYdGWsVSUYTd1dJnqn84kJkDggc2GD9RZWK5xLVEMB9iP

Deployed to http://localhost:8000/subgraphs/name/scaffold-eth/your-contract/graphql

Subgraph endpoints:
Queries (HTTP):     http://localhost:8000/subgraphs/name/scaffold-eth/your-contract
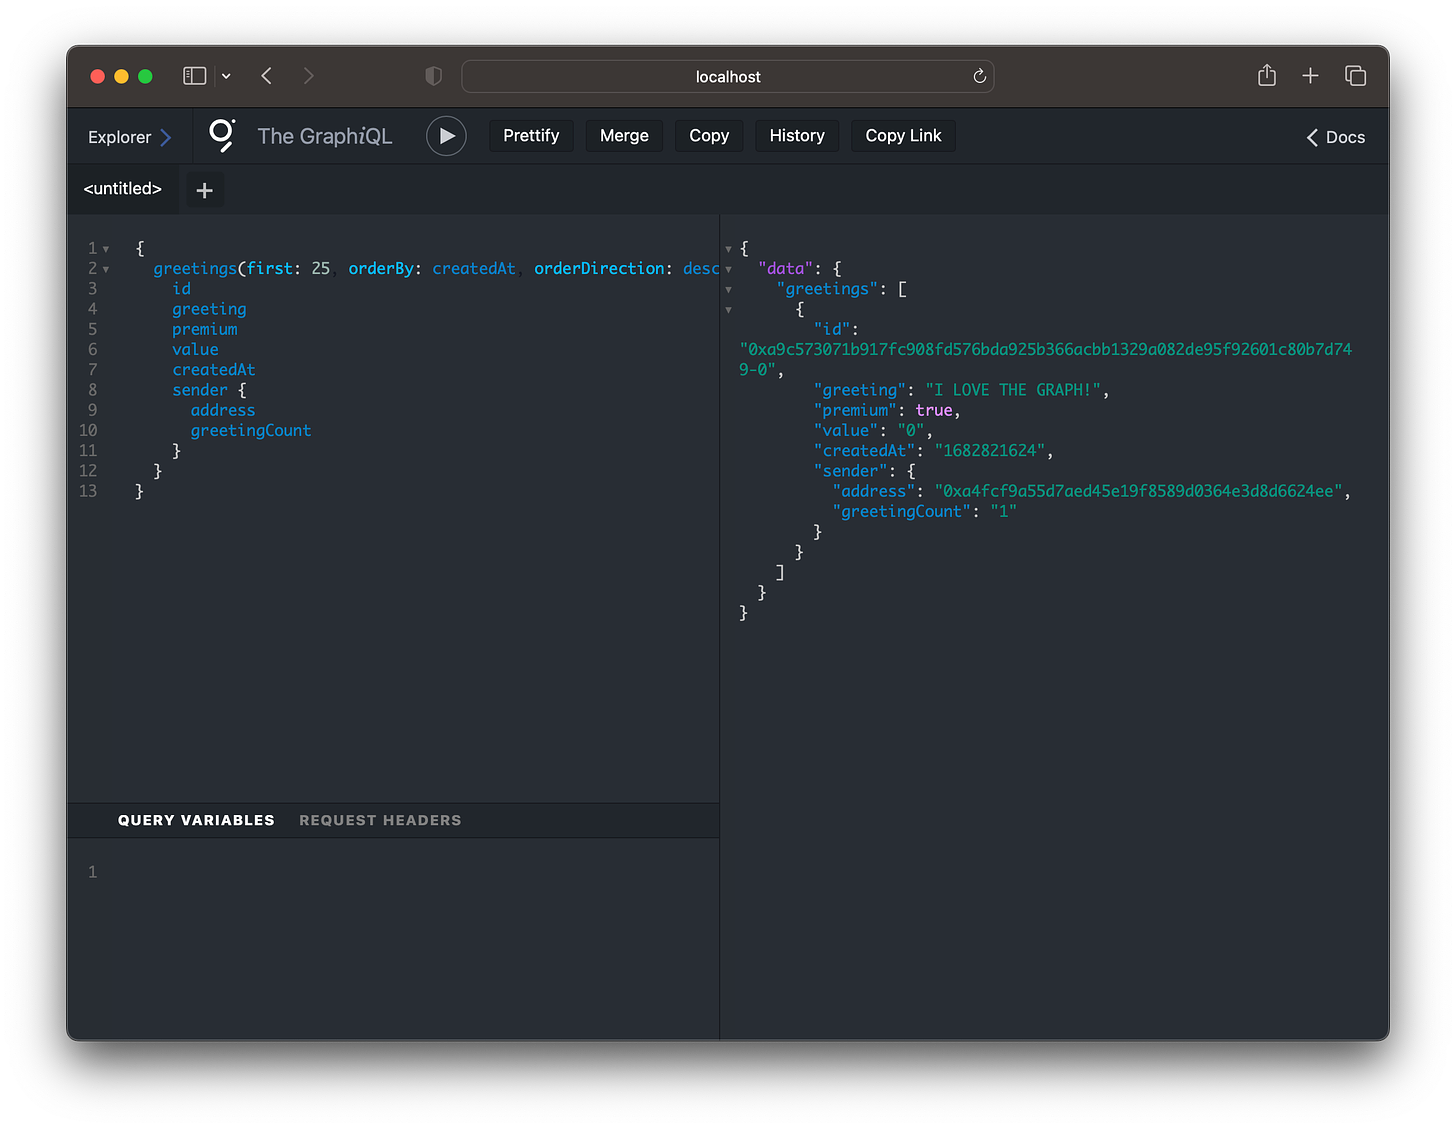
Go ahead and head over to your subgraph endpoint and take a look!
Here is an example query…
  {
    greetings(first: 25, orderBy: createdAt, orderDirection: desc) {
      id
      greeting
      premium
      value
      createdAt
      sender {
        address
        greetingCount
      }
    }
  }
If all is well and you’ve sent a transaction to your smart contract then you will see a similar data output!
Next up we will dive into a bit more detail on how The Graph works so that as you start adding events to your smart contract you can start indexing and parsing the data you need for your front end application.
Adding Additional Events
In my previous post, I outline all of the changes that you need to make in order to add an event to The Graph but I will outline them here in case anyone needs to catch up on how this is done.
In general to create a subgraph you need to do the following…
-
Create your entities (located in schema.graphql)
-
Crete mapping functions (mappings.ts)
-
Configure your subgraph data sources (subgraph.yaml)
If you want to read more please checkout these docs. Let’s use the example from my previous post. Here is an example event for sending messages on the Ethereum blockchain.
event SendMessage(address _from, address _to, string message);

function sendMessage(address _to, string calldata message) external {
    emit SendMessage(msg.sender, _to, message);
}
After you add an event to your smart contract, you will need to first update the GraphQL schema to include the entities you want to store on your Graph node. If you want to catch up on entities here is a good link to the docs for that.
So, using our message example above, if we wanted to create entities for the Message, the Messenger and the Receiver… this is probably a concise example on how we could link that data using our schema.
The schema file is located in packages/subgraph/src/schema.graphql
type Message @entity {
  id: ID!
  _from: Messenger!
  _to: Receiver!
  message: String!
  createdAt: BigInt!
  transactionHash: String!
}

type Messenger @entity {
  id: ID!
  address: Bytes!
  messages: [Message!] @derivedFrom(field: "_from")
  createdAt: BigInt!
  messageCount: BigInt!
}

type Receiver @entity {
  id: ID!
  address: Bytes!
  createdAt: BigInt!
  messageCount: BigInt!
}
You will also need to add these entities to the Subgraph YAML configuration and also add the event handlers as well.
This file is located in packages/subgraph/subgraph.yaml
entities:
        - Greeting
        - Sender
        - Message
        - Messenger
        - Receiver
eventHandlers:
        - event: SendMessage(address,address,string)
          handler: handleMessage
If you are following along, next you will need to copy over your new abi and regenerate the code.
yarn abi-copy && yarn codegen
Next you will need to update the mappings for the files we have edited above.
The file is located under packages/subgraph/src/mapping.ts
import {
  YourContract,
  GreetingChange,
  SendMessage,
} from "../generated/YourContract/YourContract";
As well as the schema file we edited earlier.
import {
  Greeting,
  Sender,
  Messenger,
  Receiver,
  Message,
} from "../generated/schema";
Lastly, we will need to add the mapping function.
export function handleMessage(event: SendMessage): void {
  let messengerString = event.params._from.toHexString();
  let receiverString = event.params._to.toHexString();

  let messenger = Messenger.load(messengerString);

  if (messenger === null) {
    messenger = new Messenger(messengerString);
    messenger.address = event.params._from;
    messenger.createdAt = event.block.timestamp;
    messenger.messageCount = BigInt.fromI32(1);
  } else {
    messenger.messageCount = messenger.messageCount.plus(BigInt.fromI32(1));
  }

  let receiver = Receiver.load(receiverString);

  if (receiver === null) {
    receiver = new Receiver(receiverString);
    receiver.address = event.params._from;
    receiver.createdAt = event.block.timestamp;
    receiver.messageCount = BigInt.fromI32(1);
  } else {
    receiver.messageCount = receiver.messageCount.plus(BigInt.fromI32(1));
  }

  let message = new Message(
    event.transaction.hash.toHex() + "-" + event.logIndex.toString()
  );

  message.message = event.params.message;
  message._from = messengerString;
  message._to = receiverString;
  message.createdAt = event.block.timestamp;
  message.transactionHash = event.transaction.hash.toHex();

  receiver.save();
  messenger.save();
  message.save();
}
After that is done, you are almost done… Simple ship it!
yarn local-ship
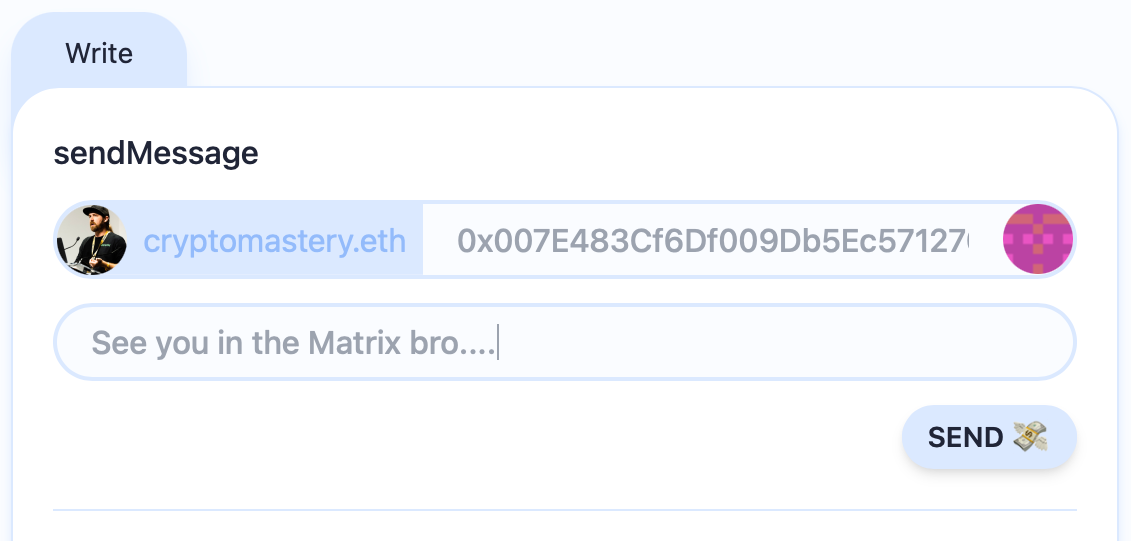
If you want to test this out on your own instance of Scaffold-ETH, navigate over to the Debug Contracts tab. Here you can draft up a message and fire it off.
Next, lets see if our data is in The Graph. Here is an example query that shows us the first message.
{
    messages(first: 1, orderBy: createdAt, orderDirection: asc) {
      id
      _from {
        messages(first: 1) {
          message
        }
      }
    }
  }
Drumroll…..
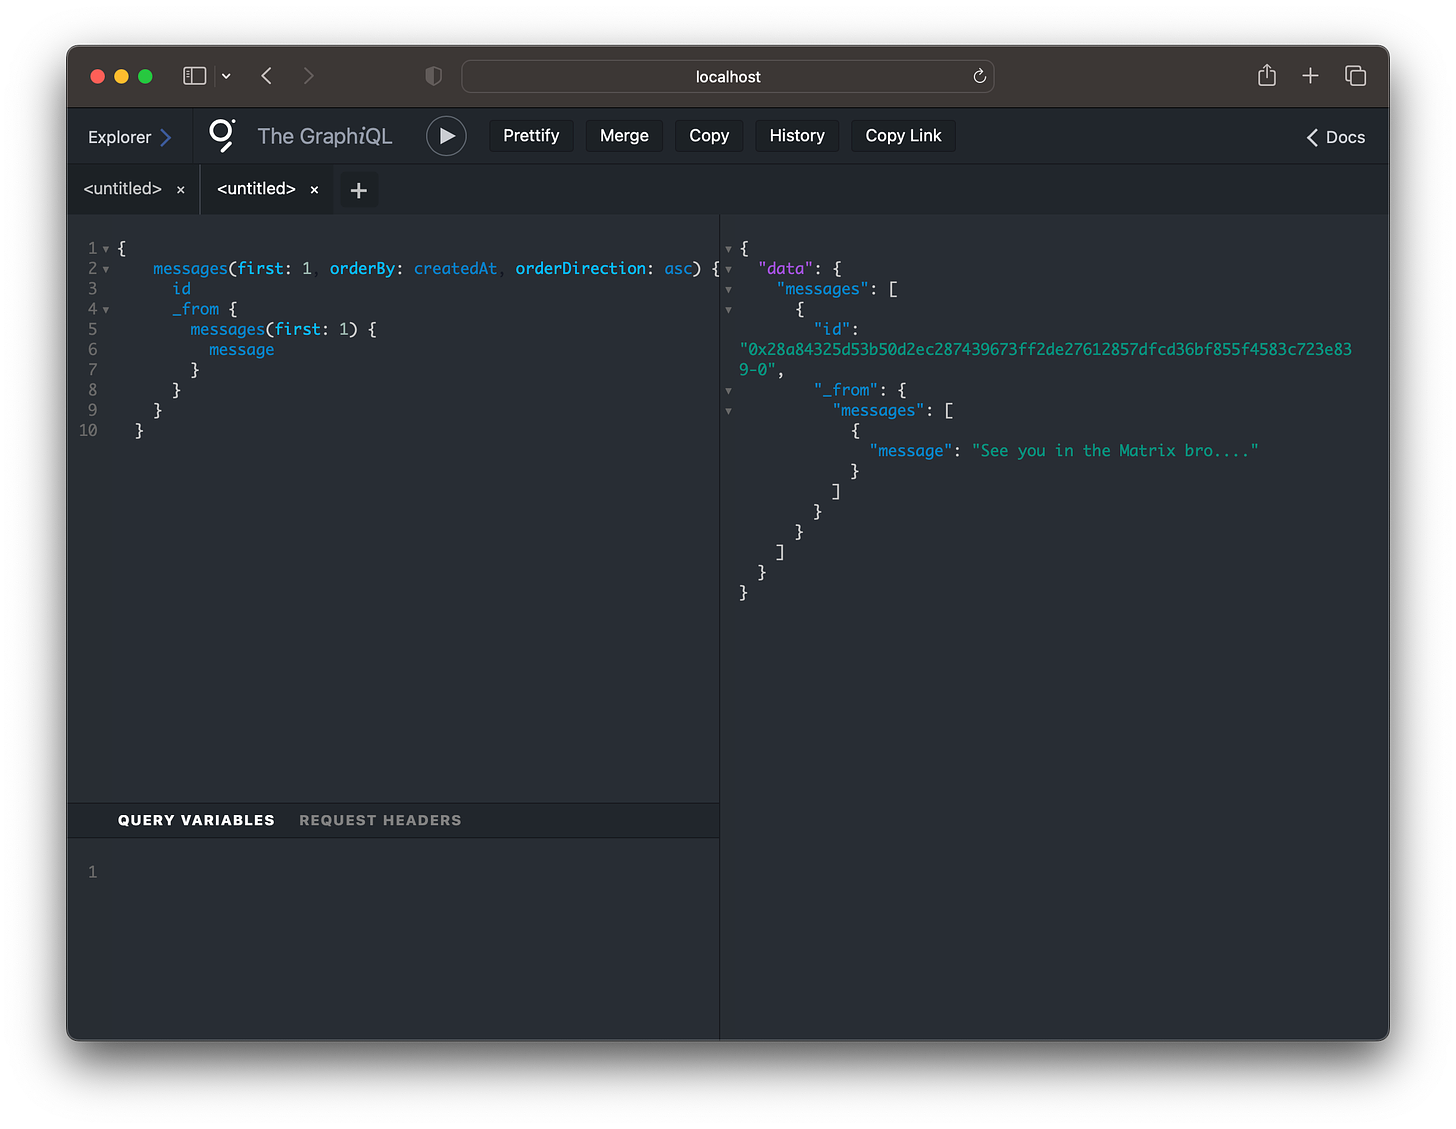
Woohoo! You did it… I guess you are ready for a hackathon eh?
Querying from an Application
Now that you have your subgraph working, the final step in the evolution of your dapp is to query that data from within your application. If you want to dive into the docs, you can read more about this topic here.
There are a number of GraphQL Client libraries which allow you to query the subgraph and populate your app with the data indexed by the subgraph.
One of the more popular clients is Apollo client and is included with this special build of Scaffold-ETH. I will walk thru the basic configuration here.
First you will see that ApolloClient is already imported to the root of your application
located in packages/nextjs/pages/_app.tsx
import { ApolloClient, ApolloProvider, InMemoryCache } from "@apollo/client";
The URI for the subgraph and client have already been configured for you as well.
  const subgraphUri = "http://localhost:8000/subgraphs/name/scaffold-eth/your-contract";
  const apolloClient = new ApolloClient({
    uri: subgraphUri,
    cache: new InMemoryCache(),
  });
The provider is wrapped within the application.
return(
  <ApolloProvider client={apolloClient}>
  ...
  </ApolloProvider>
);
Looking at the ContractData page you will see the hooks have been imported.
This is located in packages/nextjs/components/example-ui/ContractData.tsx
import { gql, useQuery } from "@apollo/client";
Along with an example graphql query.
  const GREETINGS_GRAPHQL = `
  {
    greetings(first: 1, orderBy: createdAt, orderDirection: desc) {
      id
      greeting
      premium
      value
      createdAt
      sender {
        address
        greetingCount
      }
    }
  }
  `;

  const GREETINGS_GQL = gql(GREETINGS_GRAPHQL);
  const greetingsData = useQuery(GREETINGS_GQL, { pollInterval: 1000 });
Now you can build out some ultra fast frontend code for your dapp! 🔥🔥🔥
So what next?
All the building we’ve done has been locally. At some point you will want to launch your decentralized application to the next level, a public testnet!! Or possibly even YOLO to mainnet. 😂 The world is your oyster.
In my next blog post, I will cover exactly how to do that using Scaffold-ETH 2, The Graph CLI and the Subgraph Studio! Until then… keep BUIDLing my frens.